2026 Game Jam
I've made a game for a game jam! I want to talk about it!
But, first, some news about the other projects (Stackamsels and Adventurer's Journey) that I talked about before. They're still "in the backburner" and I think about them from time to time, it's just that since the middle of last year, I haven't done much with them due to working on other projects, both games and non-games.
For Project Mirabelle, I did work on some new features and organized some focus playtesting for the new content, in a big focus phase that took from mid-November until about mid-January - after which I basically switched to reading a lot, writing another story, and doing non-game-creation things in general (and also a bit of depression but unrelated). I will eventually do a blog post about the Project Mirabelle Alpha 2 progress and all of the new stuff I added, which basically amounts to "there's now a whole new game system", "map events now have a whole lot of useful extra options" and "it's getting very close to releasing that new content but we're unfortunately not quite there". But more on that in the next post, once I'm closer to it being as good as I can make it. Needless to say, that next blog post is going to be pretty big (though hopefully shorter than this one).
Now, onto the meat of the post. Last week, I participated in the NSFW Bondage Game Jam again, as part of the third edition. For people not familiar with game jams (and this jam specifically), it is a one-week-long gamemaking event where everyone participating is given a theme related to the bondage / DiD context at the start of it, and then we have one week (167 hours, this time, due to daylight savings) to make a game around that theme. This year's theme was "Control" ; and for the people who know a little bit about the other content I make, it will be of absolutely no surprise that I interpreted it as "mind-control" specifically.
My goal before this jam started was simple: I would try to make an entire project by myself* (*minus the sound design), and I would make the best, most ambitious project I could realistically do during a week. Now, about that asterisk after the "by myself", I'm not confident at all about my sound design and music selection abilities. So, I asked Kero if she wanted to team up and help with this part, and she has been nice enough to accept! She also proposed to help a bit with writing if she could, which she did (a bit)!
One week later, I, and twenty other participants / teams, had presented a game for the jam.
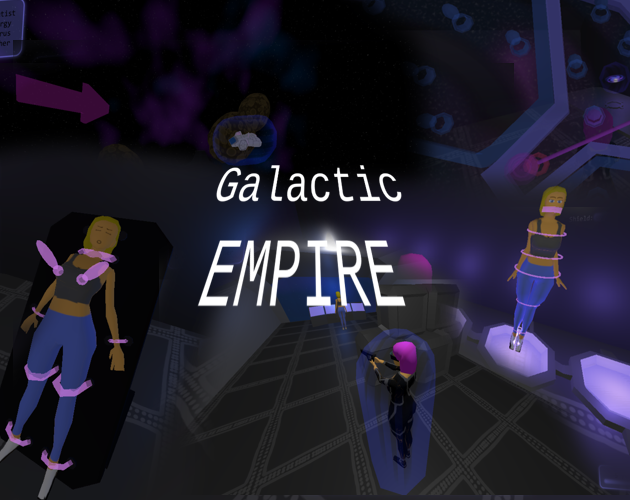
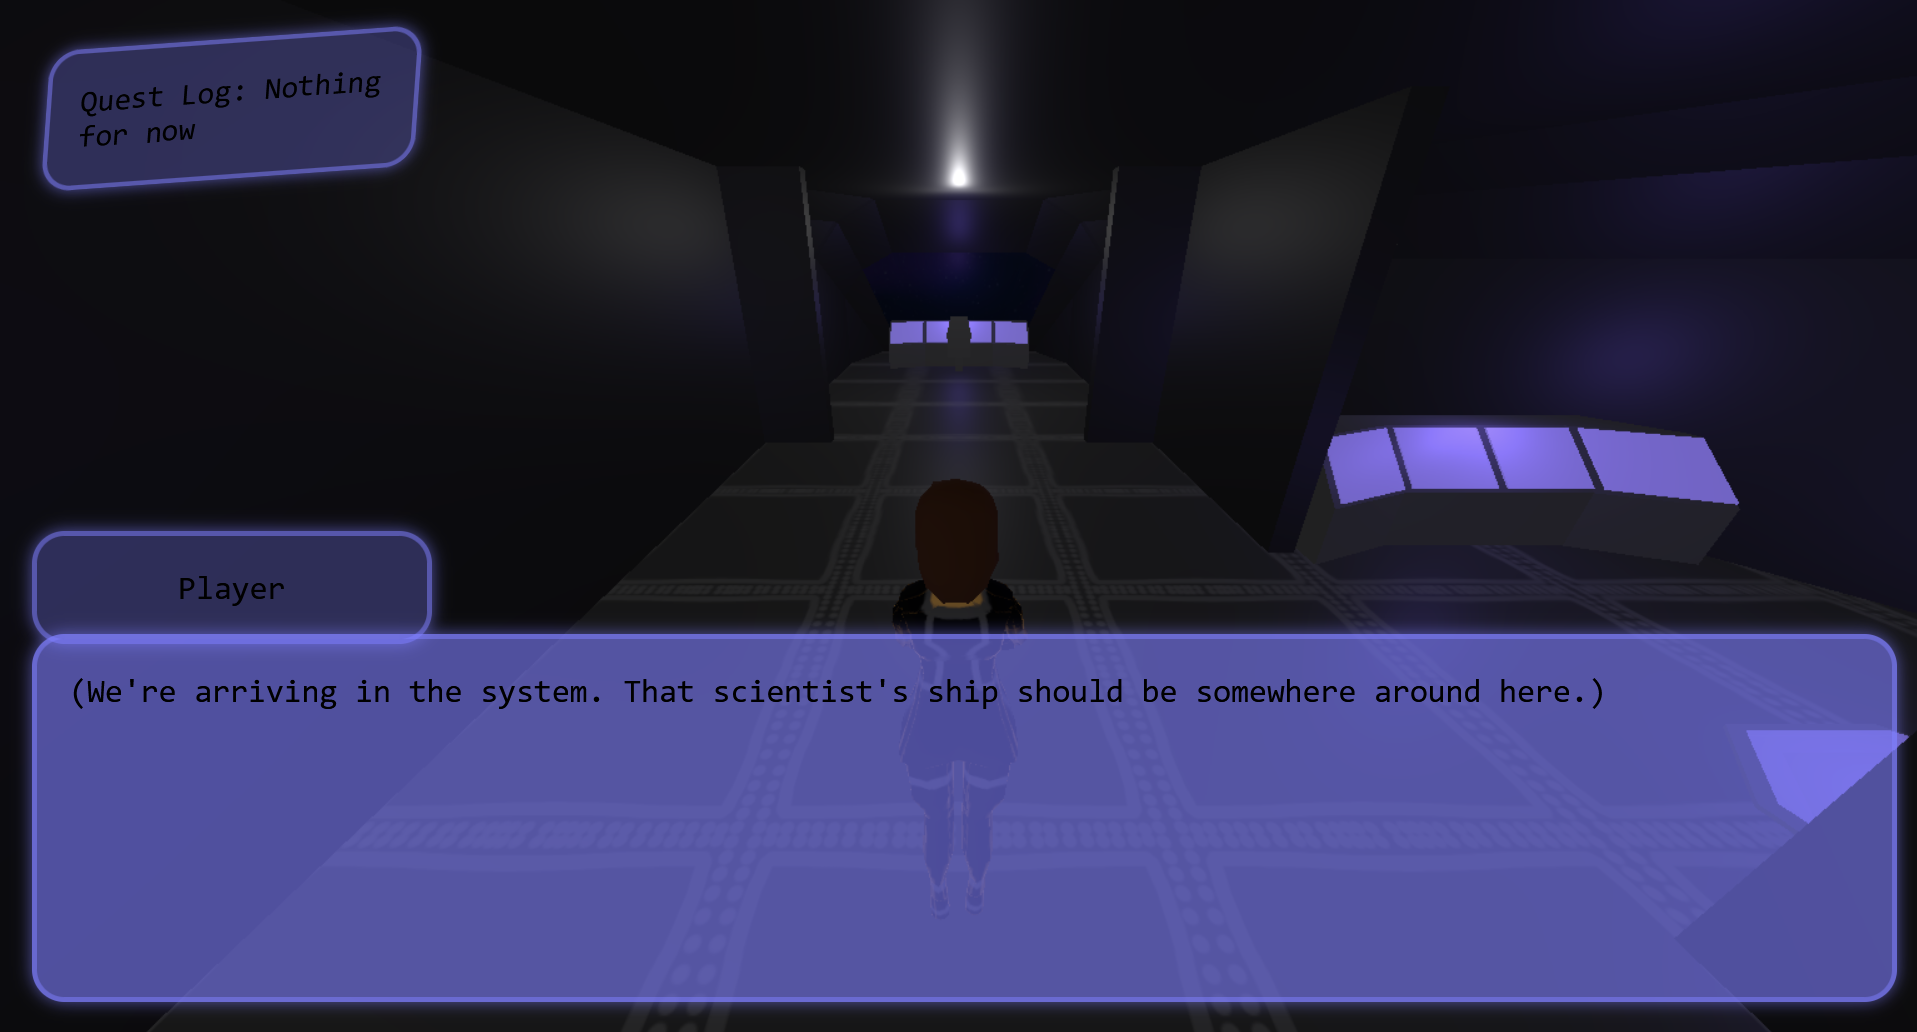
And my own game, Galactic Empire, is available to play here!!
Now that the jam is over, I did want to make a blog post about my experience with making this project. A fair warning, it's going to be a long post (very long). But I hope it will be interesting to both see my process and read about my feelings. So, let's go along on a memory trip for making the game happen!
Before the jam: preparation and ideas
Before the jam's theme of control was even announced, I already had a very rough idea of what kind of "thing" I wanted to create during that jam: it would be a 3D game, it would be in space, it would involve flying in space in your own spaceship and kidnapping people from other spaceships. I had even talked about that idea on Discord months before the jam was even announced. The exact "details" of the why, what, and how for that game weren't clear, it was really not much more than a concept, but some ideas were for example bounty hunting so you'd capture people to turn them in for a reward, or a kidnapping ring so you'd ransom them or sell them on the black market.
Even with these basic ideas, all of the gameplay specifics were left in the air at the time. How would the combat work? How would the space combat work? How would you bring the characters back to your ship, and out of it? All of that would be decided during the jam itself.
I didn't do much to prepare about making that specific game during the jam, but I did three things that were directly done as preparation for getting a space 3D game up and running as fast as possible.
First, I did the same thing I did before the last game jam, and derusted my 3D making skills and my speed modeling. I decided to go and make a simplified model of a Mass Effect character, and after making a Discord poll that ended in a tie and that I decided would let me pick for myself, I ended up modeling and texturing EDI.
The model isn't detailed or proportioned correctly at all, and doesn't give more than the impression of the Mass Effect character, but that was the goal of this experiment ; to remember how to actually do models like these in the reasonable time of "under four hours" so I would have plenty of time left for animations, texturing, and all of the other things that go into a game. Thinking back to it, I should have explored more about the character 3D modeling/texturing side at the time - especially about artstyle variations, and techniques like toon shading and outlines - as that would have helped having an actual "art direction" ; but it seemed good enough for me, so I stopped there for this specific part of the preparation.
The second thing I did was to refresh myself on how shaders works, with the specific goal of being able to make my own "sci-fi shield" shader. I looked at some example shaders online to see how they were structured and what the different "steps" to making a shield effect like this was, but it quickly became better for me to just re-read through the book of shaders from cover to cover, and compare that to what I wanted to do and the examples I had found. It's a very, very instructional resource, even if it stays surface-level on what you actually do with all of this, but when you have examples to compare against then it is really an awesome book!
Finally, the third thing I did was to learn about how to make good-looking space skyboxes, and I found this great 2022 Youtube tutorial by Ruan3D for how to do the effect in Blender and then this "Code Intrinsic" article from 2020 for how to export a Blender environment into a cubemap skybox. This is actually a very cool technique in general, and I'm sure there'll be lots of use of the fact I can now create custom 360° skyboxes, but for now, the main focus was on stars and nebulae.
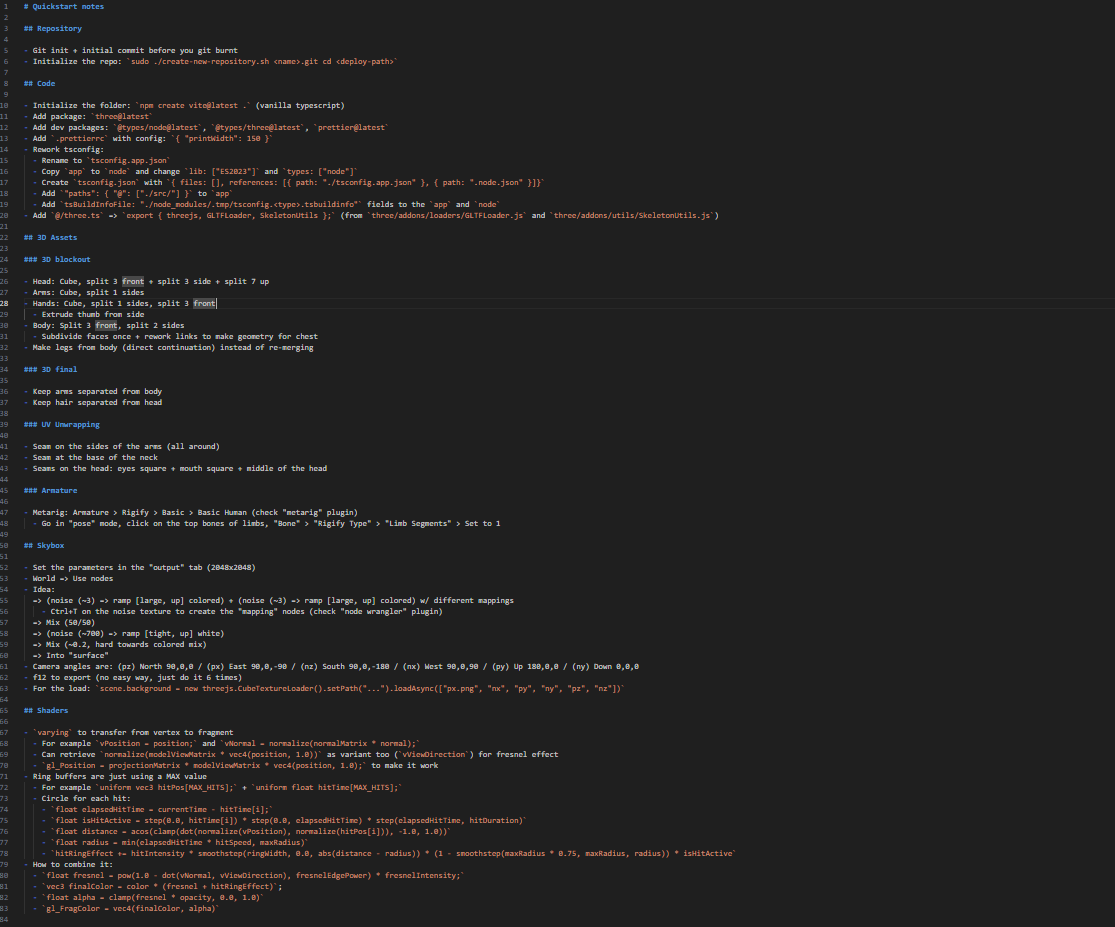
At the end, the last thing I did before Friday and the start of the jam was to create a file called "QUICKSTART-NOTES.md" with 83 lines inside. The file was basically a summary of this preparation ; it contains generic instructions for how to get a vite+ts+three.js project running as fast as possible, reminders about how to do fast character 3D modeling, notes about making cubemap for skyboxes - and specifically, about space skyboxes - and finally, some notes about shaders and useful tips about the shield effect specifically.
The idea was basically to get the project off the ground as fast as possible. If it's of interest to someone, let me know and I can send you the file directly!
Day 0 / the first six hours (March 27th, 7PM to 1AM UTC)
The way the jam was structured, it fell from friday evening to friday evening a week later in my timezone.
The first thing I did after the theme was announced was to DM Kero about some ideas I had for the story ; since the theme was "control", the player would be a villain trying to take control of the galaxy. Simple, easy, and to the point. This was more of a way for me to start thinking about the specifics, since I would be mostly working completely alone for the first few days, but it was still a good way to clear up my thoughts.
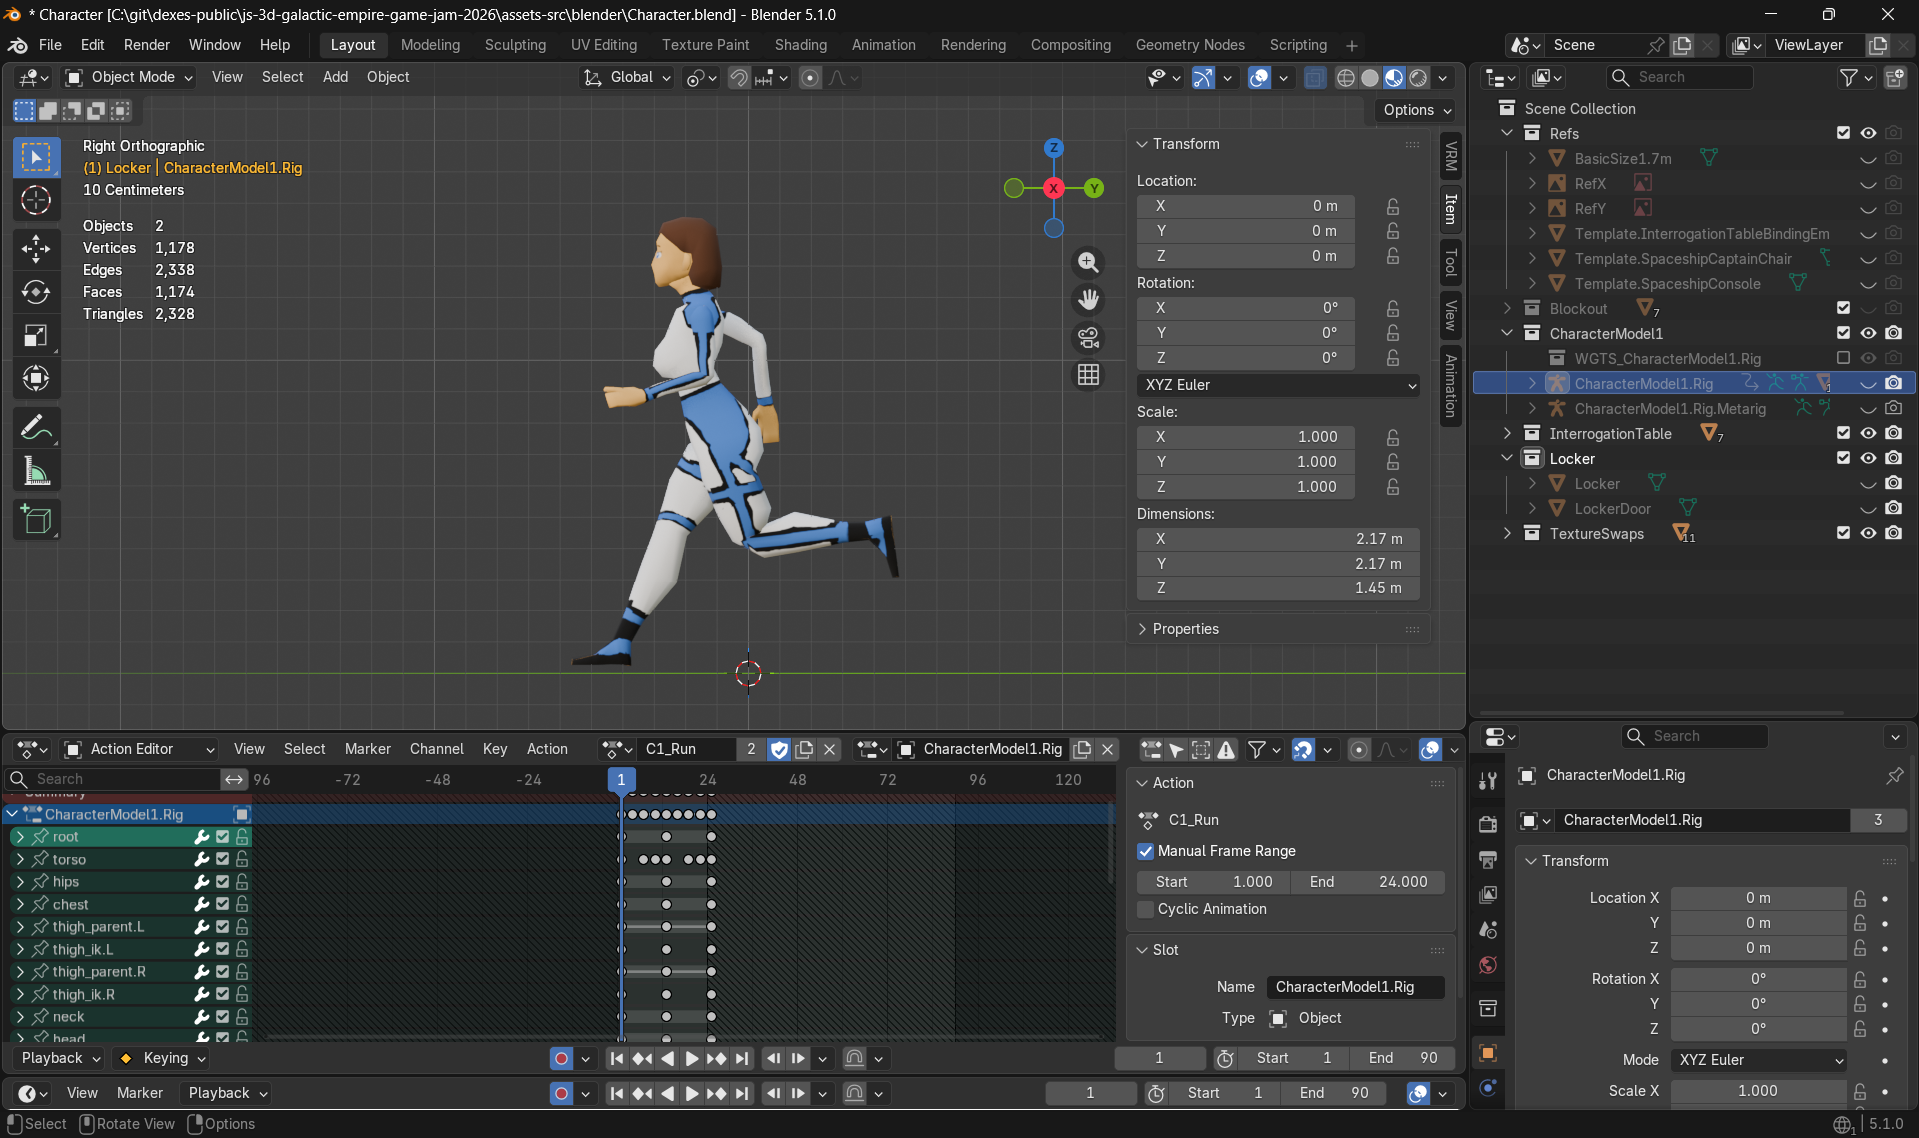
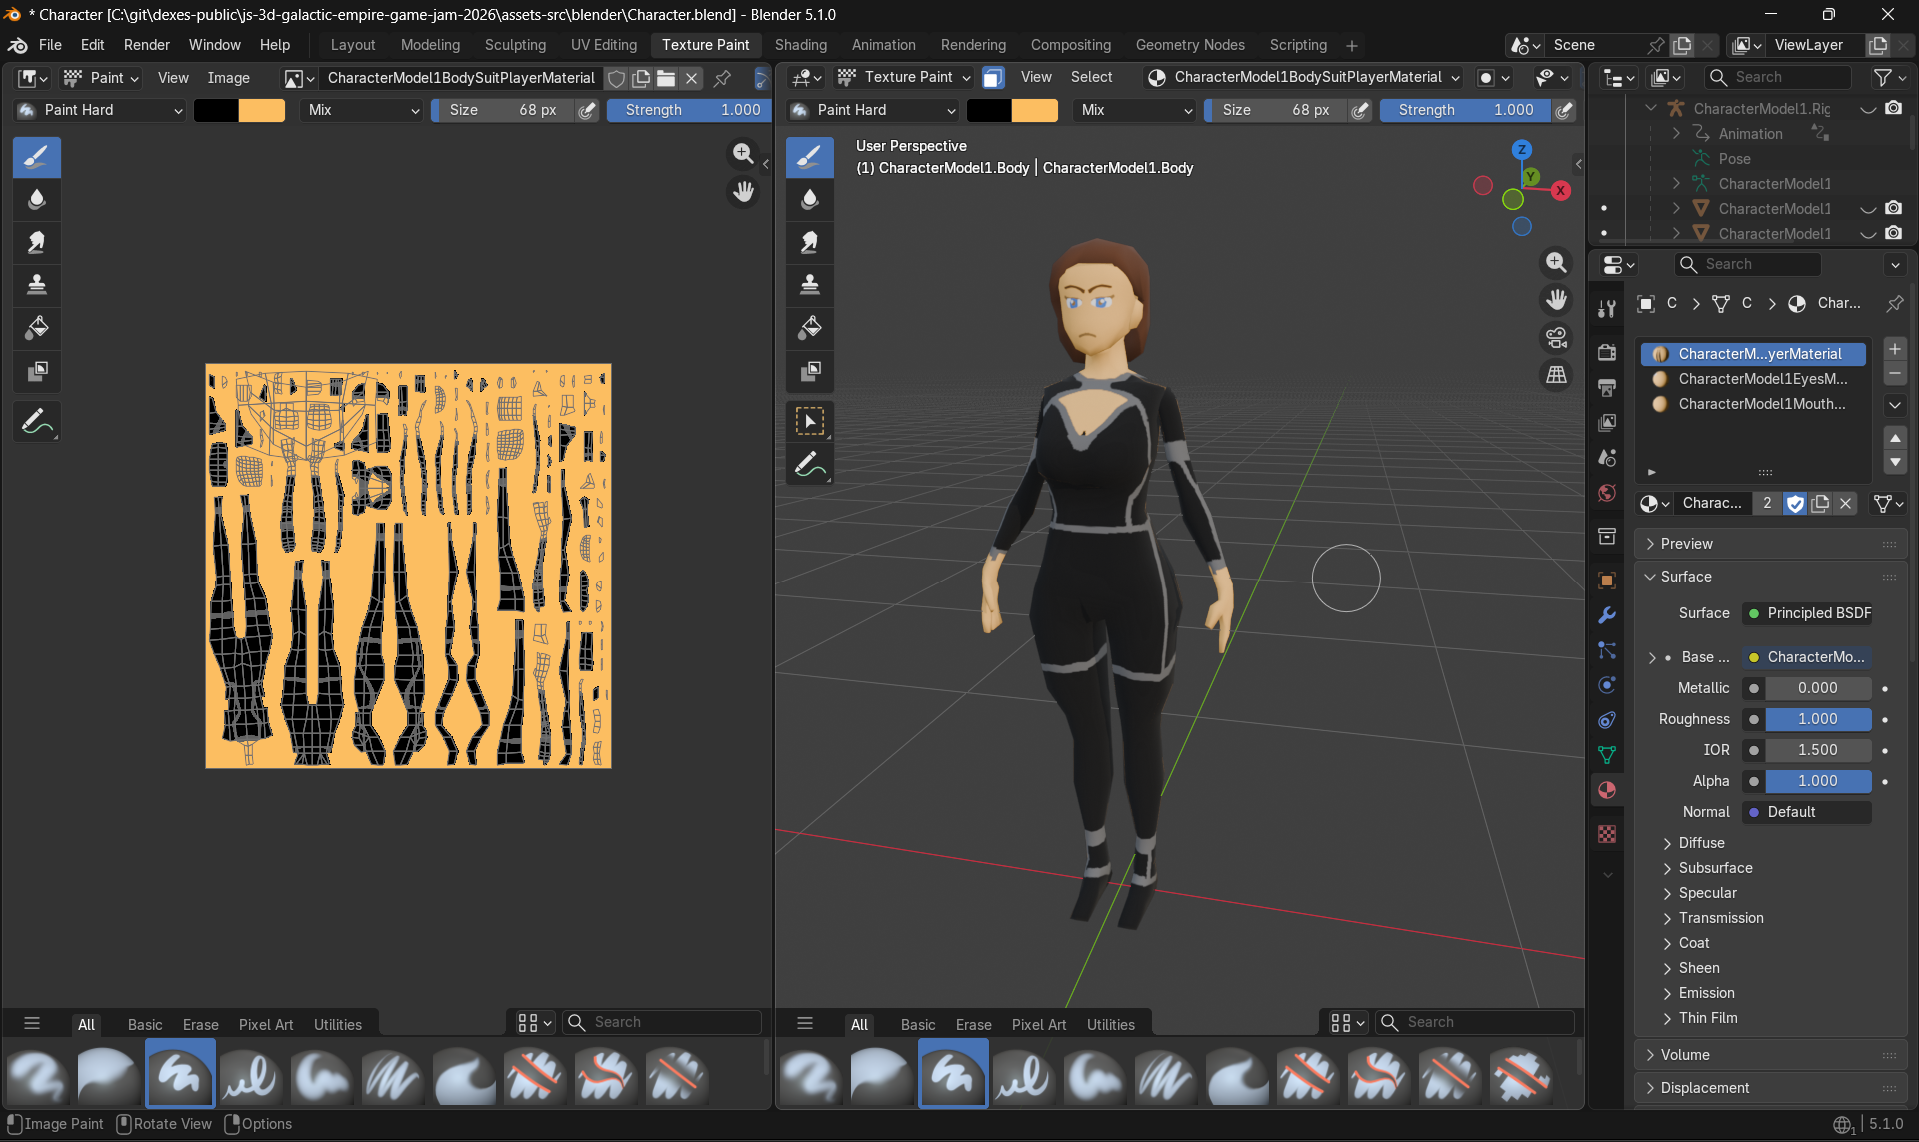
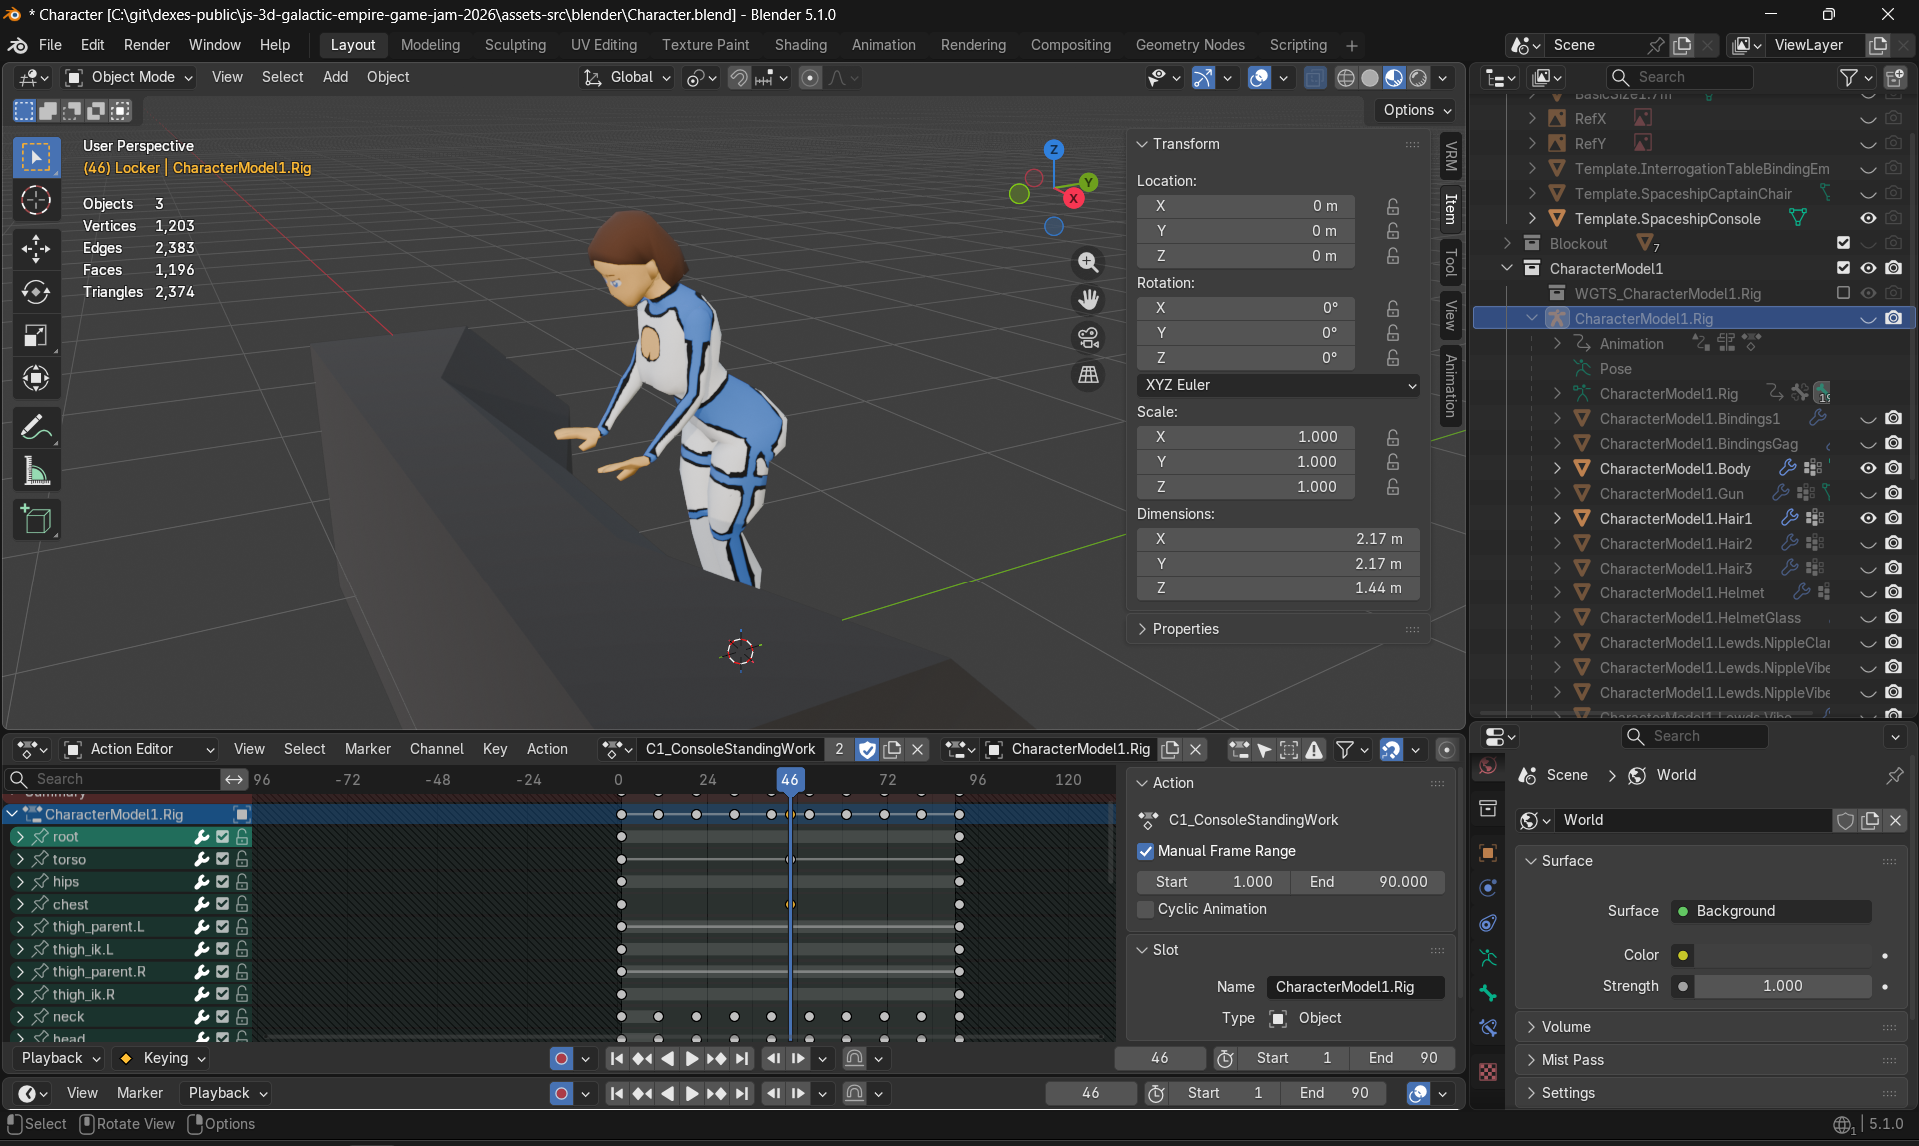
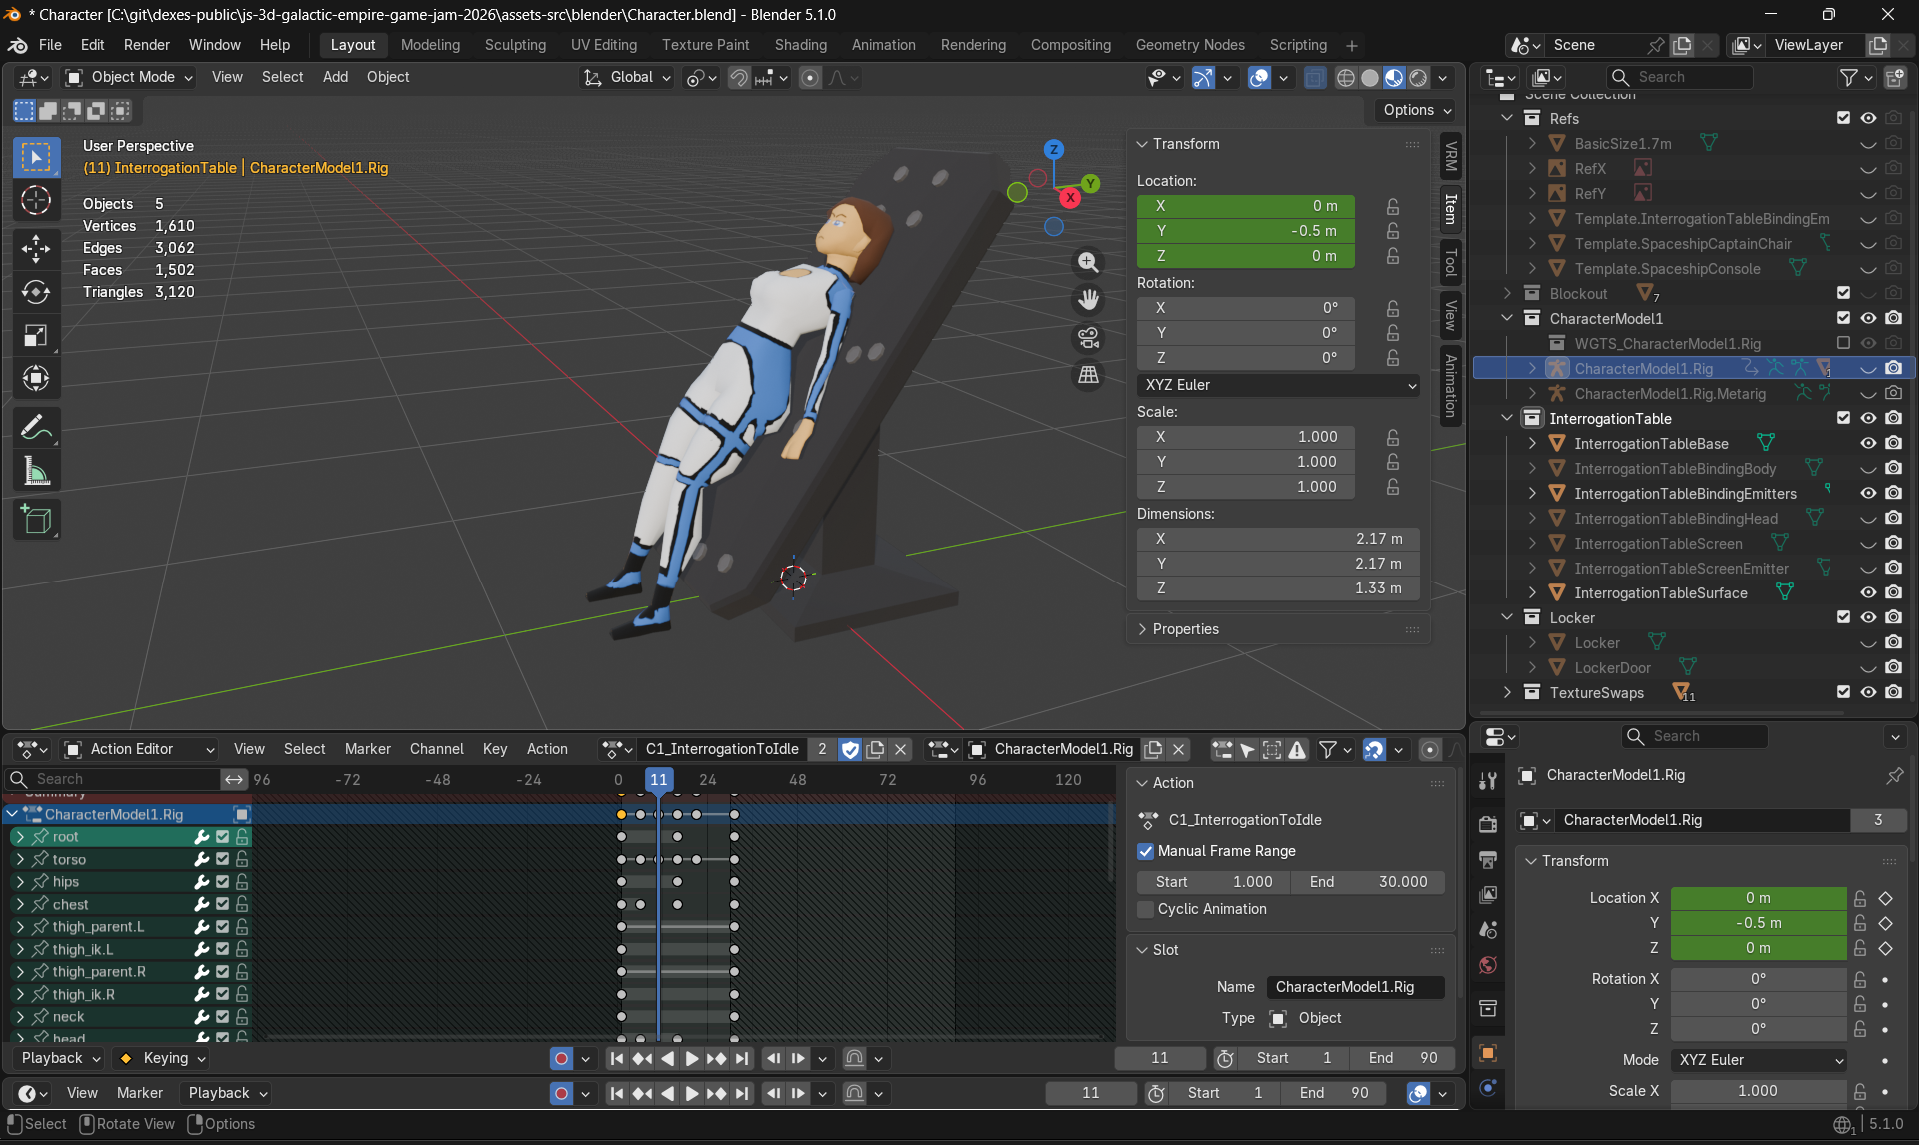
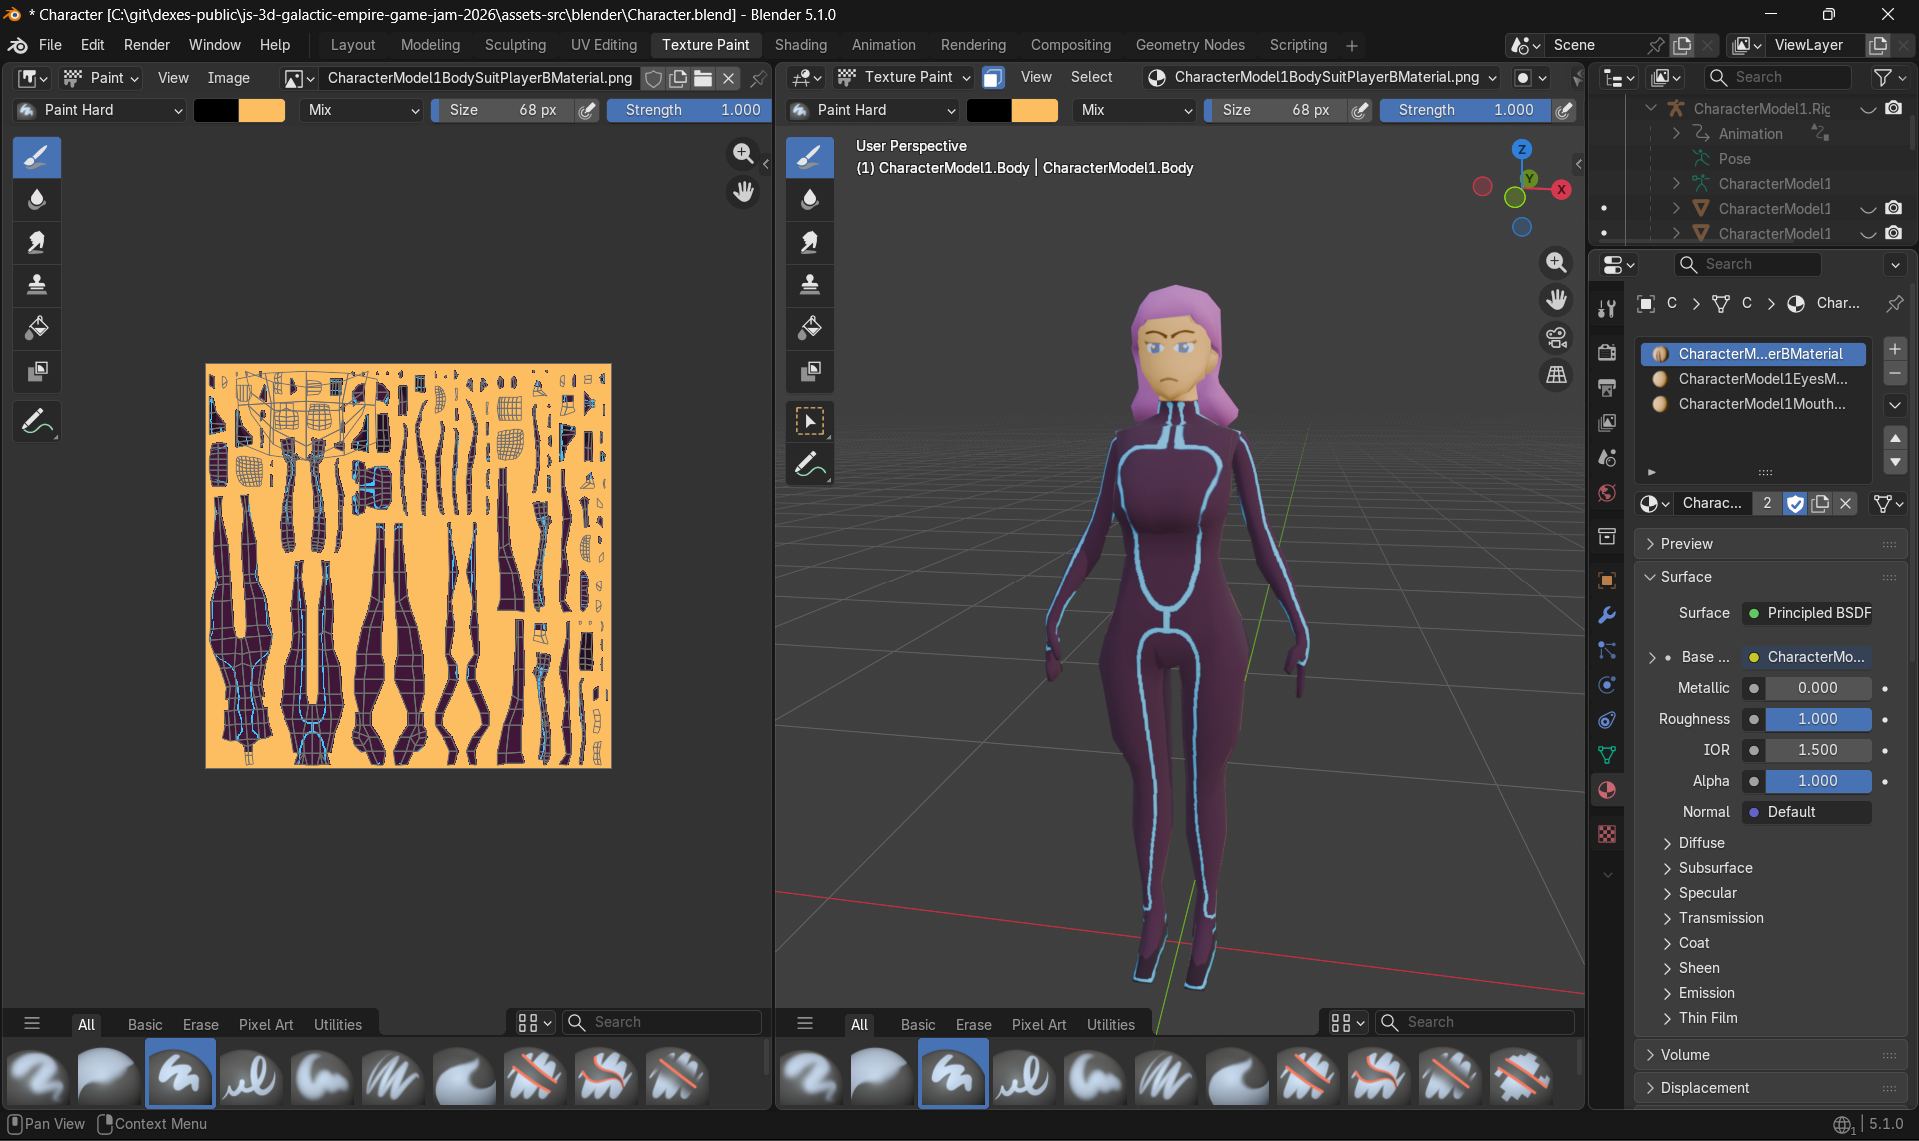
Then, I started streaming in the event's Discord server and set out to start modeling the characters. It's what I usually do at the start of jams, and it's usually a good way to get running. Of course, the model isn't really "good", but it's "good enough" to give the idea of what happens in the game and to not be completely offputting.
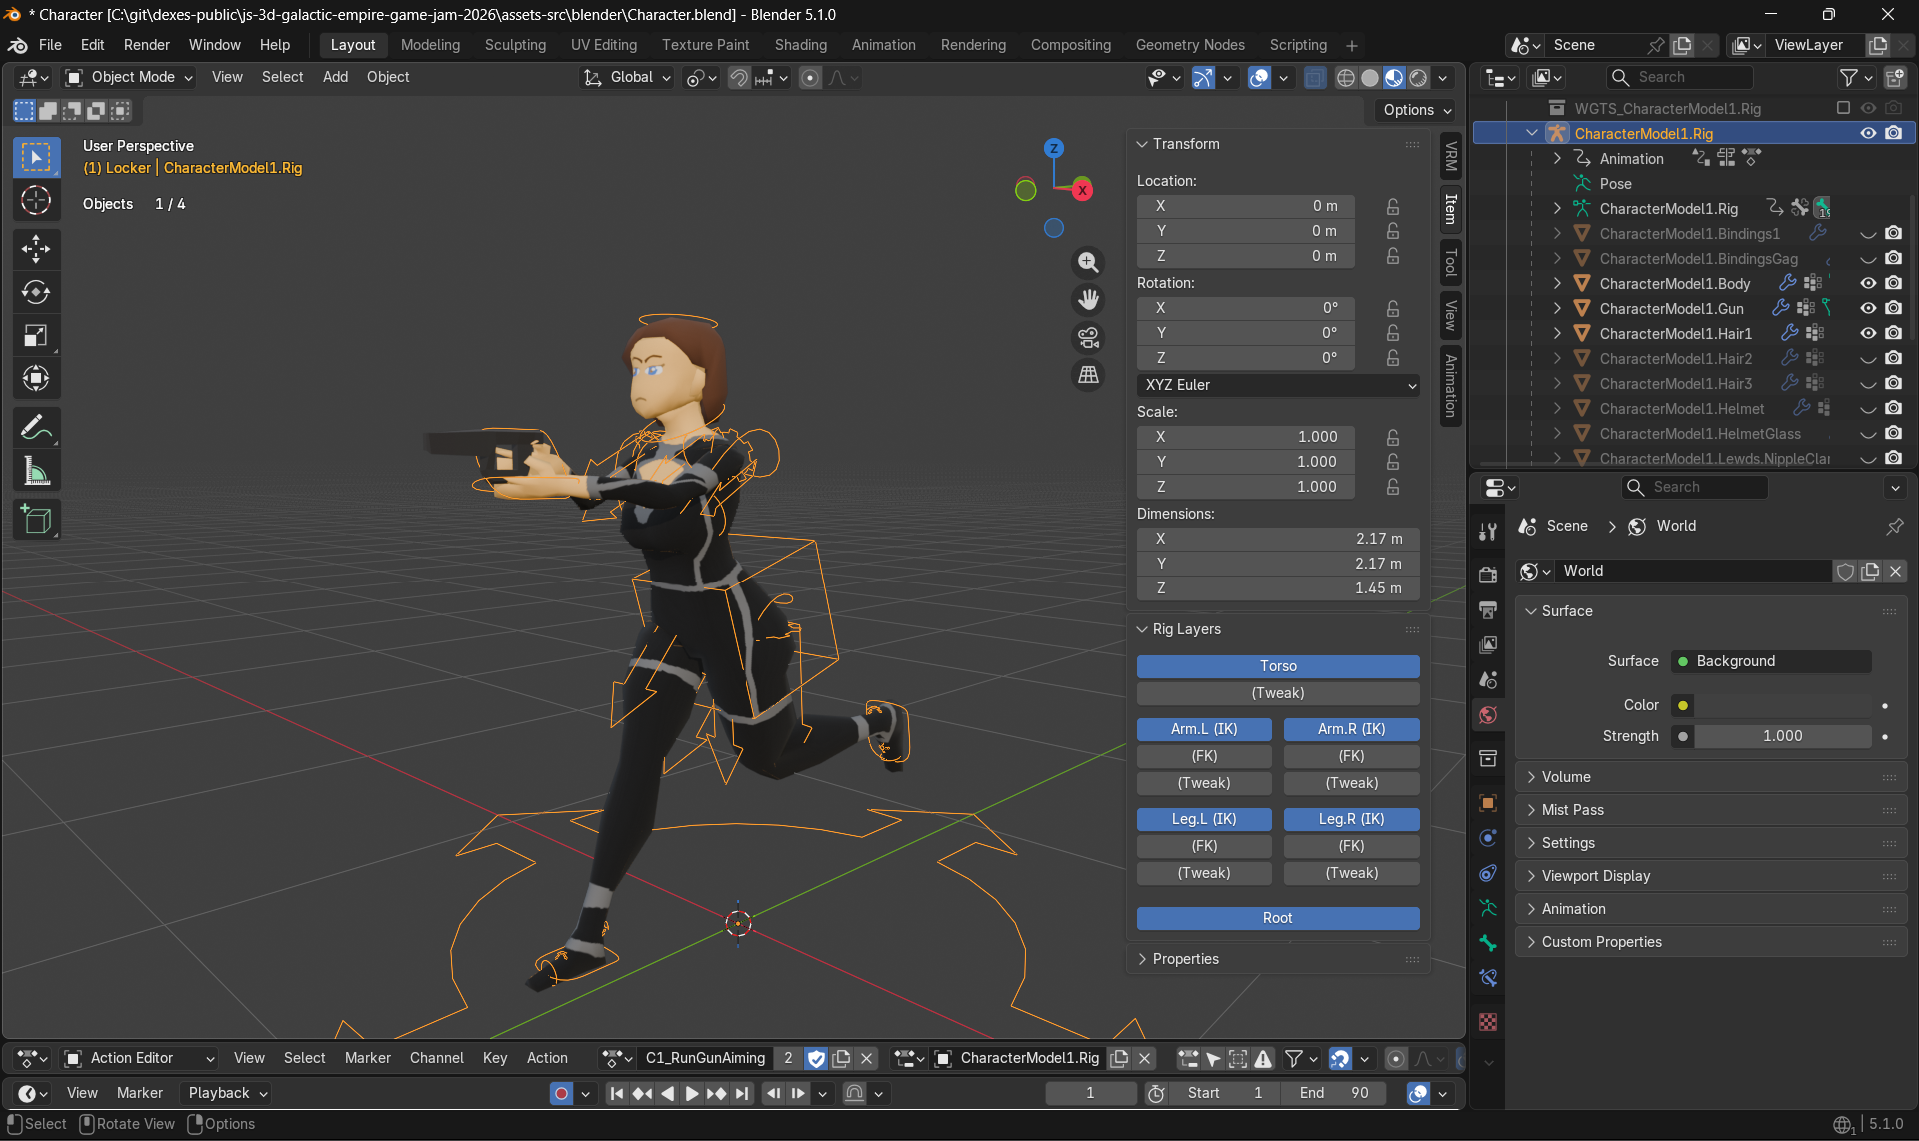
I then took the basically created character, and added some rigging (a skeleton) to it. This is used to create animations later on.
However, I made a mistake that people who know about Rigify will notice immediately, and that is about where the pelvis is placed. It should be placed way more "inside" of the body, and way less on the "edge".
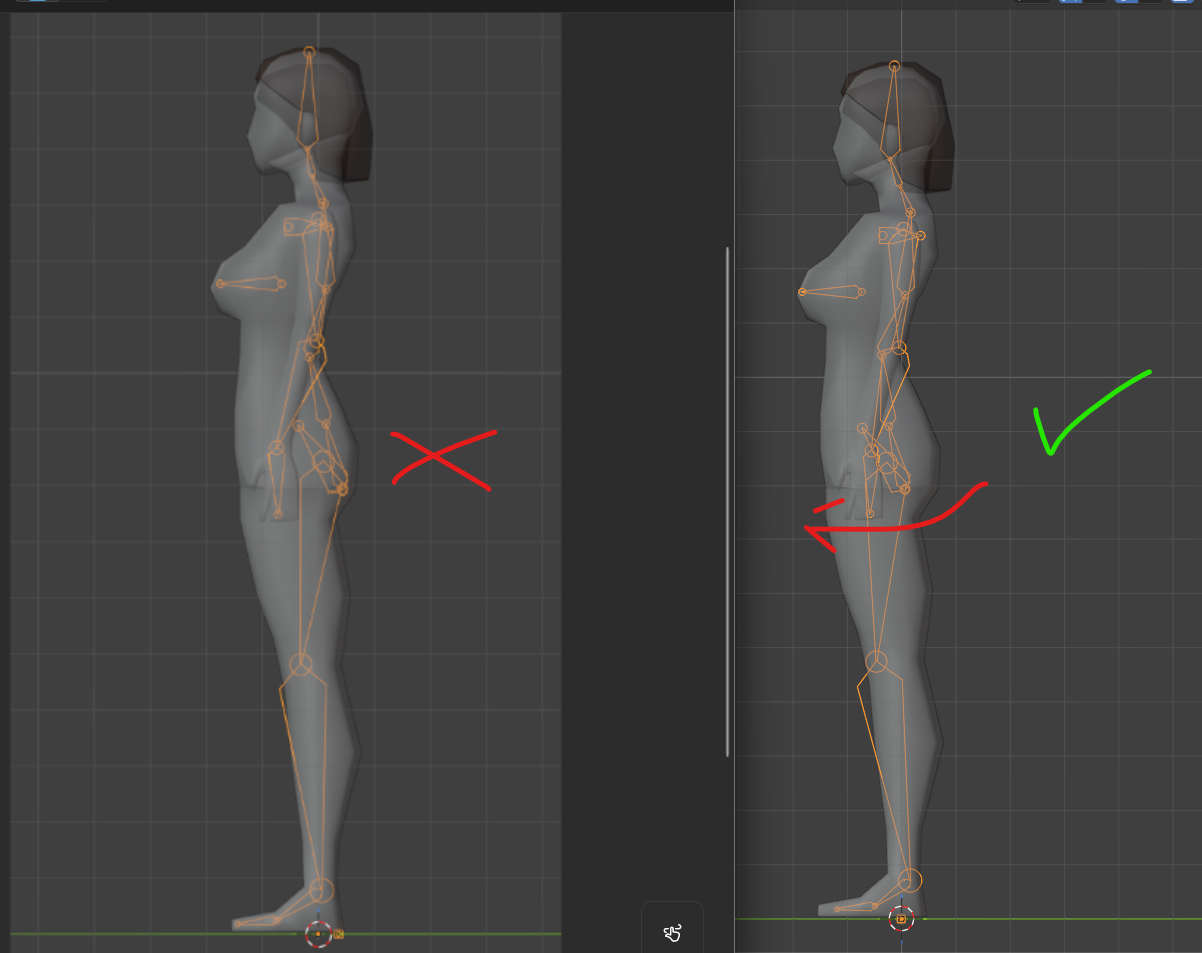
This doesn't seem too bad at first glance, but this basically makes it so the legs pivot way "further" into the body, and it kind of... Completely removes the shape of the character's upper legs and ass during animations. It makes all animations where the upper legs are bent (including all walking and running animations) look wrong in a subtle way.
I would not notice that specific mistake until very late into the jam, but I will experience its consequences over the next few days as my work on animations will slow down because of that.
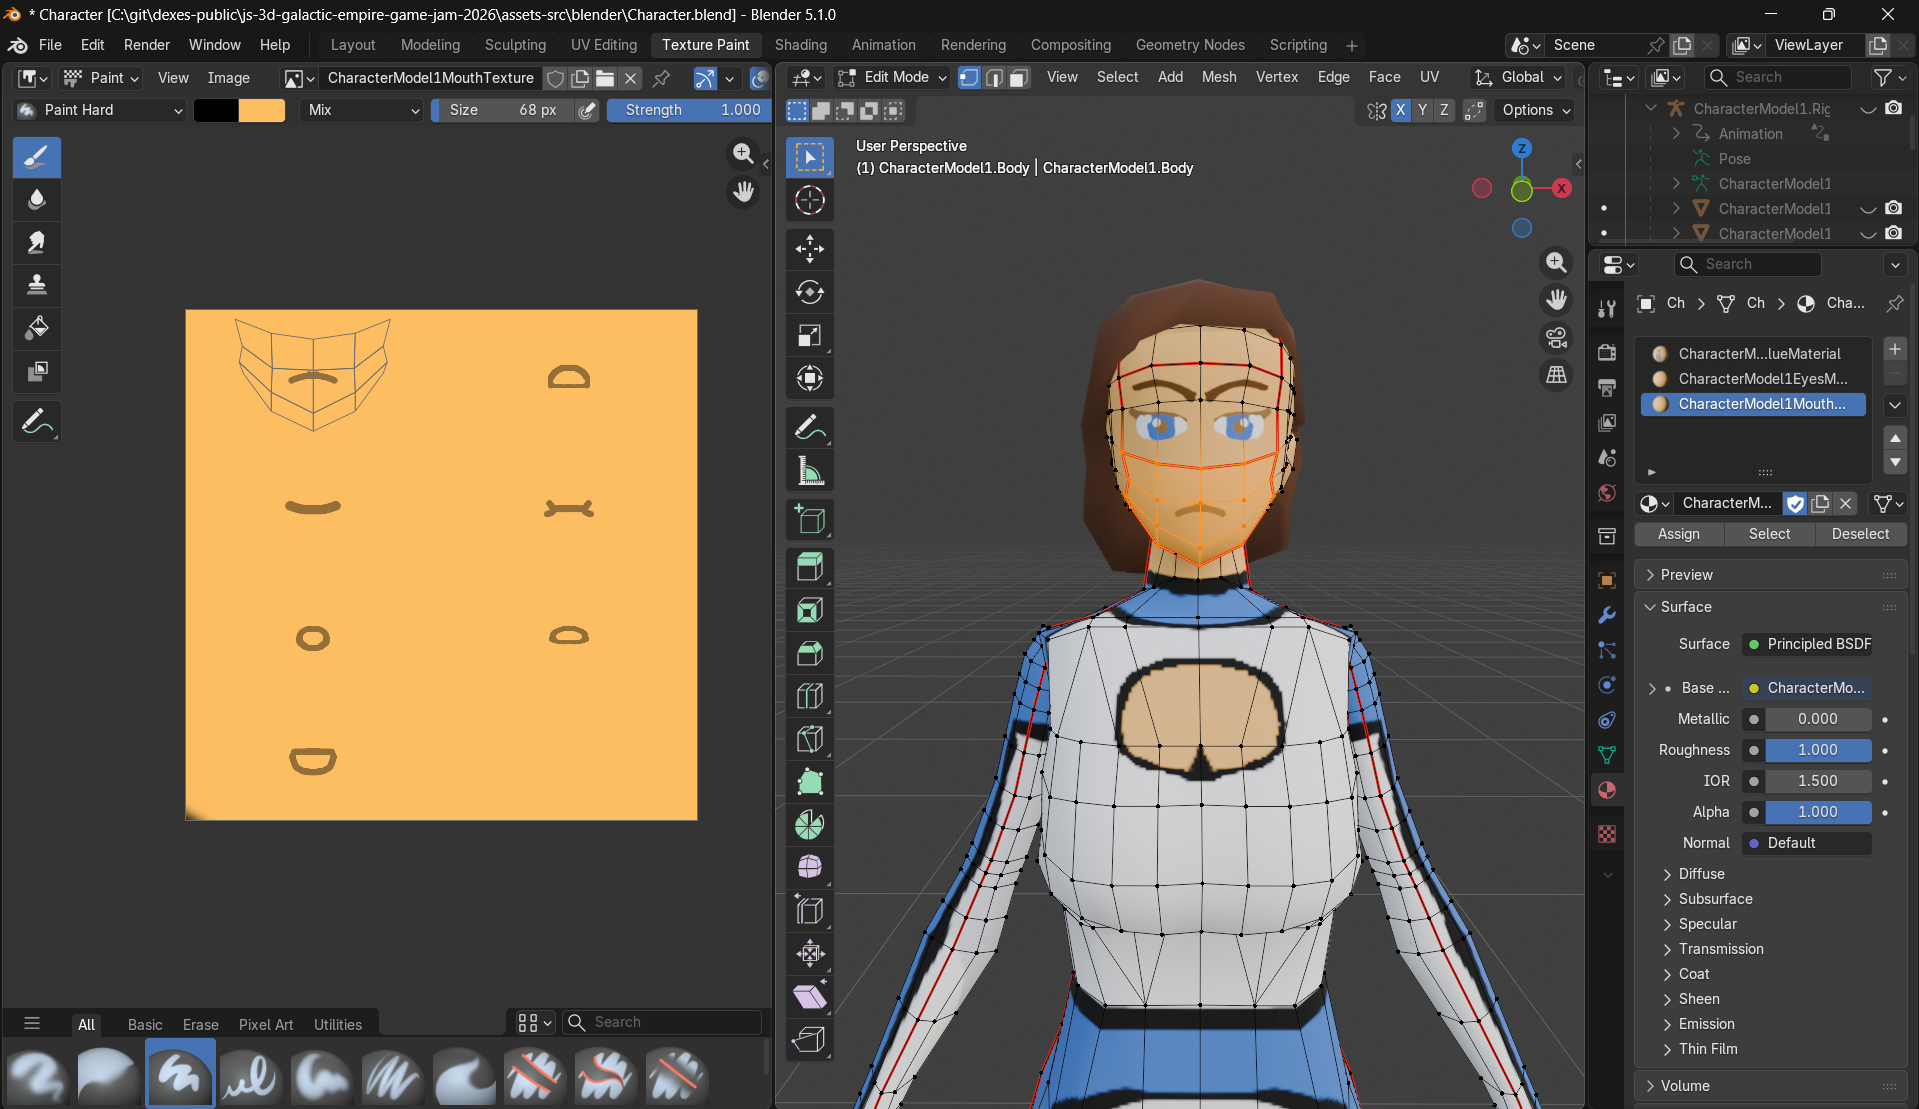
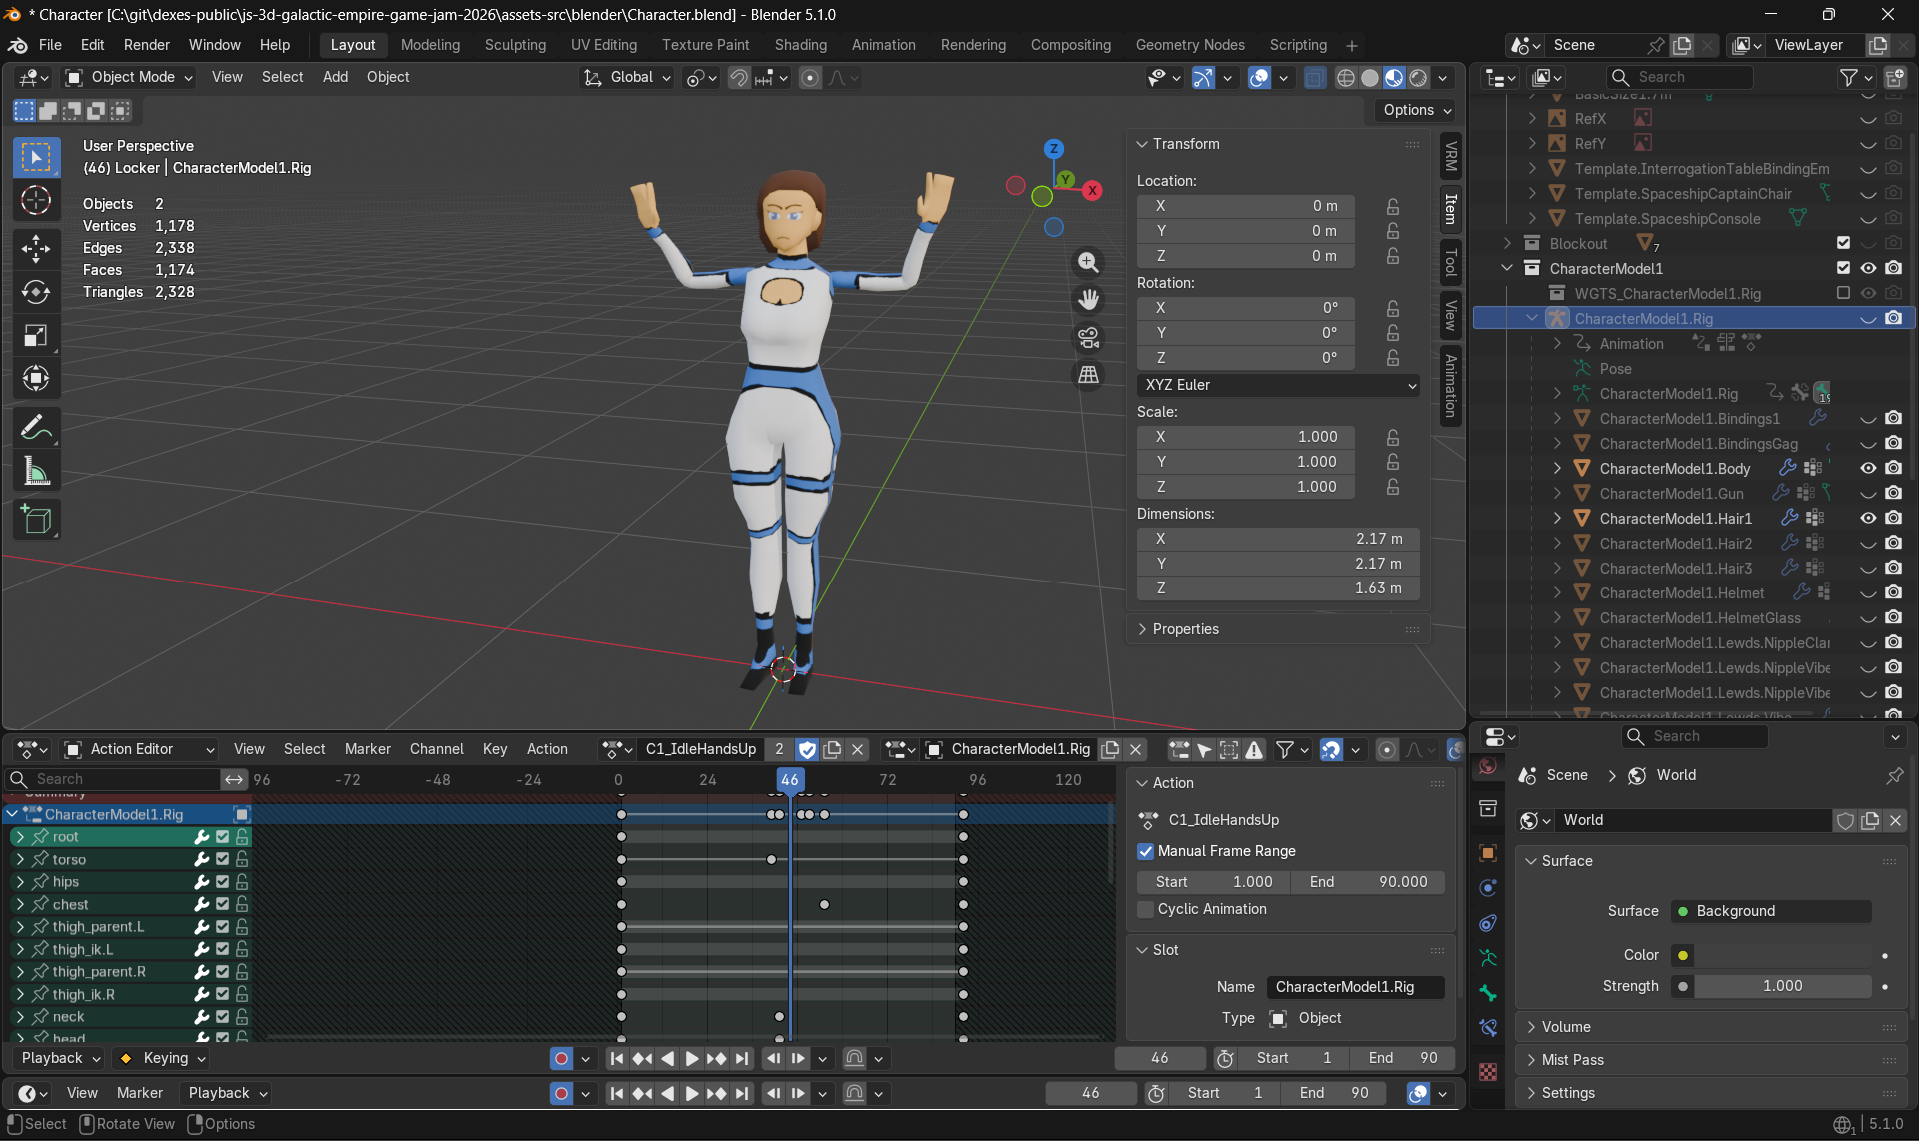
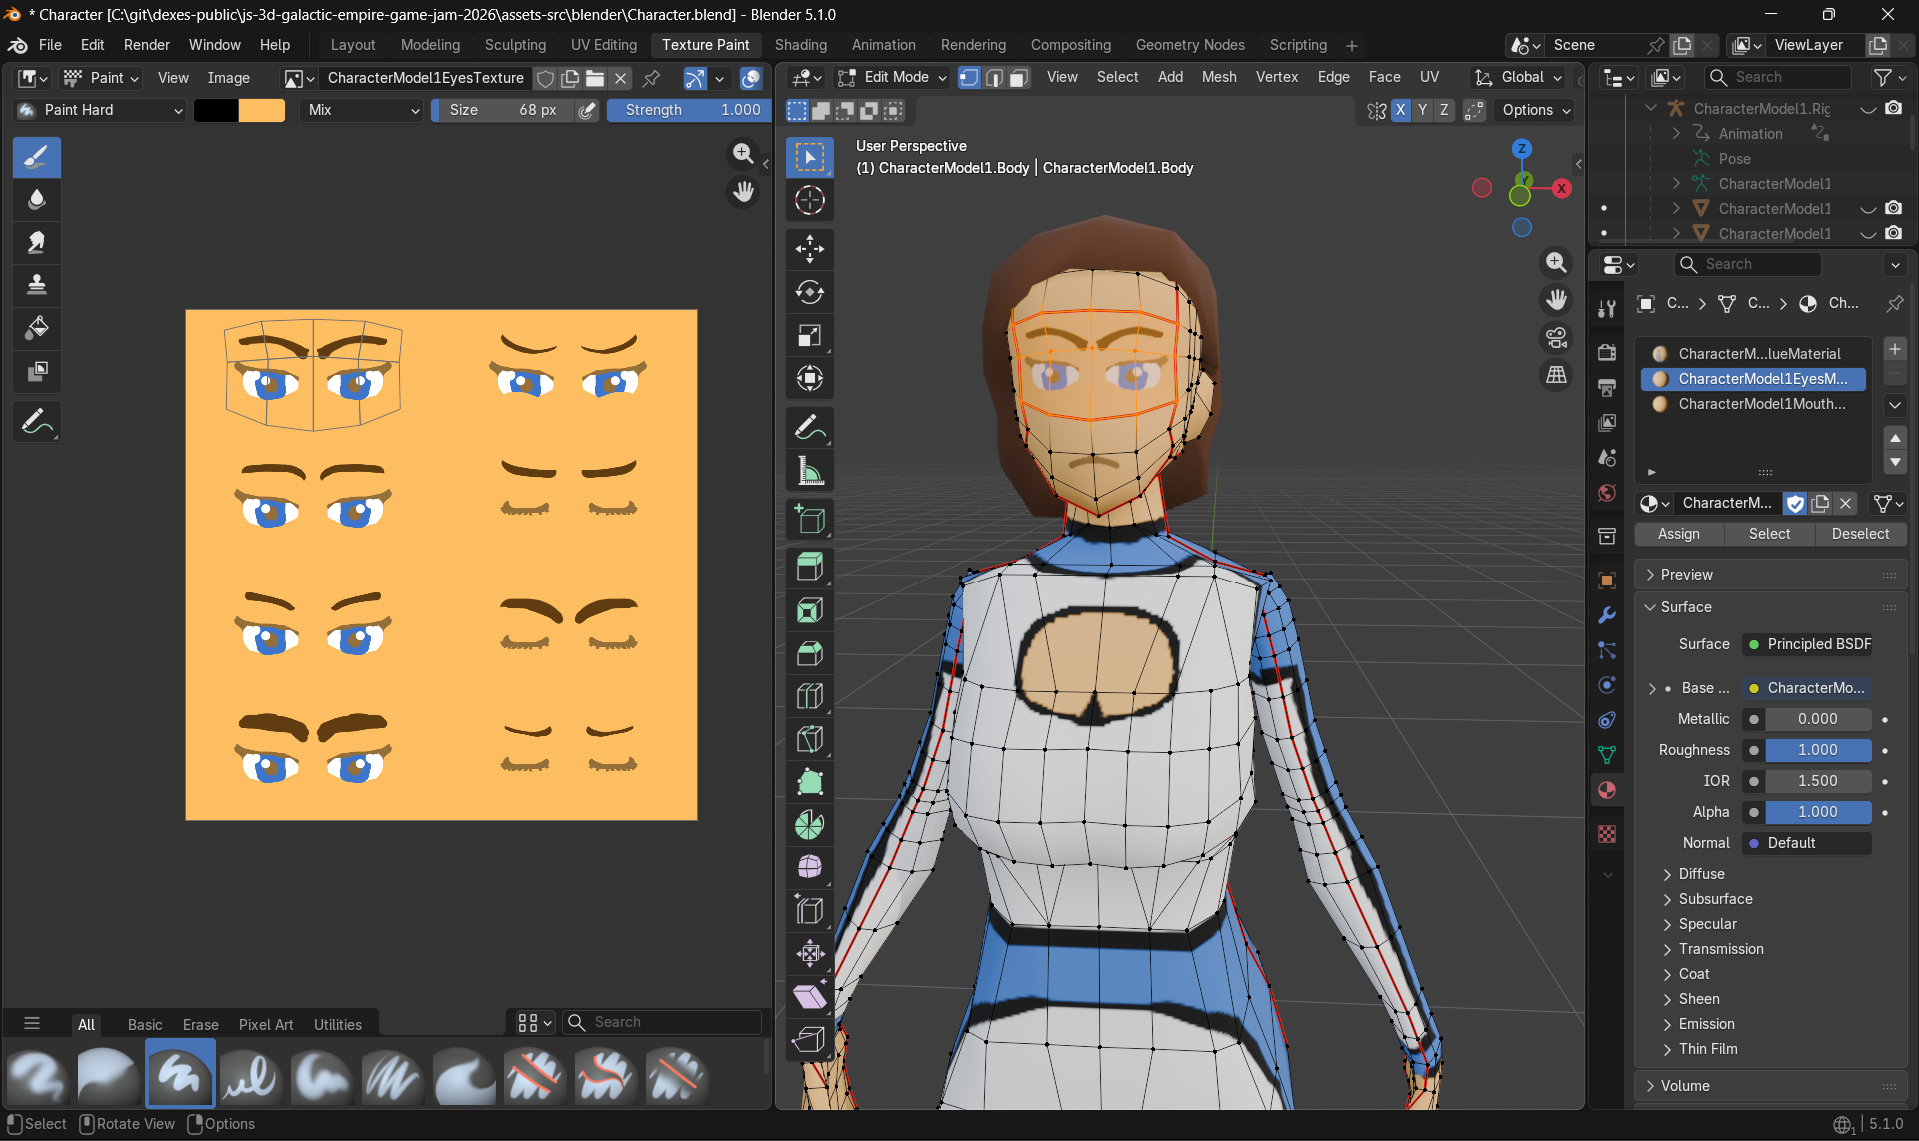
Then, once the modeling, texturing, and rigging was done, I started work on the mouth animation textures. On these models, much like for the last jam, I use a simple "UV map movement" technique to do the mouth animations, where basically you have a single texture that has several mouth shapes on it. And then, the game "slides" the texture so it shows the correct mouth when needed.
I learnt that technique years ago, but it's actually not useful at all because unless you're heavily constrained by the number of textures you can use for some reason, it's just better, faster, and cleaner to have several "lower quality" textures and let the graphics card do the texture atlasing for you. Still, it was what I knew and thought was the best thing to do, so it's what I used.
I then added some simple animations for idling, shooting, struggling, and running. It was all pretty generic, but I was still thinking about the specifics of what I wanted to do in the background, and these all seemed like good starting points. The running animation was looking a bit wrong (mostly due to not using references but also because of the aforementioned rigging issue) so I left it alone for the day in whatever state it ended up at.
Finally, I went through the project initialization steps, and started showing the character I created in the browser in a core loop that would eventually become the "game engine". For now, it was just a technical check that everything was working well and got exported correctly.
Then, I went to sleep, and got ready for the next day, where the real work would start.
[DONE] Create character model 1
[DONE] Create character spacesuit texture
[DONE] Create character underwear texture
[DONE] Create character mouth animation textures
[DONE] Create character idle animation
[DONE] Create character shoot animation
[DONE] Create character struggle (standing) animation
[DONE] Create character struggle (down) animation
[FIRST DRAFT] Create character run animation
Thoughts on day 0: This day went more or less exactly as I wanted it to go at the time, but looking back at it, I think I would do two things differently. First, I should have thought more about the story and the "core loop" at the time, and maybe drafted how a single quest would go or something. Having this (evolving) guideline written down would have helped with focusing on the core features, instead of relying on half-finished ideas that only lived in my head. The second thing would have been to use more references for both faces and animations, because I lost easily an hour trying to do things "from memory" instead of just looking at examples. Still, this was a good day.
Day 1 (March 28th, 8AM to 11PM UTC)
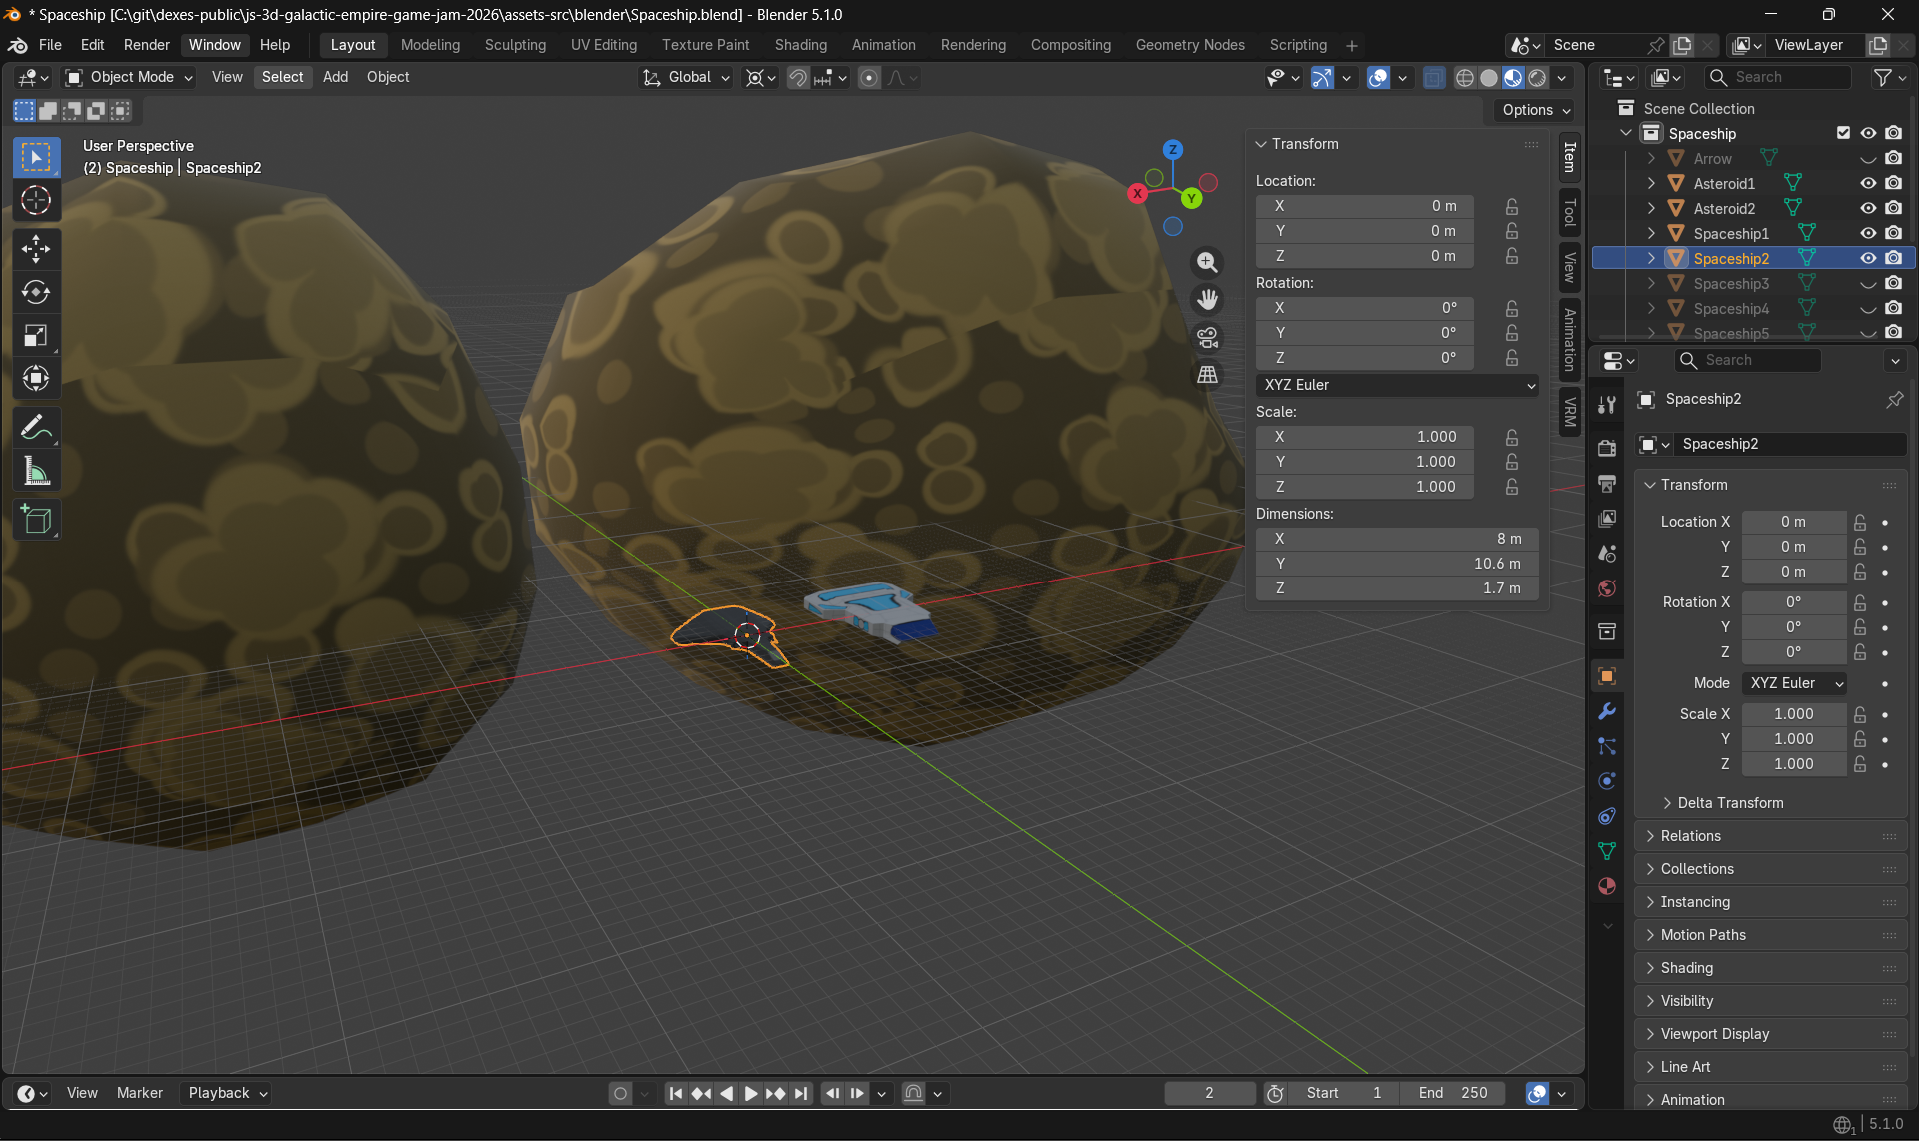
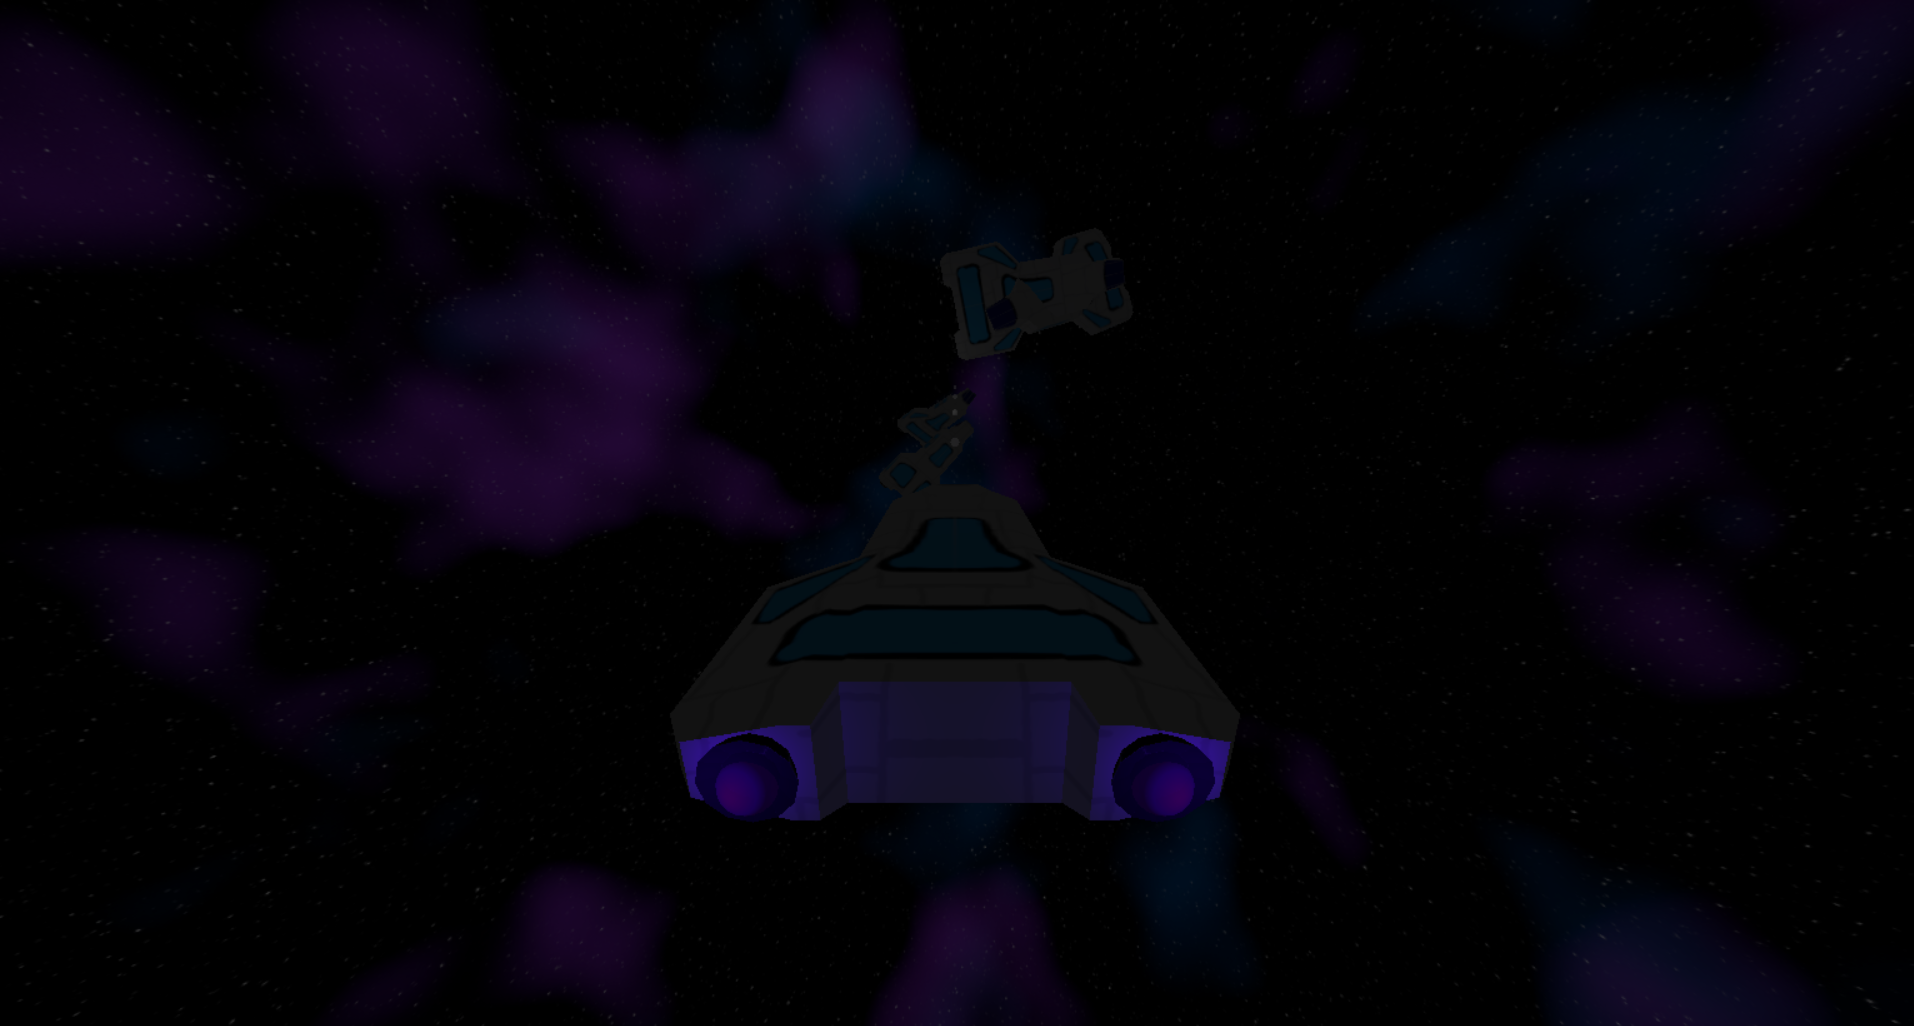
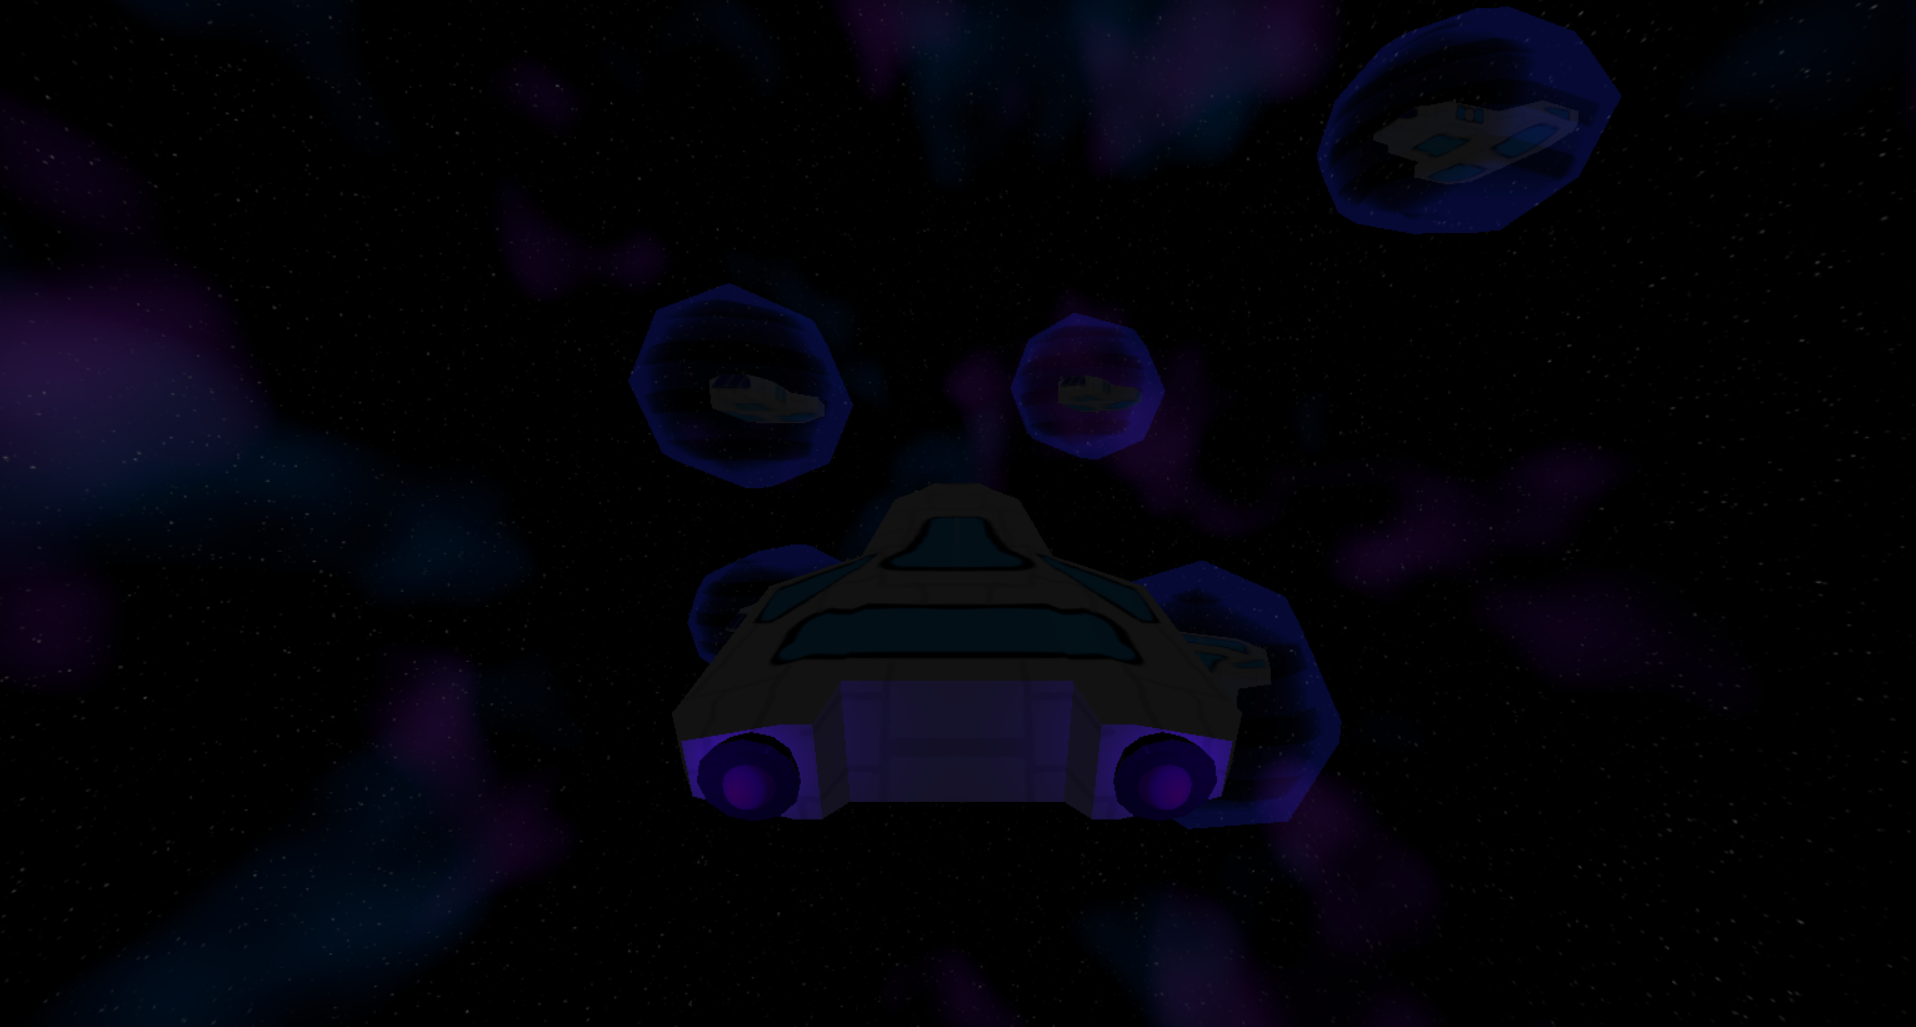
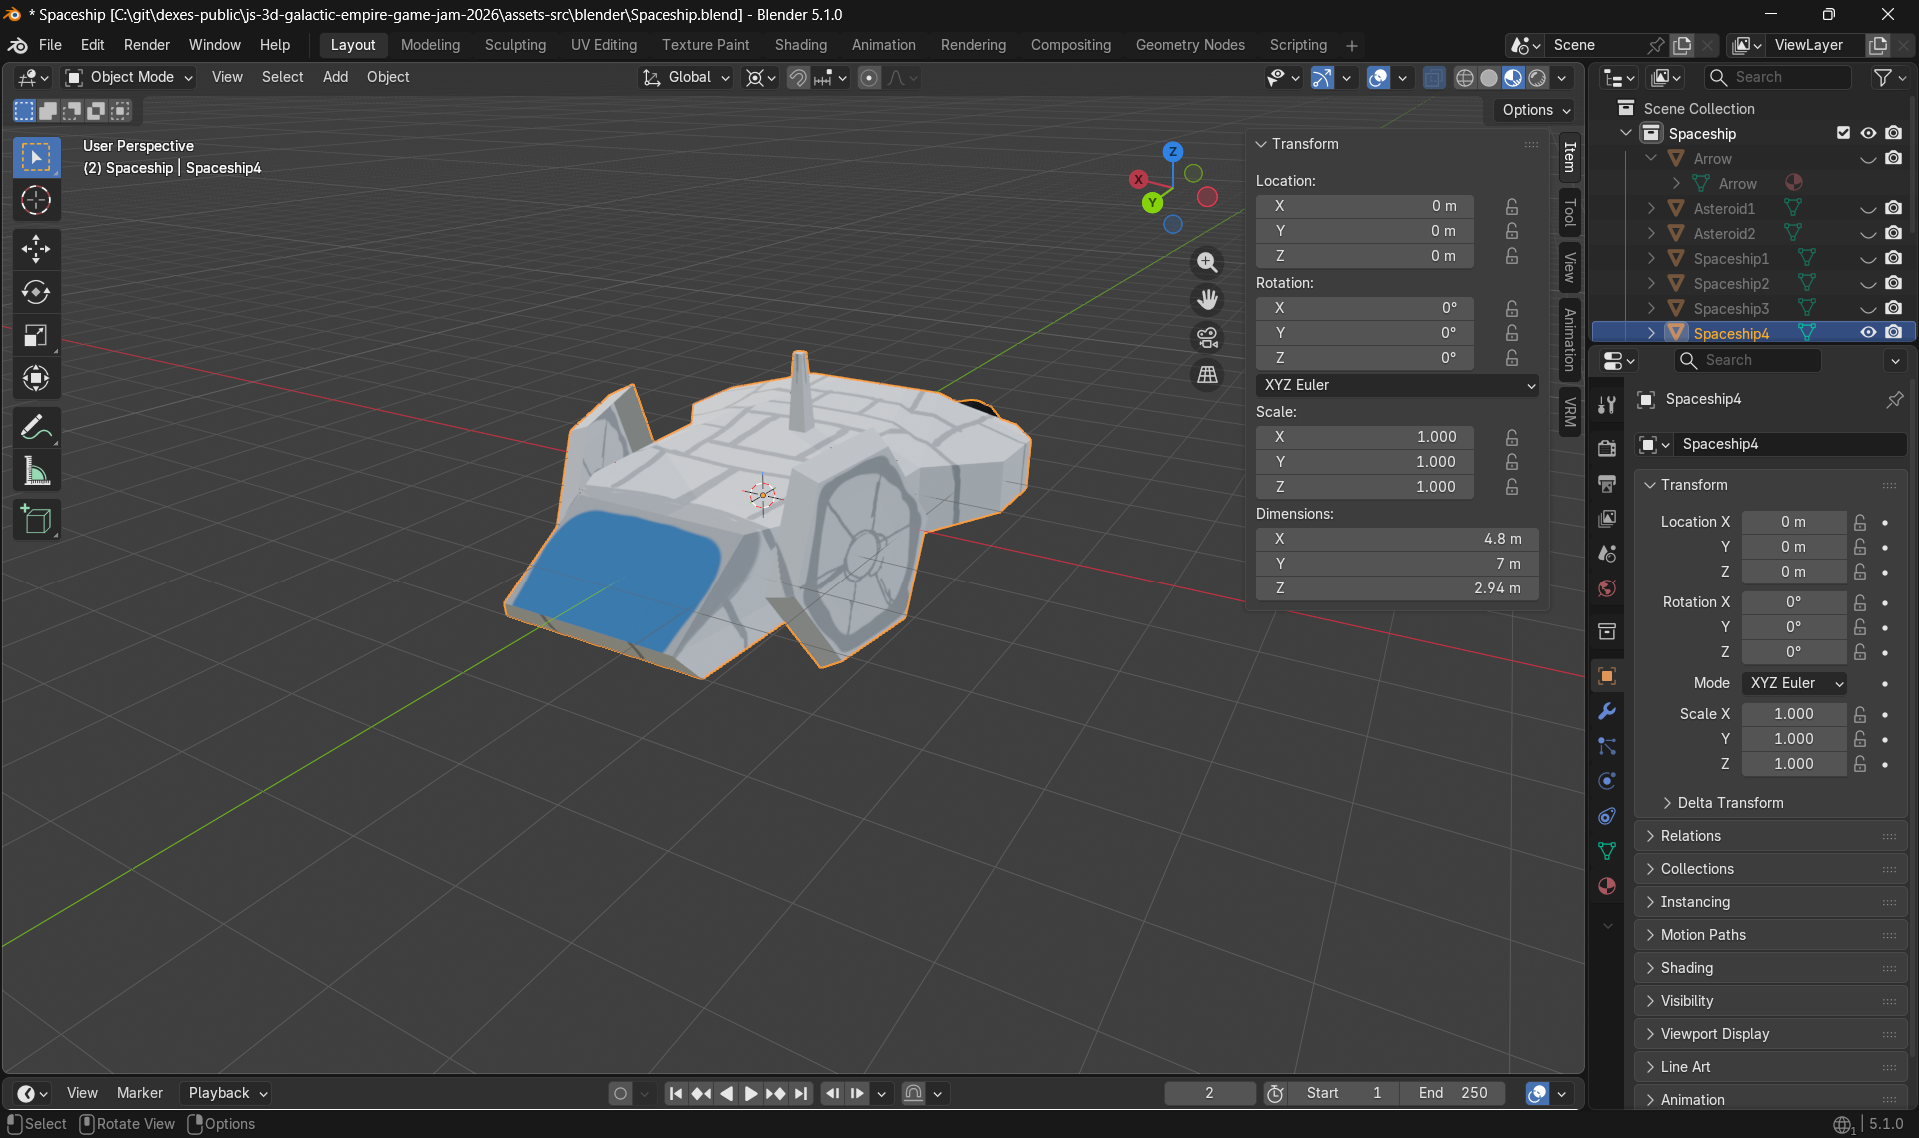
Coming back the next day, I quickly did the space skybox that I would use for the entire game. I then also did some enemy and player spaceship models, as well as asteroid models, to try to create a basic "space level" fairly quickly.
The next step was to create the utilities needed to actually make the player move. I made the correct decision of creating a remappable input system from the get-go, even if there was no UI to remap it, and which is a big plus when you get to the polish phase of the game. This is just a somewhat smart thing to do in general, and only really takes six lines (if you ignore correctness checks and things like that)
const inputMap = {'z': 'up', 's': 'down'};
const pressedKeys = { "up": false, "down": false };
document.addEventListener("keydown", (e) => {
  pressedKeys[inputMap[e.key]] = true;
});
document.addEventListener("keyup", (e) => {
  pressedKeys[inputMap[e.key]] = false;
});
I then went into the logic of the game, and added some very basic space shooting gameplay. The goal was to have this as a very first draft. It... Didn't move past that first draft ; but it didn't need to, as it was good enough.
I also implemented the shield shader. I kept the effect fairly basic, just sticking to what was provided initially, and with a slight "wave" effect in a single direction. The wave effect was not using the correct direction on my first try, which tripped me up, but I just changed the axis and it looked right. It turns out that this was because of the shader expecting local object coordinates everywhere, but I only found that out the next day once I start actually dealing with how the shield reacts to the player shooting at it.
Once I was done with the shooting loop, I started working on the inside of an enemy ship, to create a model for that.
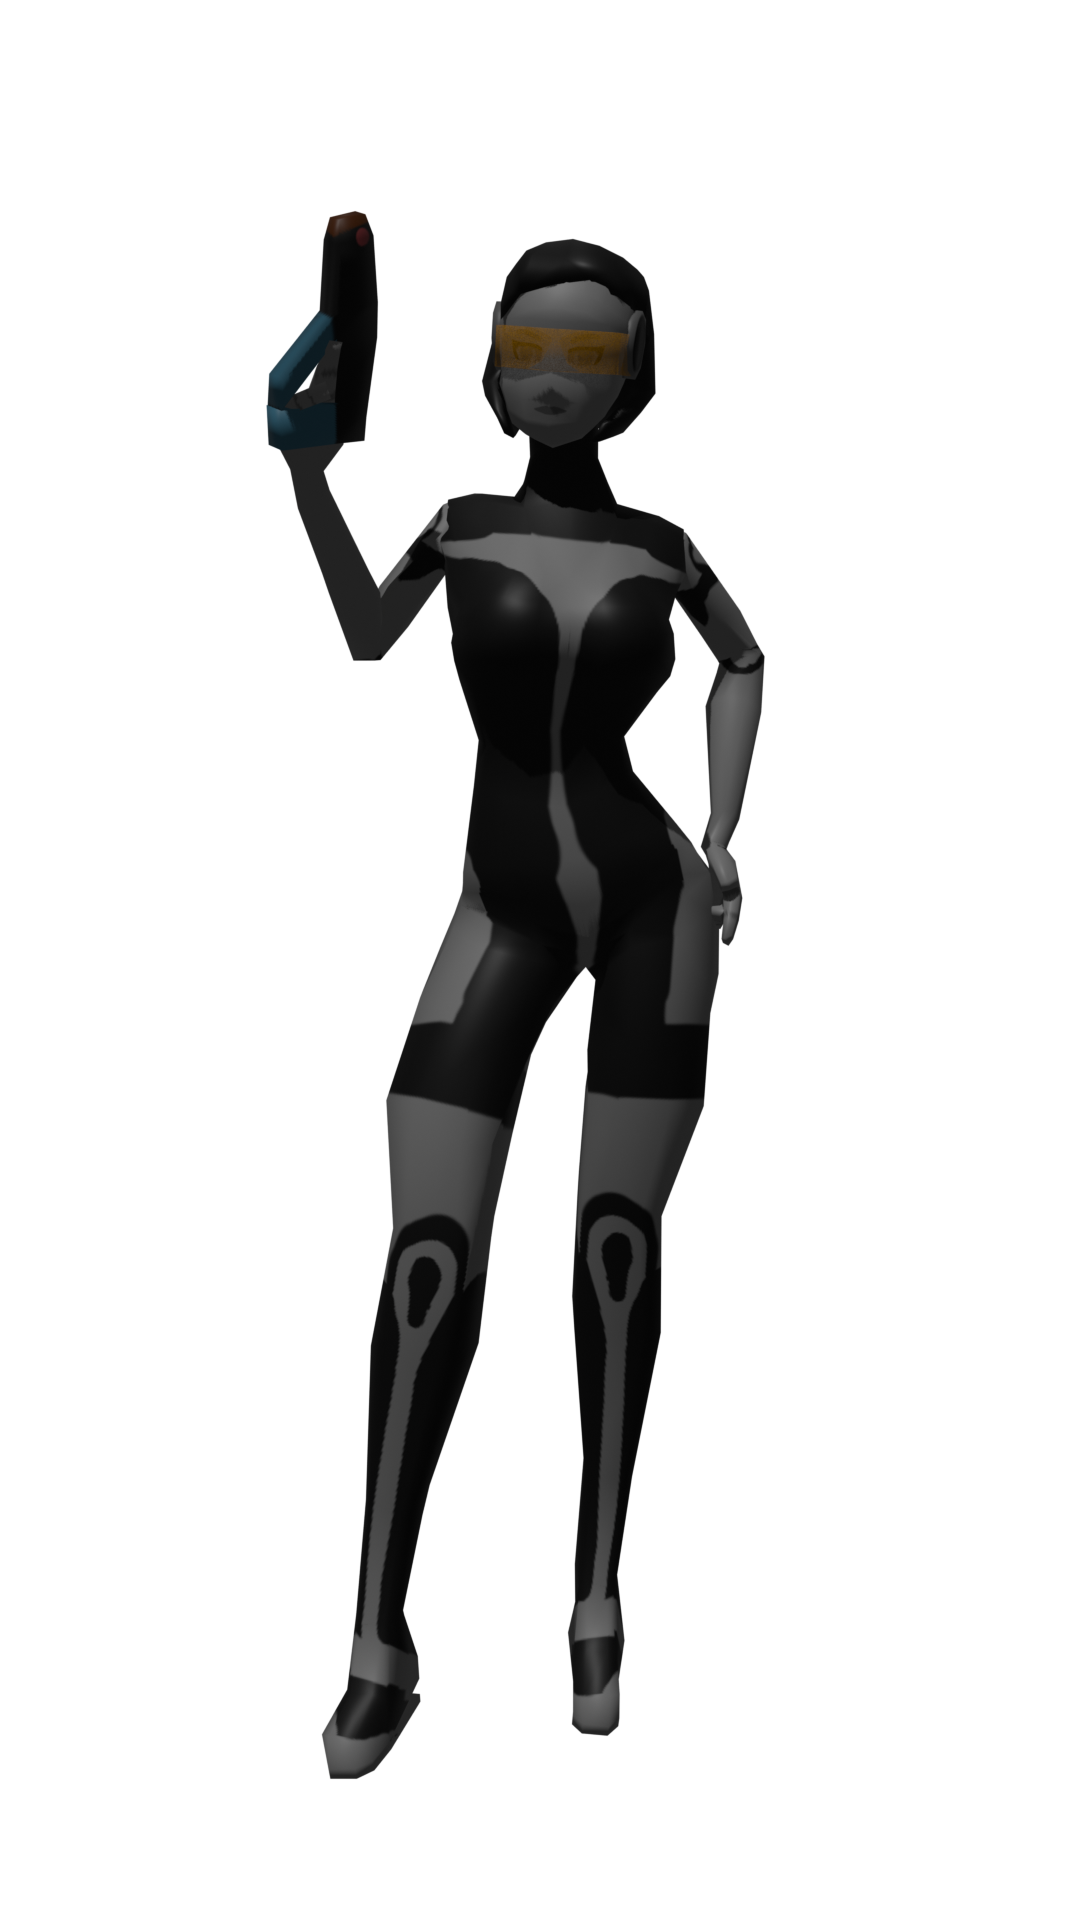
Doing that made me figure out that I was actually missing a few things for that combat system. First, I needed a custom player skin (to distinguish it from the enemy skin):
And then, I went on to make all of the animations of moving while carrying a gun.
The first thing I did was to improve the run animation, and to create a walk animation. For that, I used these amazing reference sheets found here and here. I also added some "moving while holding a gun" animation variant to these, to make it all fit.
I also took the time to start splitting the game engine's main loop into "scenes" that could be toggled on and off. This would allow to switch from one gameplay to another at this point.
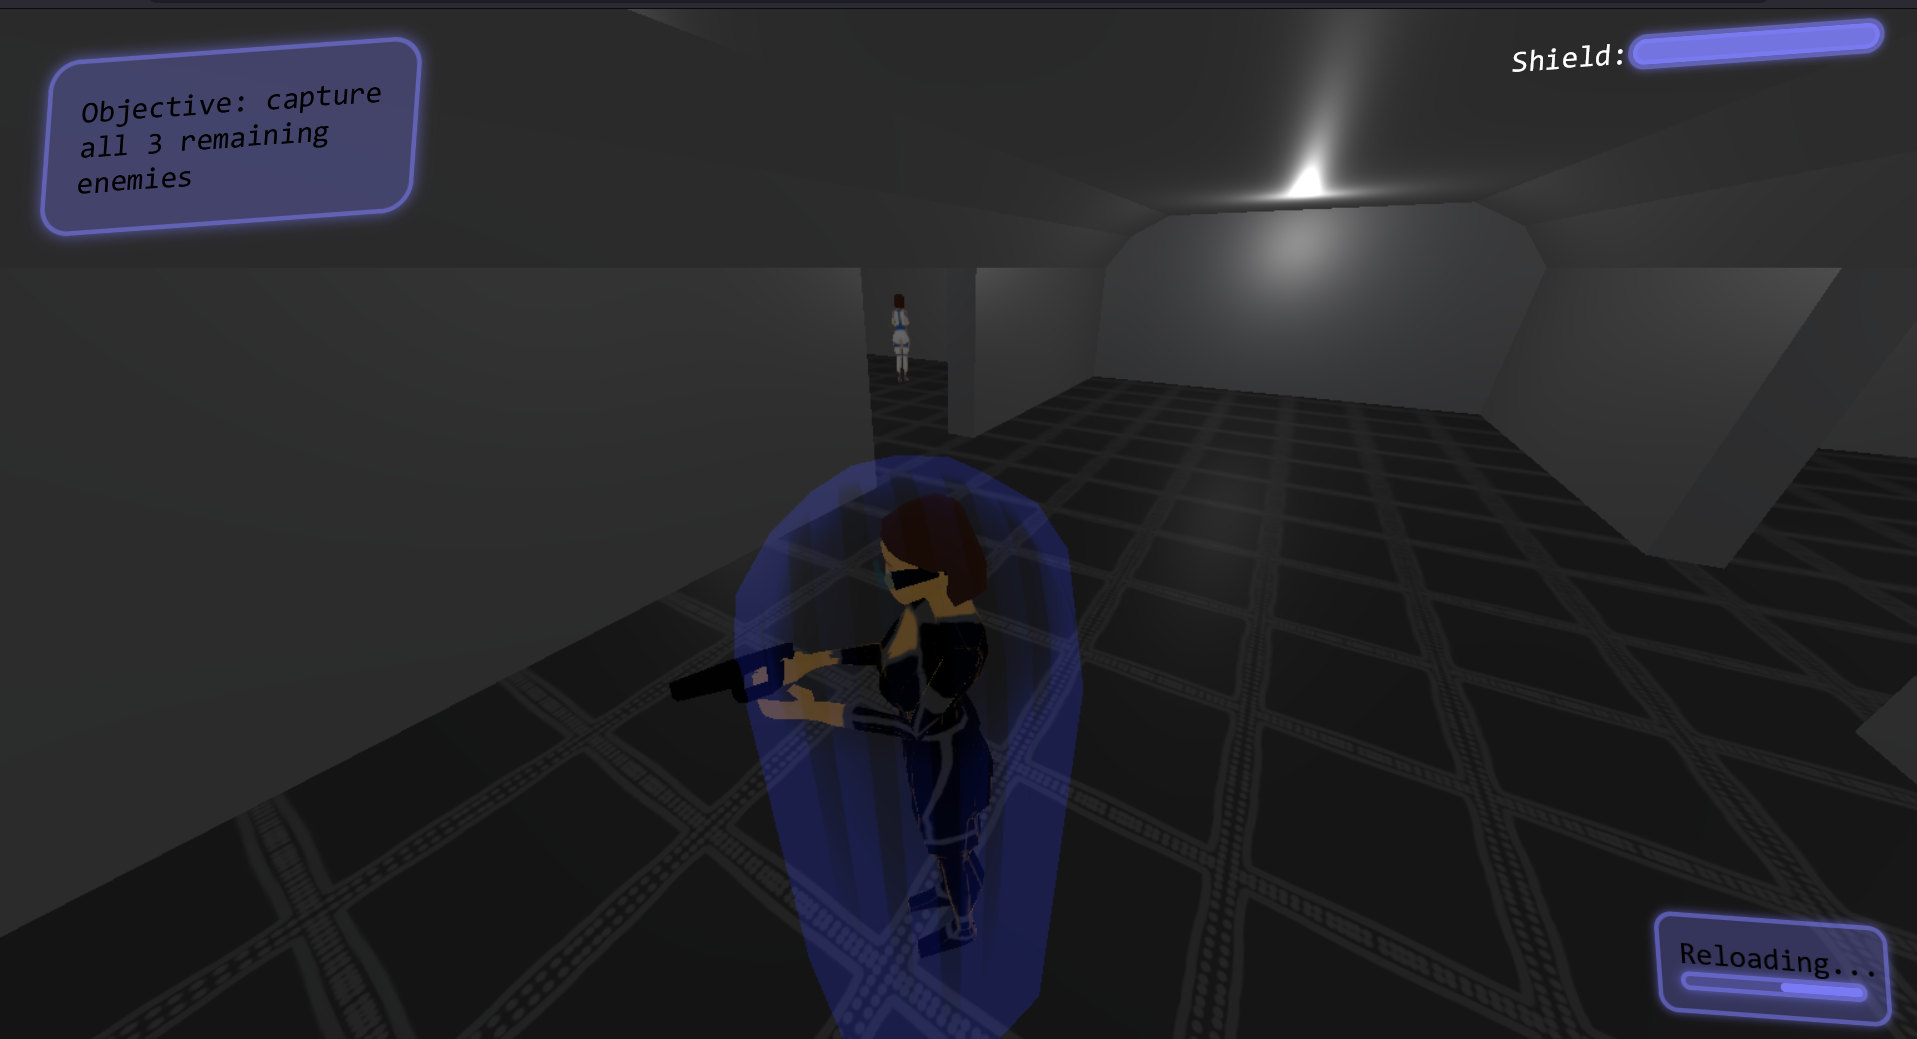
And then I was able to move on to the very basic shooty gameplay but inside of a ship, as well as a basic UI for the combat:
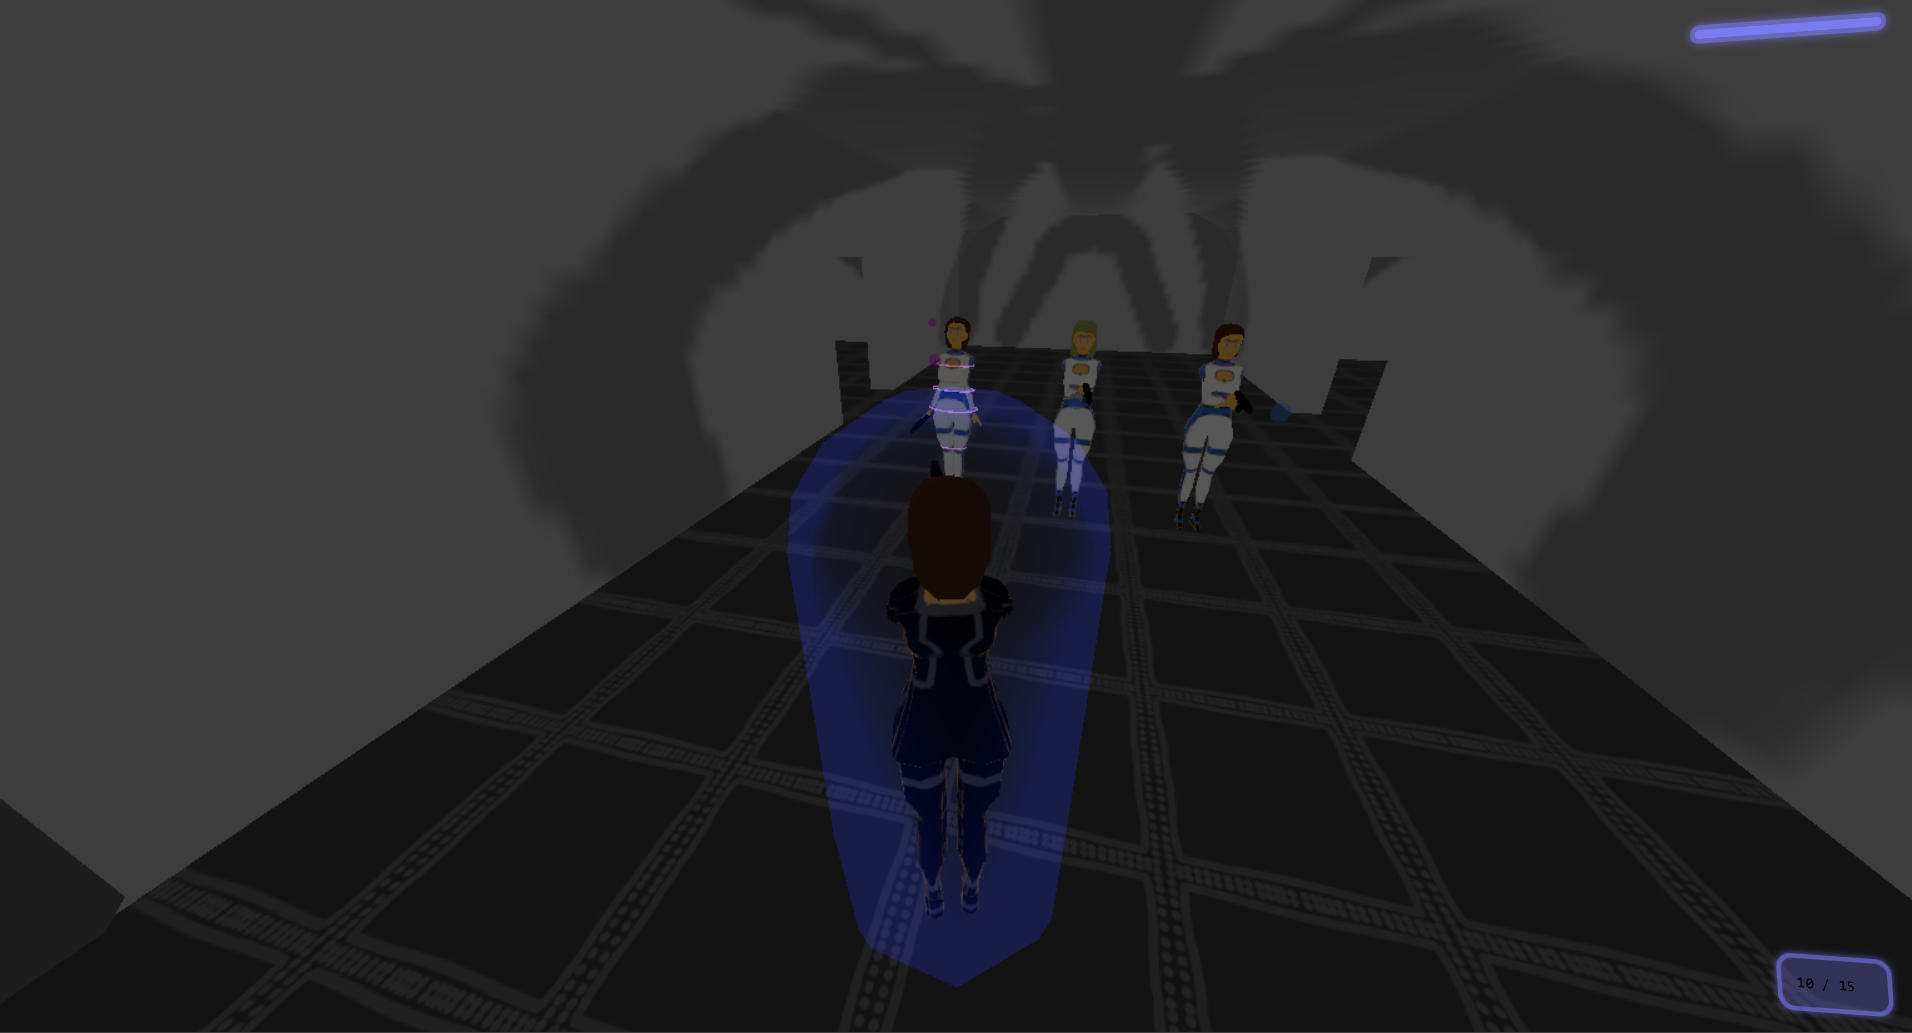
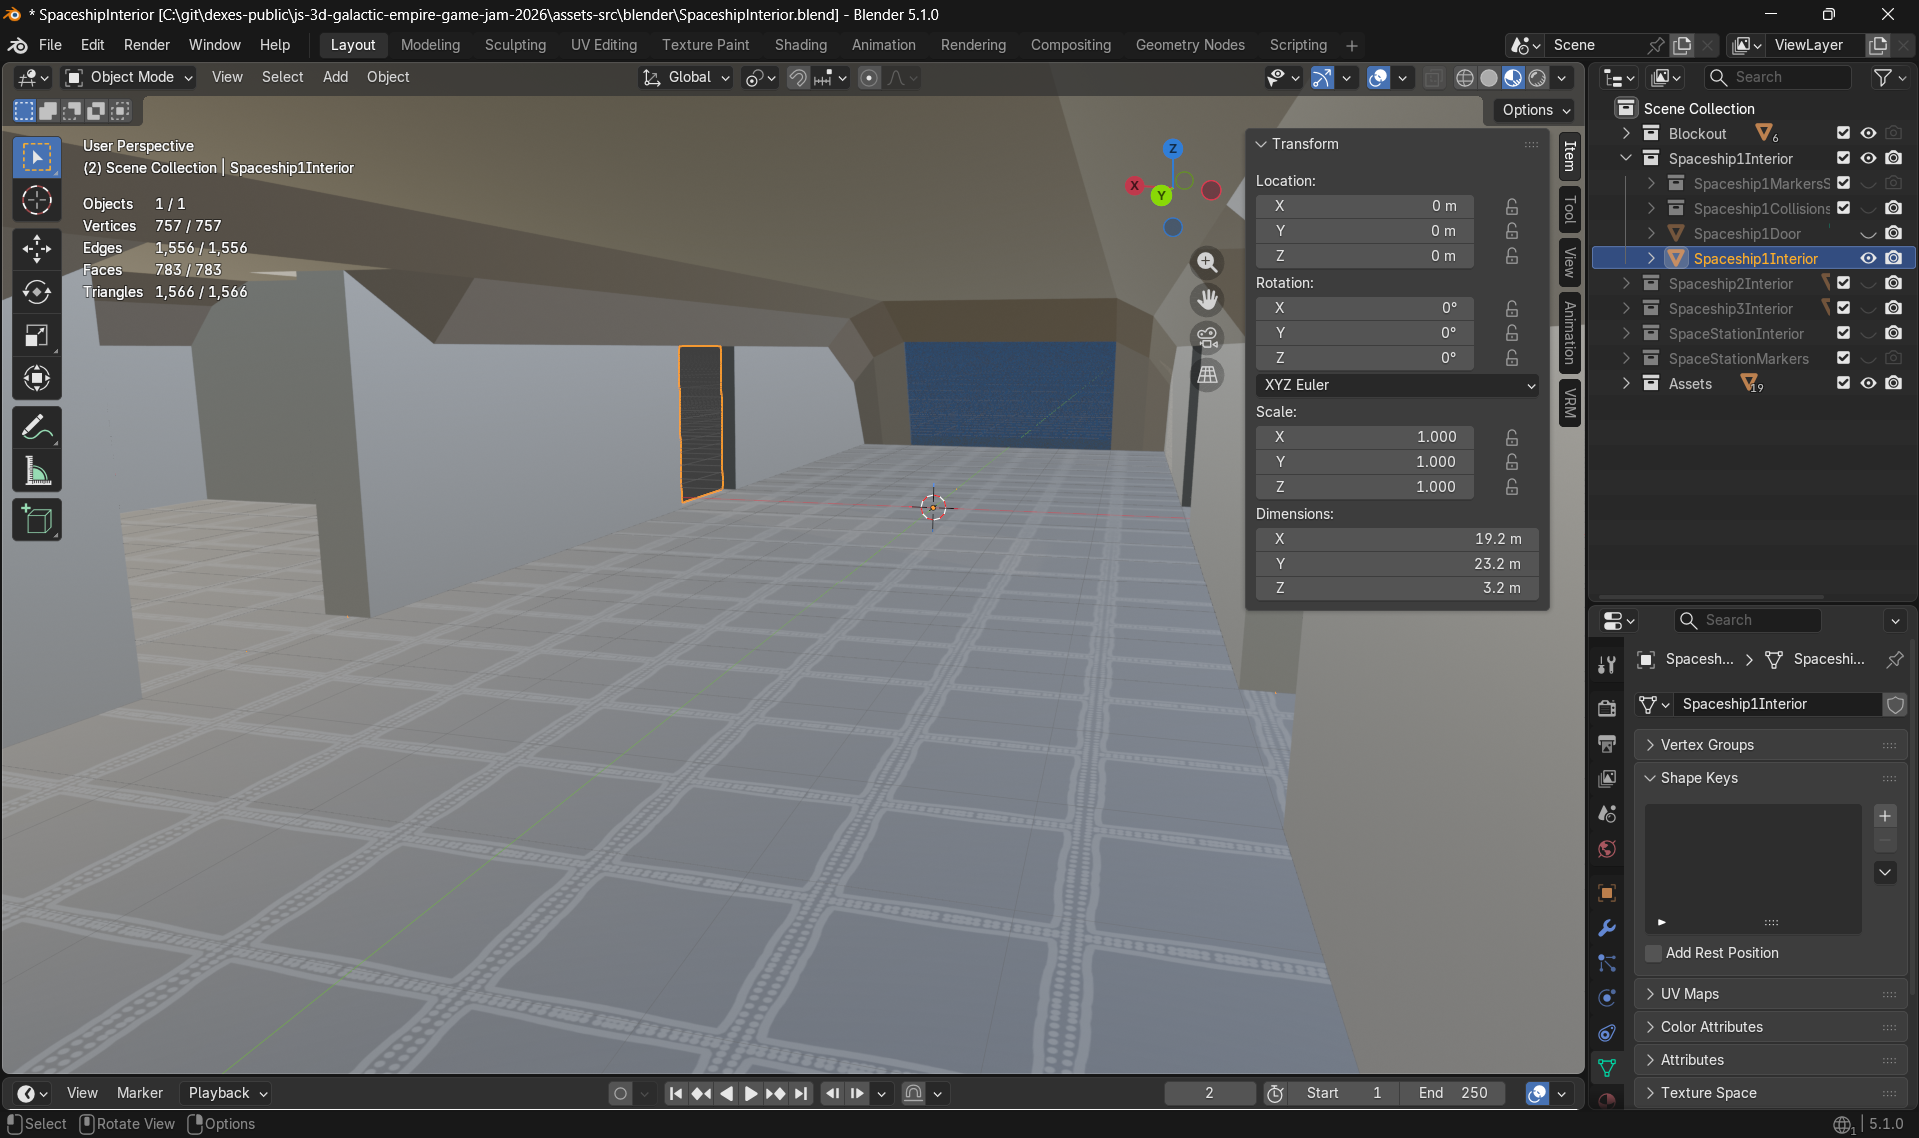
I also started creating a "player spaceship" map to just move around in:
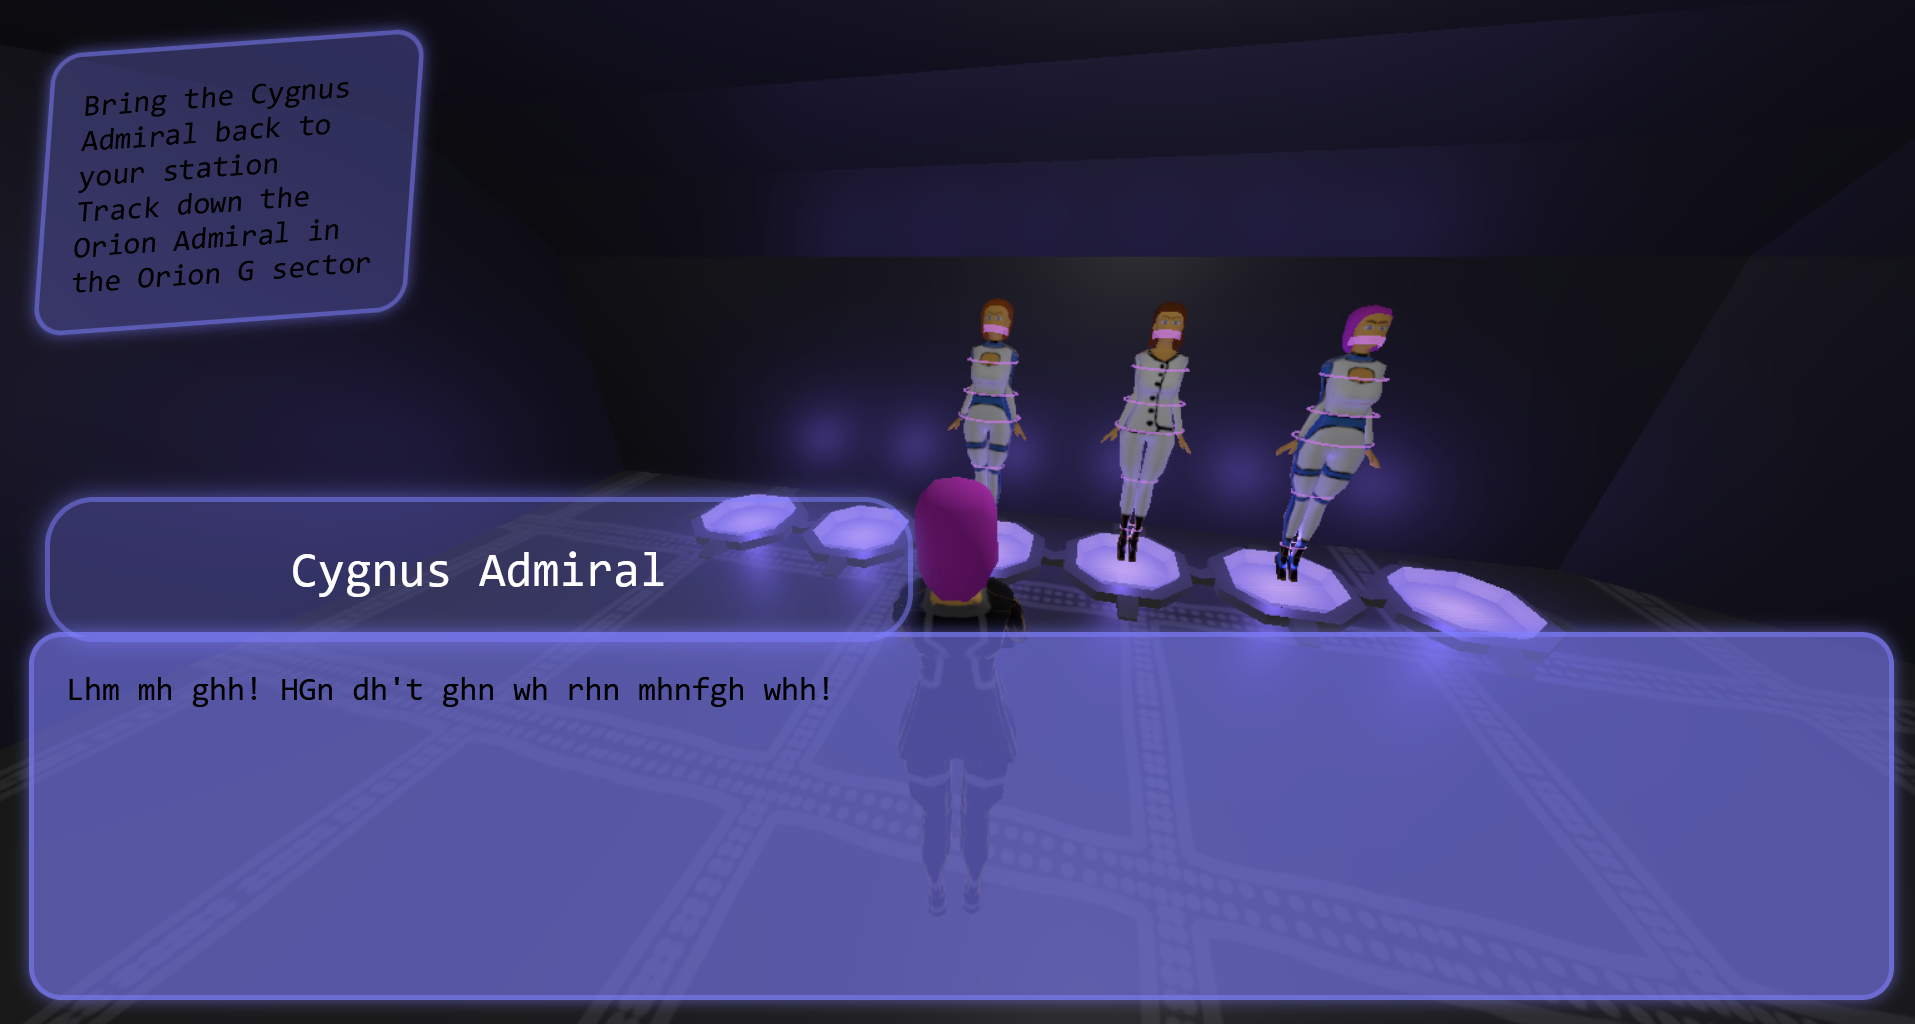
With, of course, the stasis spots to keep captives in, with some sample captives at the moment:

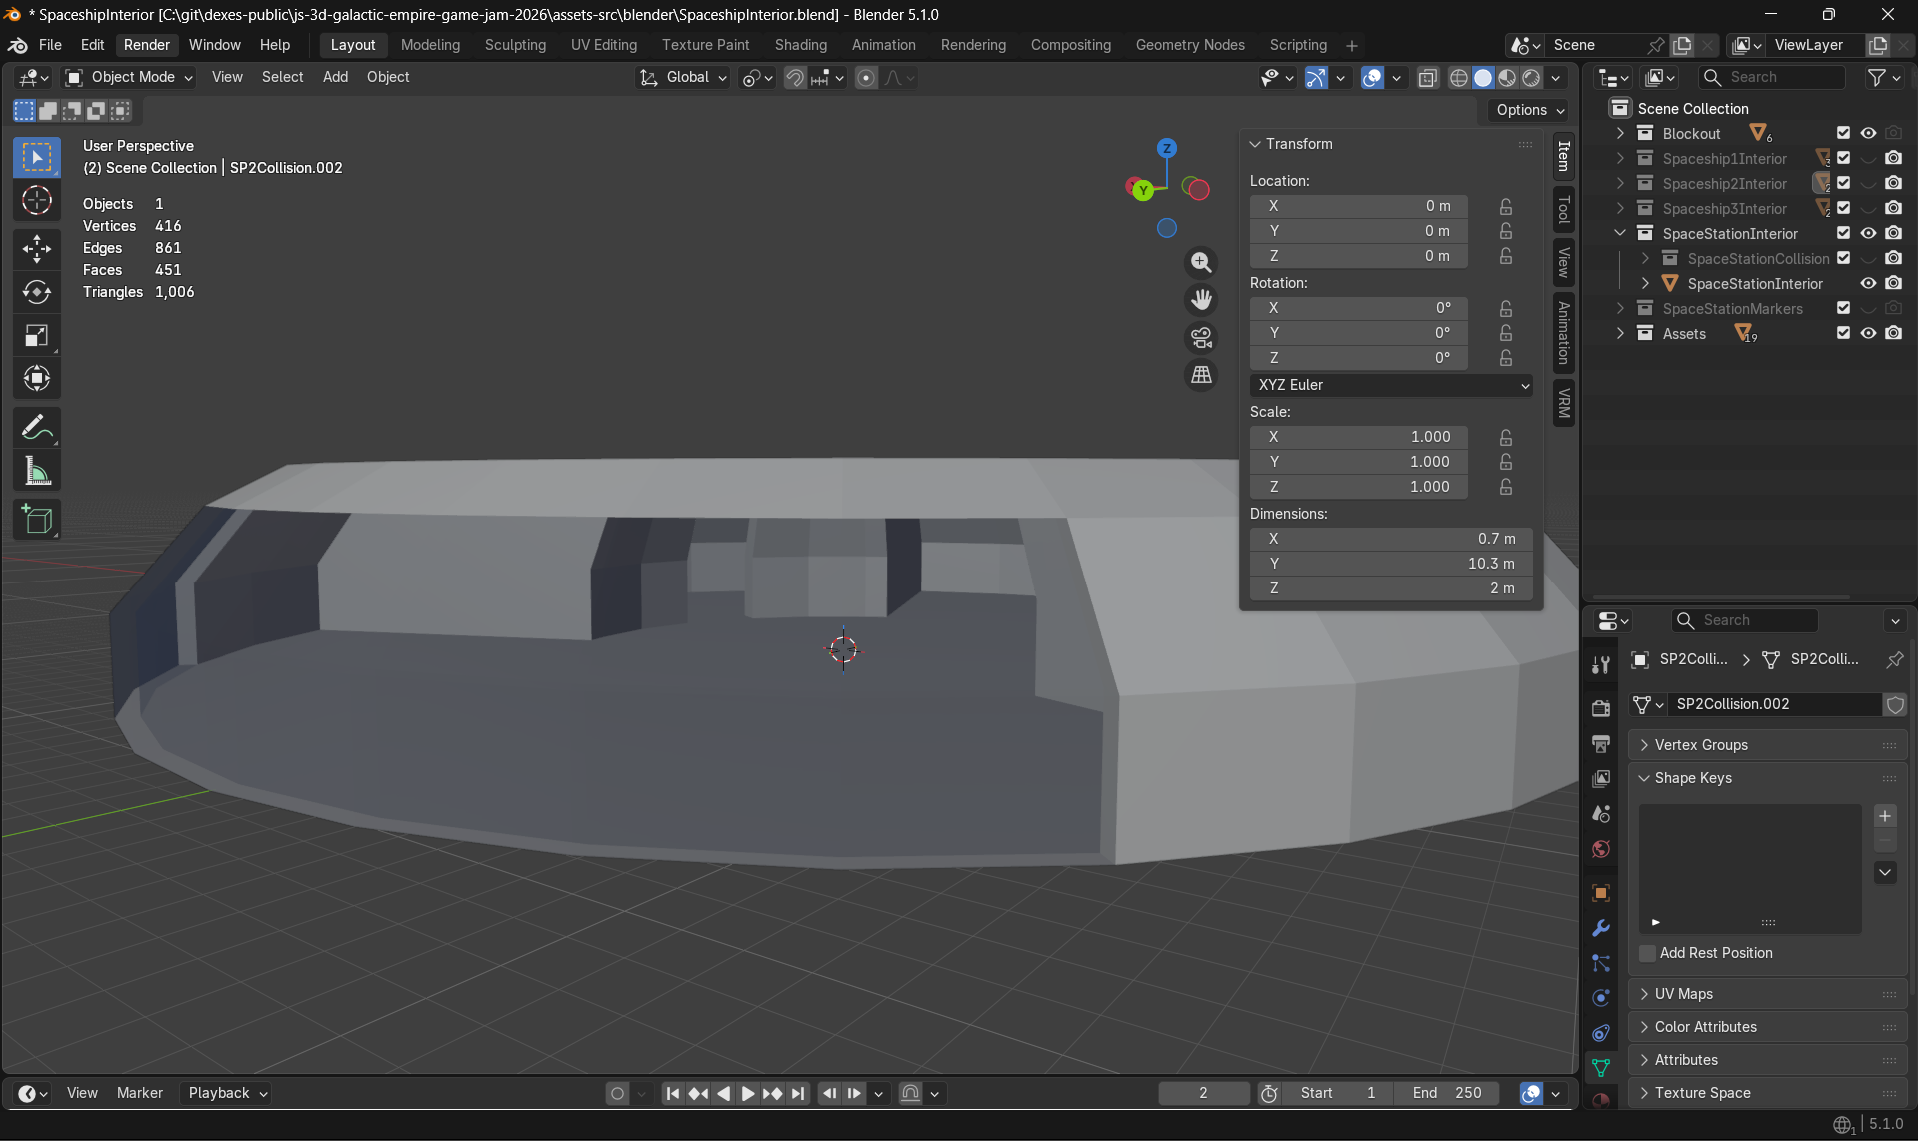
Finally, I started work on the collision system. The collisions were actually one big issue with this game jam project ; since I didn't want to recreate a whole collision engine like in Mirabelle - a collision engine is of course the correct solution to the problem, but it takes a long time to write - I instead decided to use the (fairly heavy to use) raycasting system provided by threejs to check for intersections with "collision boxes". I did some needless premature optimization by refusing to test collisions with actual objects, and instead trying to only use custom-made "collision boxes" with simplified geometry. I have no idea how expensive actual full-model raycasting would have been, and I guess we'll never know, but I still think going that optimizing it this way was premature without even testing first if bare raycasting would have worked...
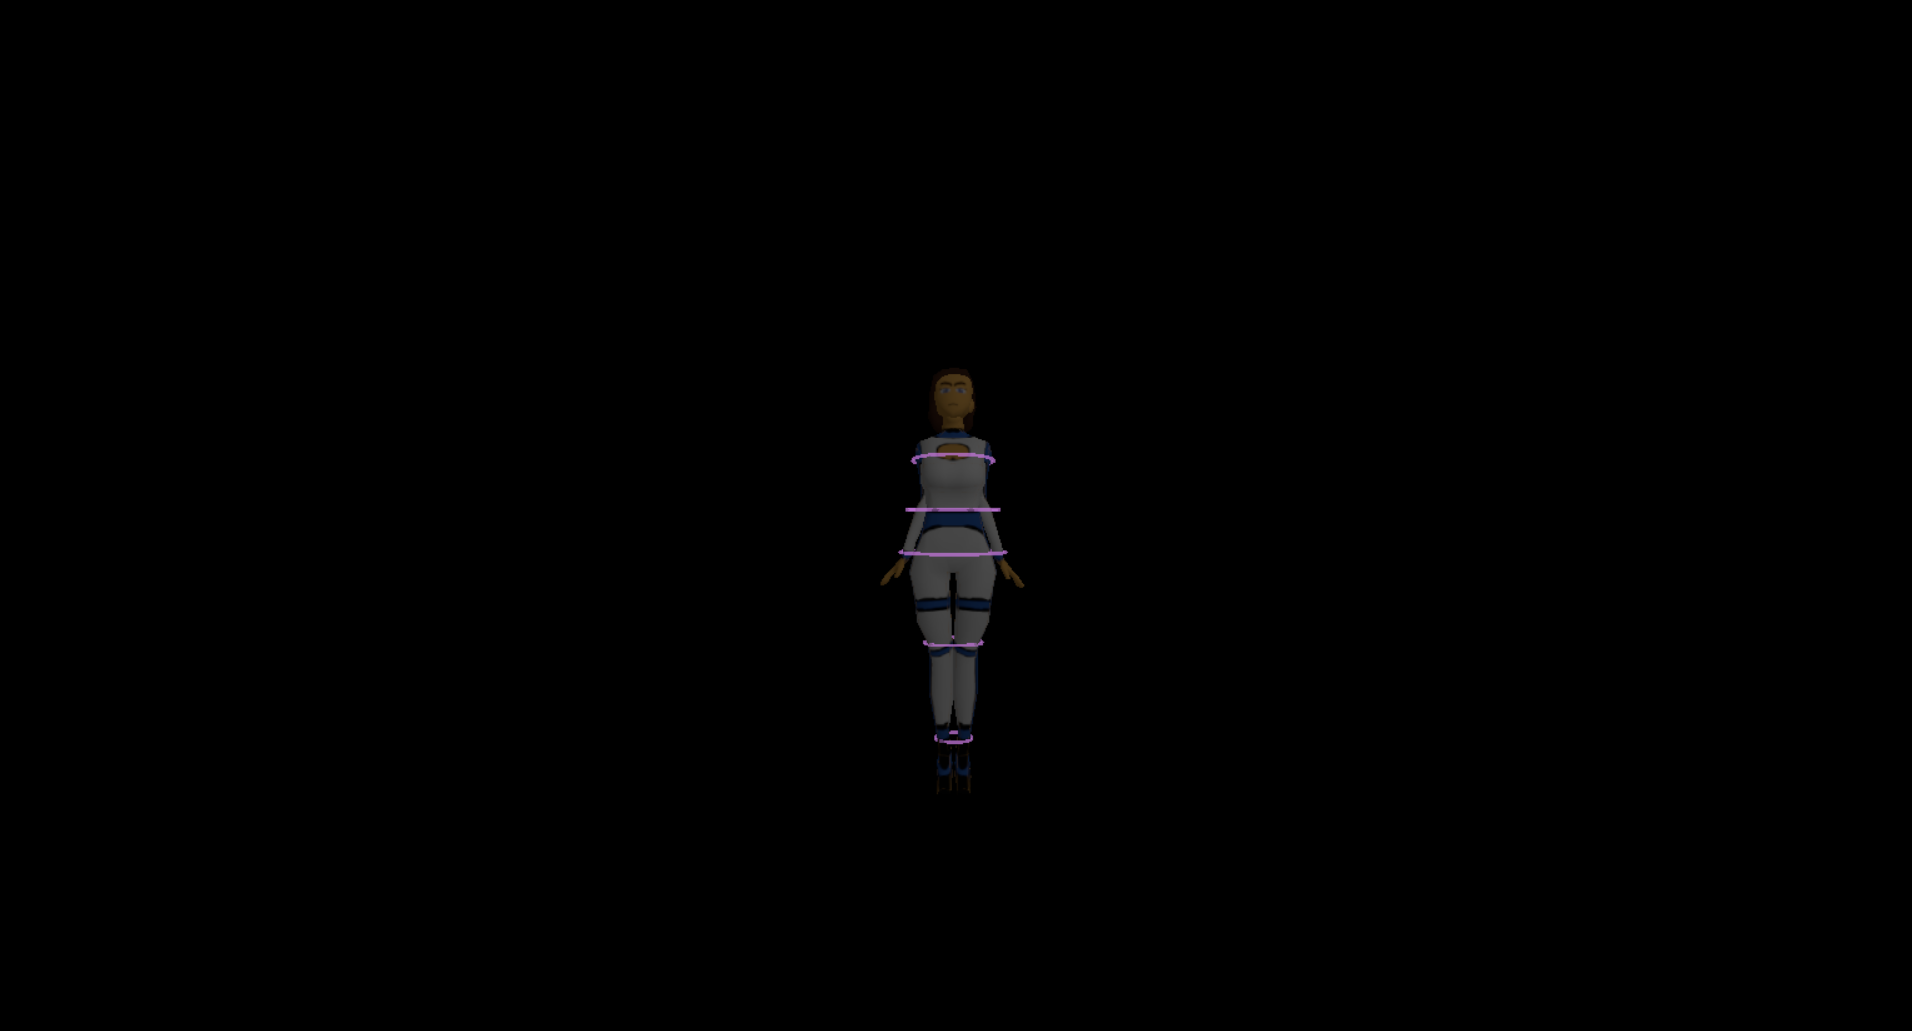
Anyways, to build this raycaster-based collision detection system, I created the collision boxes inside of Blender for the player ship.
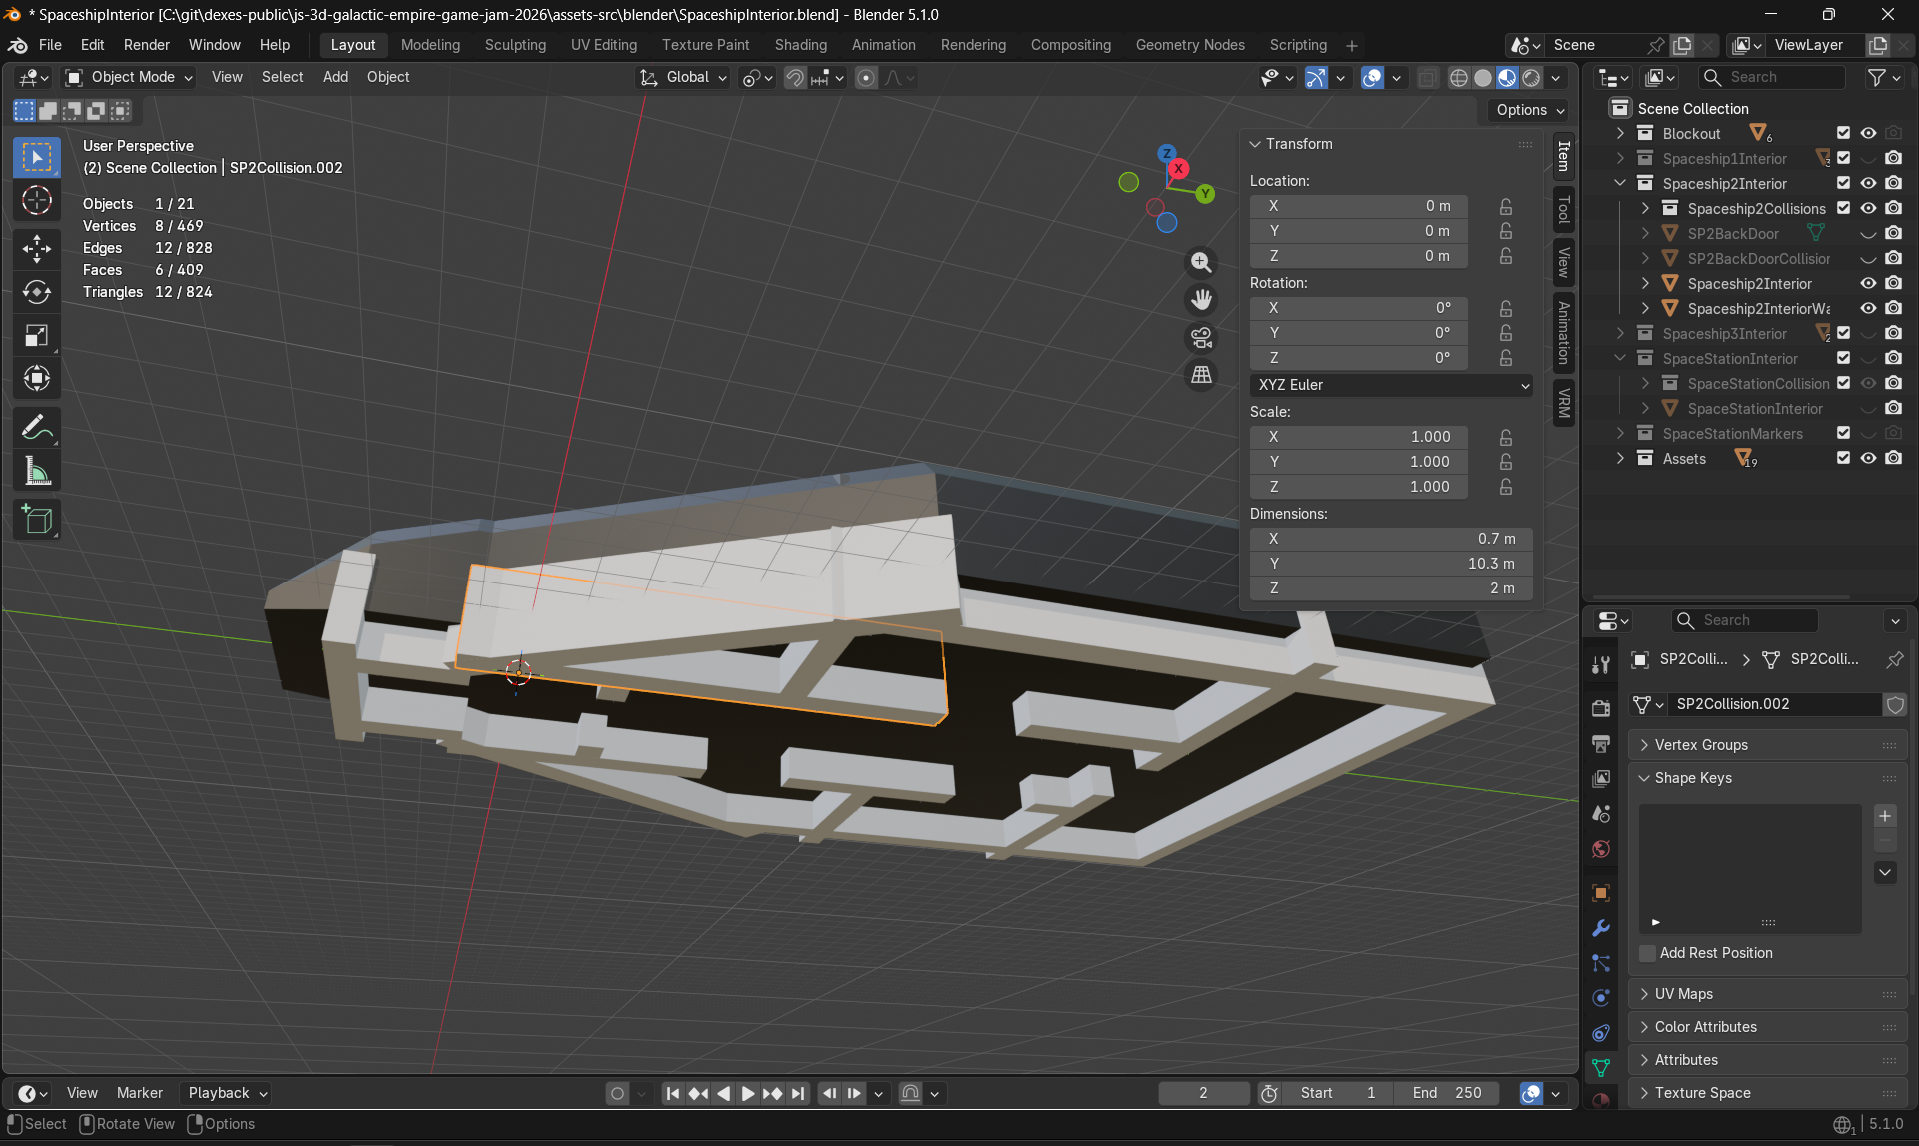
This Blender modelling was a subpar way to go about it. First, I needed to create the collisions individually for each part, then to place them correctly in the scene in Blender, then to export them as 3D models, and finally to actually load the collisions in the engine - rinse and repeat for every layout, and each change to the collisions required a full back and forth through Blender again. Add to that various issues I had with some of the collision boxes being "inside out" (having inverted normals) due to me messing up my mirroring, and therefore not registering on the raycaster, and also the fact that I needed to create these boxes manually for every map I wanted to implement, and that easily made me lose hours.
I don't know if another technique would have worked better. But I'm convinced it wasn't the best technique.
[DONE] Create the space skybox model
[DONE] Create an enemy spaceship (outside) model
[DONE] Create a shield shader
[DONE] Create the player's spaceship (outside) model
[DONE] Implement basic space dogfighting gameplay
[DONE] Create an enemy spaceship (inside) model
[DONE] Rework character run animation
[DONE] Create character walk animation
[DONE] Create an asteroid (outside) model
[DONE] New suit style for the player character
[DONE] Create the player's spaceship (inside) model
[DONE] Idle/walk/run animations while holding and aiming a gun
[DONE] Idle animation variant
[DONE] Second hair style
[DONE] Implement basic collisions for in-ship walking
[DONE] Implement basic in-ship walk around gameplay
[DONE] Implement basic in-ship shooting gameplay
[DONE] Implement basic player game over
[DONE] Implement basic in-game UI (shield status, ammo, quest log, available actions)
Thoughts on day 1: This was probably the best day of the jam in terms of new content gotten off the ground and to an almost-playable state. I felt like I did a lot that day, basically implementing the two major systems (flying in space and walking in ships) ; and that I was well on my way to have everything "done". Of course, there was lots to do still, and the collision system was subpar and I knew it, but it was a great start.
Day 2 (March 29th, 9AM to 3AM UTC)
First, this night, I 'Lost' an hour of sleep due to the daylight savings, but it was fine. The 9AM I started at was actually 11AM local time, but it "should" have been 10AM without the daylight savings, and it definitely felt like it was earlier than I thought it would be. That is, however, the hazards of the timing of the jam.
Right away, I finished the work on the collisions system, and added the collisions for the enemy ship. This allowed to clarify the workflow to create collision boxes that I would keep (or drag around, as it felt more like a ball and chain at times) until the end of the jam.
I then worked on the very simple enemy AI. The prototype from the day before just added some code for enemies to always shoot straight forward after bieng spawned in, so I added a very simple enemy AI with detection, attack parameters, and configurable patrolling. AI-controlled NPCs would have no collisions, but they would not need to, as once they player was detected they would stop and stand still, which would prevent them from walking in "unexpected" places. They would also do very basic raycasting to check whether they could "see" the player, and use that result to stop and turn towards the player before shooting.

The patrol code was actually fairly straightforward to make, and only took around an hour. A patrol is, after all, just a sequence of "points" to go through.
const enemy = {
  patrol: {
    current: 0,
    route: [
      { type: "goTo", target: new Vector2(0, 0) },
      { type: "wait", waitMs: 2000, ms: 0 },
      { type: "goTo", target: new Vector2(0, 5) },
      { type: "wait", waitMs: 2000, ms: 0 },
    ],
  },
}
And then, in the logic loop, you just make each enemy execute the current step and (when needed) advance to the next step:
const current = patrol.route[patrol.current];
let switchToNext = false;
if (current.type === "wait") {
  setAnimation(enemy, "idle");
  current.ms -= elapsedMs;
  if (current.ms <= 0) switchToNext = true;
} else if (current.type === "goTo") {
  setAnimation(enemy, "walkHoldingGun");
  moveTowardsPoint(current.target);
  const dSq = distanceSq(current.target, enemy);
  if (dSq < 0.25) switchToNext = true;
}

if (switchToNext) {
  patrol.current++;
  if (patrol.route.length <= patrol.current) {
    patrol.current = 0; // Loop to the star
  }
  const next = patrol.route[patrol.current];
  if (next.type === "wait") next.ms = next.waitMs;
}
I then had to work on the slightly more difficult part of the code, which was enemies detecting the player during their patrol cycle in a configurable way. This took two more hours to get it right.
This is also when I finally figured out why the shield hits were registering weirdly (due to the shield parameters requiring local coordinates instead of global ones); that issue kept being extremely annoying to me during that whole combat implementation, and then it took me less than five minutes to fix once I figured out why it happened:
// Replace thi
sceneData.shieldHits.positions[0].copy(collisionPoints[0]);
// With thi
tempVector.copy(collisionPoints[0]);
sceneData.shield.object.worldToLocal(tempVector);
sceneData.shieldHits.positions[0].copy(tempVector);
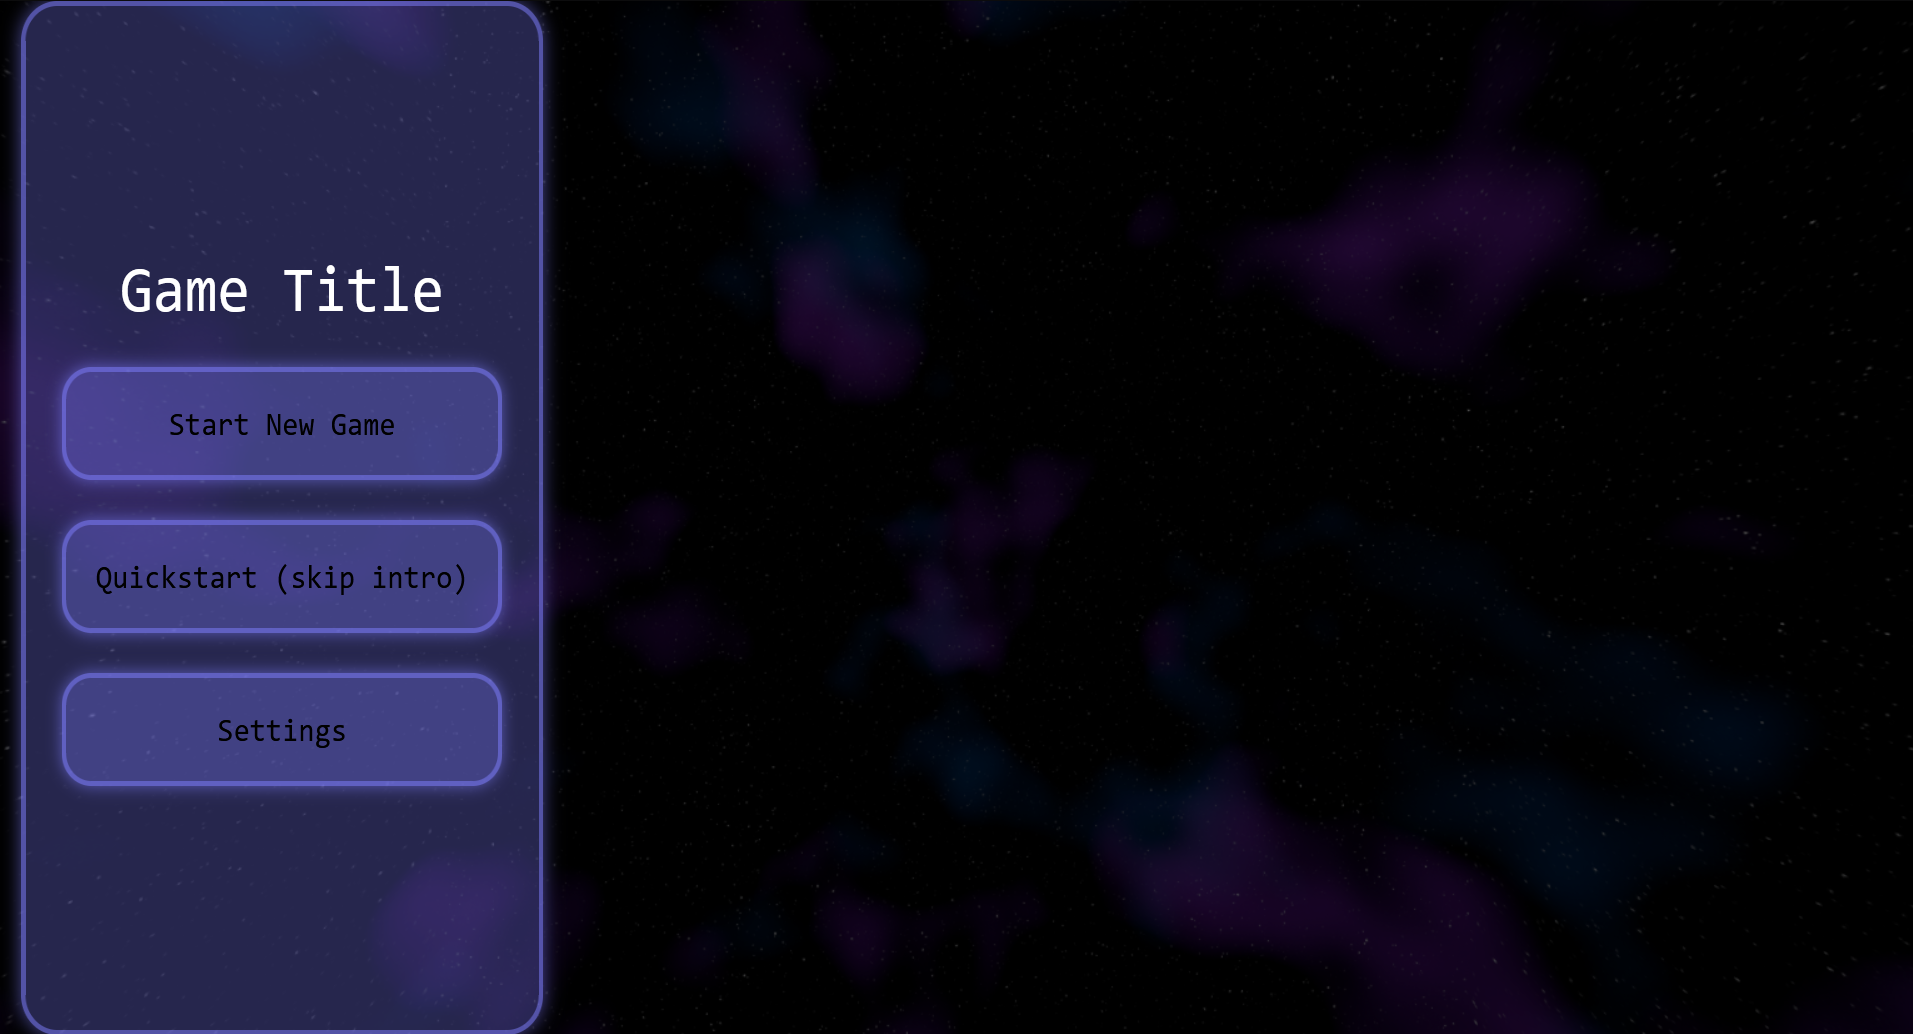
The next step was to work on the "boring parts" of the game. I already had things set up properly for the inputs, I had something set up for switching scenes, so it was basically just UI work: making a simple main menu, a pause menu, and a settings menu. I left the game's name as "Game Title" for now, since I didn't know what to call it, and it would stay that way until the second half of the jam.
The final big thing was to create a basic layout for the space station, which would be a very important location in the final game. At this point, I still wasn't quite sure what kind of models to put in that station, all I knew that I wanted them to be "brainwashing machines" of some sort that could convert an enemy.
I was now ready to do the last big technical change that would pay off later: creating a global state. The idea was to separate what's happening "on screen" (fighting enemies, flying in space, walking on a station) from what's happening "in the game" (what enemies are on the ship, what enemies are captured, what the current unlocks are). This is a very good model for two reasons: first, it allows each "scene" to have its own local data that can be as complex as needed without caring about how the other scenes work, and second, the "state" can then be easily saved to a file (or, in this case, to local storage), and the game quickly "restarted" from whatever that global state is. So, it's basically a free save system.
Here's a simplified idea of how it works.
const globalState = { /* ... */ };

function mainLoop() {
  if (scene === "mainMenu")
    mainMenuLoop(mainMenuData, globalState);
  if (scene === "outerSpace")
    outerSpaceLoop(outerSpaceData, globalState);
  if (scene === "enemyShip")
    enemyShipLoop(enemyShipData, globalState);
  if (scene === "playerShip")
    playerShipLoop(playerShipData, globalState);
  if (scene === "spaceStation")
    spaceStationLoop(spaceStationData, globalState);
}
The global state is "shared" between every loop, while the "data" is "local" to each scene and isn't shared between them. Not shown here is the way that the "data" is reset whenever "scene" changes, but this is implentation details.
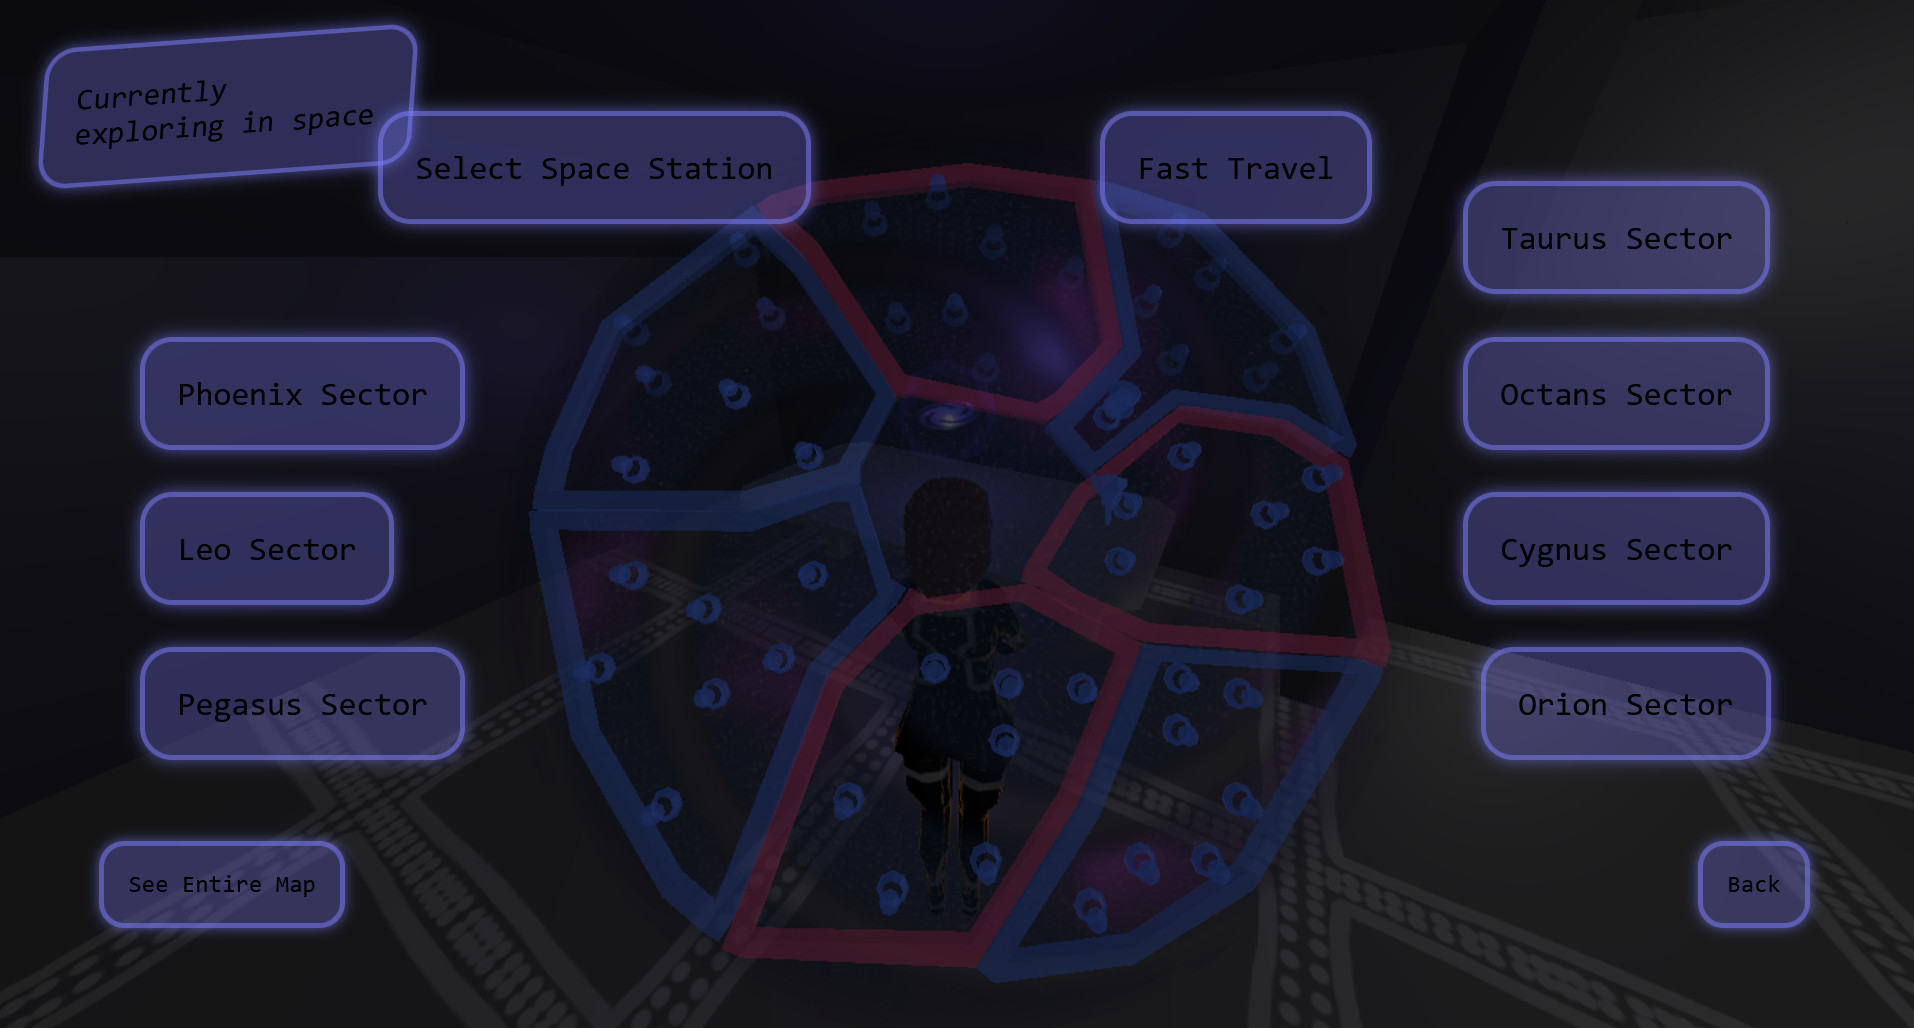
Finally, I started on the second-to-last system of the game, the starmap. As a first draft, I did a very, very quick UI to make it work.
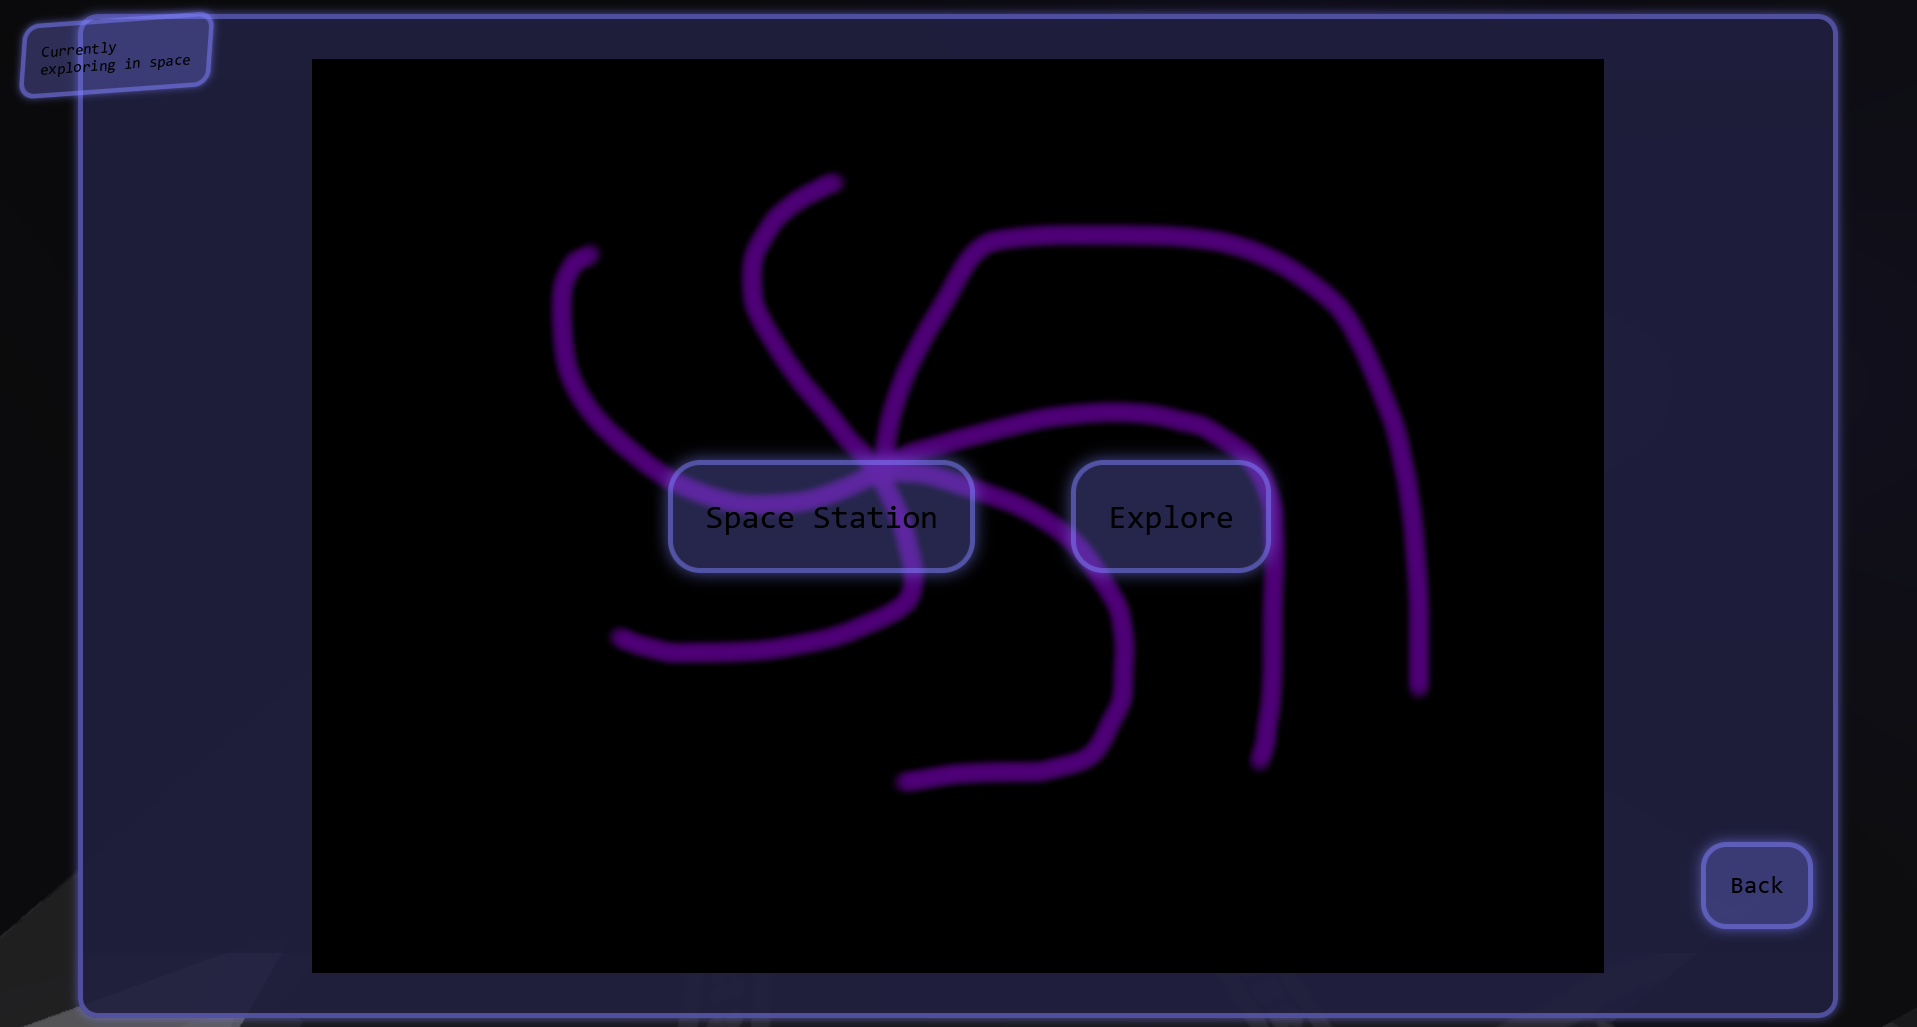
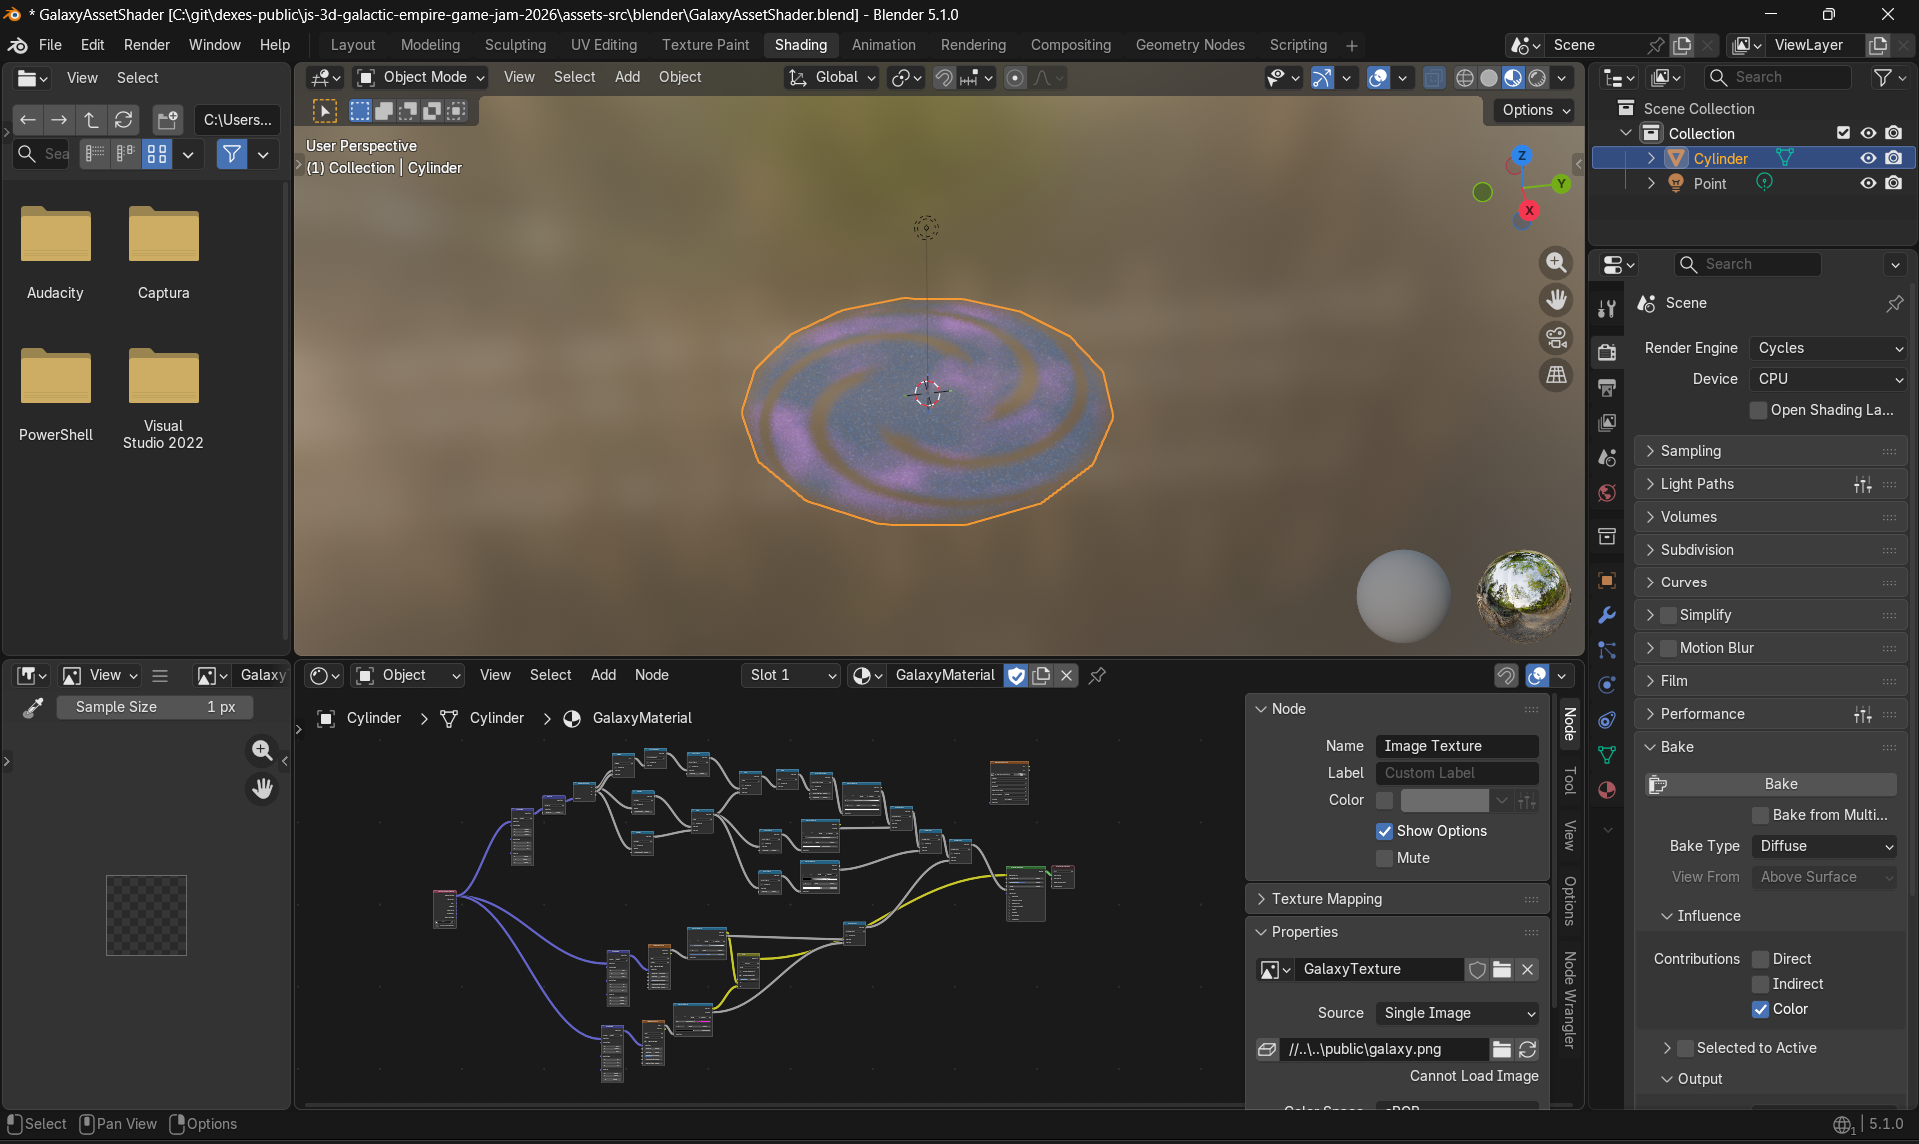
The issue is that, by doing that, I noticed that drawing an actual galaxy by hand would be very hard, so I would need to somehow "generate" that galaxy instead. I had the shaders to generate the skybox, so it seemed easy enough to me, but I didn't try right away and tried to go to sleep.
That skybox to galaxy idea however made it so I couldn't sleep, came back fairly quickly to actually implement it. I ended up making it work in under a hour. The sleep lost for that wasn't really worth it, but I'm not sure I could have forced my brain to let me think in any case.
[DONE] Collisions for enemy ship map
[DONE] Enemy patrolling movement
[DONE] Enemy spaceship dynamic definition
[DONE] Enemy player detection & targeting
[DONE] Enemy shield
[DONE] Figured out why the hits register "weirdly" on the shield shader (transform to local coordinates in the hit buffer)
[DONE] Pause menu
[DONE] Main menu
[DONE] Settings menu
[DONE] Rework player spaceship interior
[DONE] Model for player main space station
[DONE] Collisions for player main space station
[DONE] Global state for captures & enemy ships
[DONE] Basic Starmap UI
[DONE] Add an area / spawn for the space station
[DONE] Blender custom shader to generate a galaxy asset
Thoughts on day 2: Much like day 1, it was a day that was filled with new features and that basically implemented everything left with the game. By the end of it, I nearly had a full project, just not a complete gameplay loop yet. However, I also remember not being happy with it at the end, which was understandable seeing that I listed everything left to do and saw so much remaining, and unfortunate because I was making good time on the project as a whole. Day 2 is another day where I would have done something differently in retrospect, which is integrate sounds to the existing scenes. Not knowing exactly what sounds are needed and why is going to be something that I'll need to deal with very late because of not trying it out earlier.
Day 3 (March 30th, 3PM to 12:30AM UTC)
Real-life made it so I couldn't work on the game all day on the third day of the jam, but it was good enough to work on it starting in the afternoon.
First, I finished the work on the global state by creating it for the upcoming starmap. I took a quick detour to implement weapons reloading in the combat systems (basically, I added the data to the global state and immediately implemented their use in the scenes).
Then, once that felt done, I focused on making the starmap use the new galaxy assets. This ended up being a very big project, since that I now had a galaxy model to place the assets on top, I decided to make the starmap fully 3D... And that caused it to take quite a bit of time. I spent the entire evening, about six hours, on the starmap alone.
I also implemented the path rendering and the fast travel system right away.
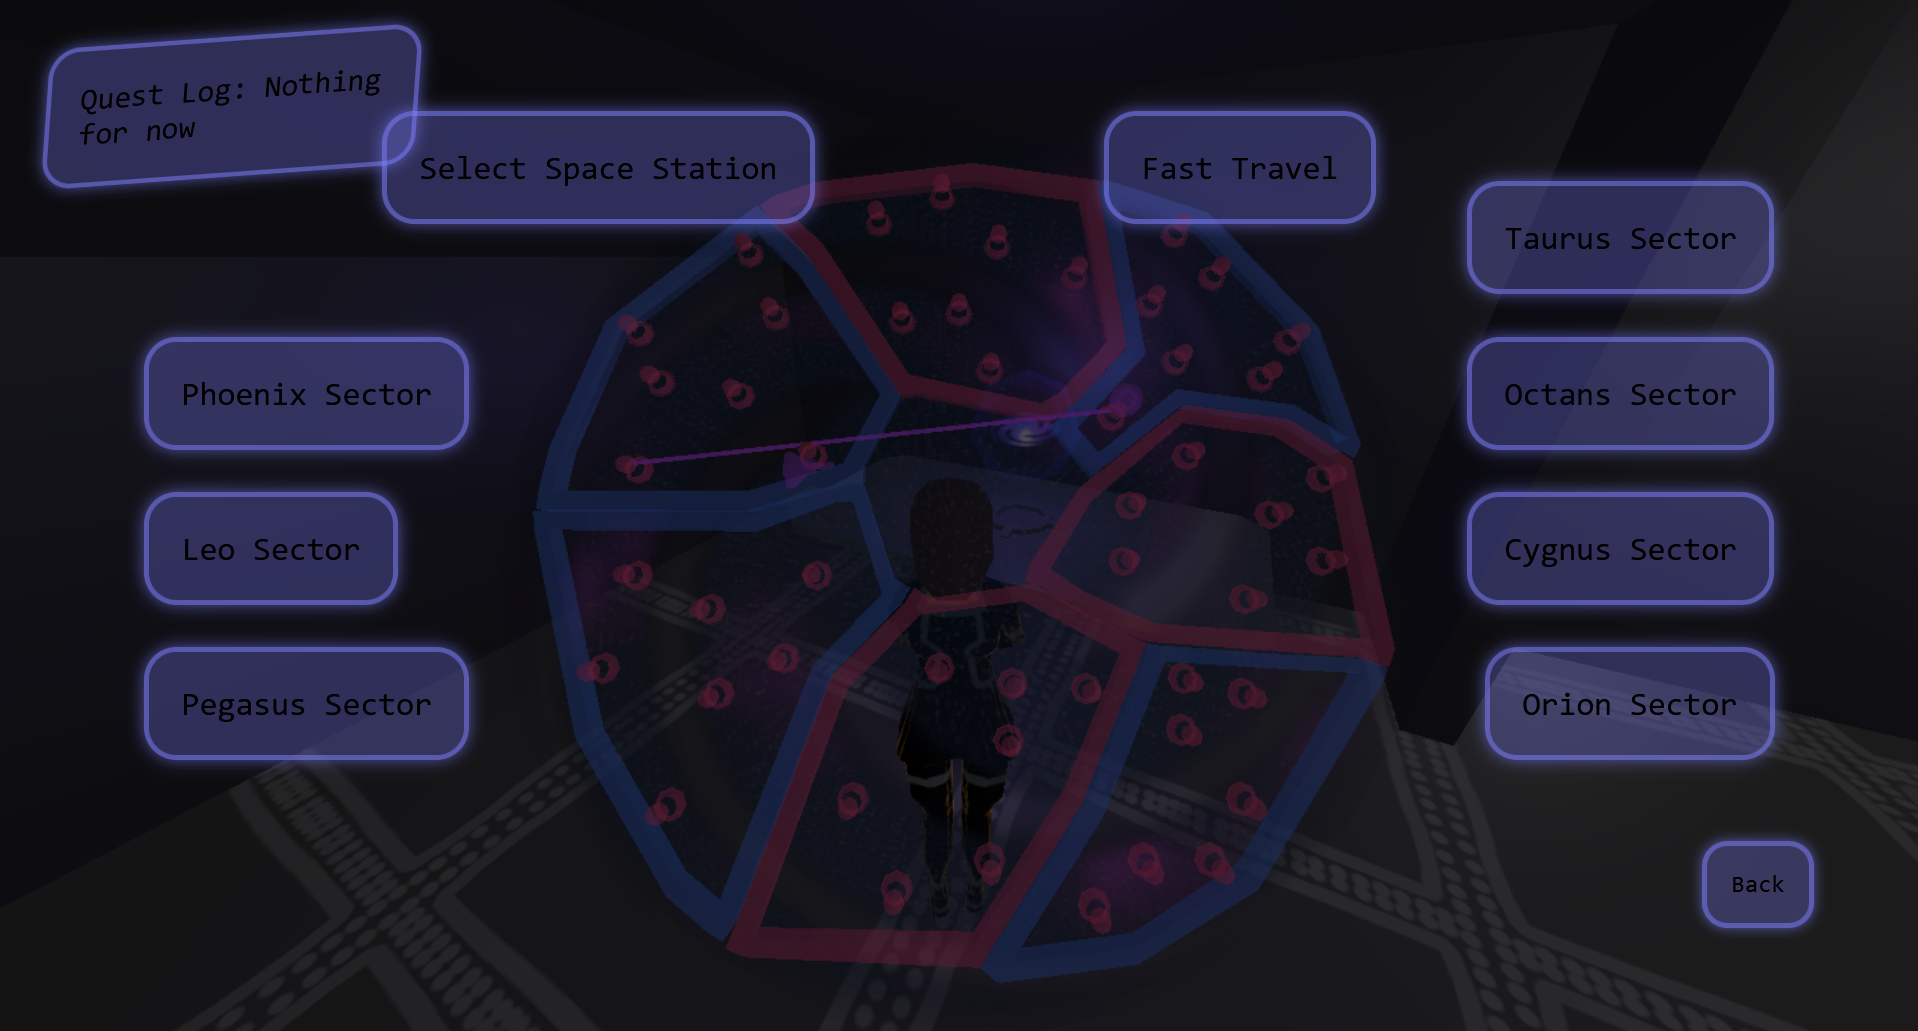
The two main difficulties with that starmap system was, first, to actually make it "show up" on screen (as the galaxy map UI is its own 3D object), and second, to actually make it "feel good" by highlighting points on hover over buttons and things like that. This took a fair amount of programming and testing, both on the UI side and on the mesh side.
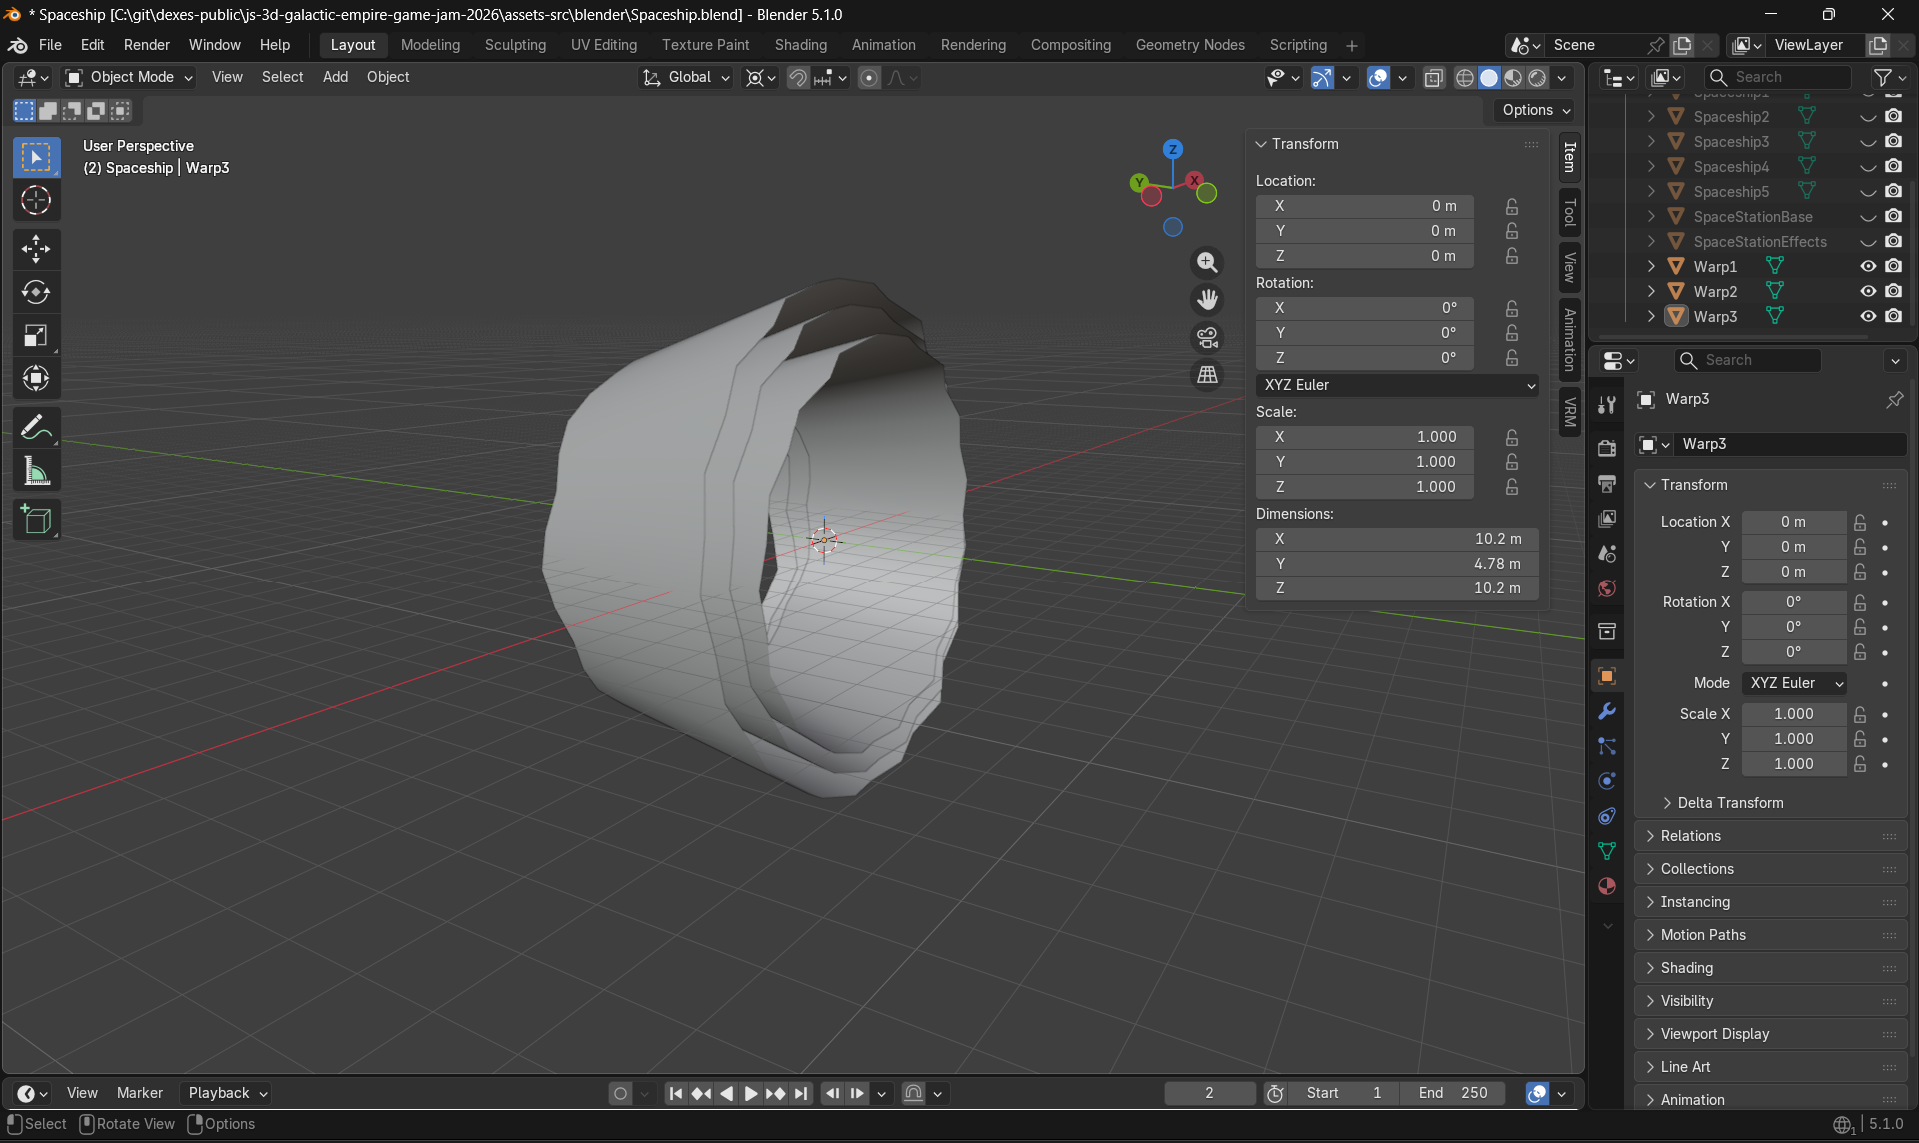
I then closed the star system transportation game loop by creating "warp points" in space. They are simply three 3D models in Blender that are transparent, and that are then rotated at different speeds once in game.
I then wanted to finish a few things before leaving for the night, and accidentally pushed two more hours before finally leaving. During that time, I implemented gags (which are really just bindings over the mouth) and a teleportation effect (which is a transparent cylinder whose size keeps getting modified).
I also added a casual outfit, as I knew the first NPC target would have to look different to be eye-catching.
And then, it was time to call it for the day, and try to catch up on the sleep I missed last night.
[DONE] Proper global state for the space map
[DONE] Reloading for the spaceship
[DONE] Reloading indicator in the UI
[DONE] Actual Starmap UI
  => Starmap Fast Travel
  => Starmap Path Rendering
  => Starmap Zoom
[DONE] Starmap Gameplay System
[DONE] Star System Transport
[DONE] Gag bindings
[DONE] Casual outfit variant
[DONE] Teleport effect/animation
Thoughts on day 3: This was both a very productive day, and also a day where I spent a lot of time or a complex star system that wasn't strictly necessary. It was important elements, of course, and I think having the star system look that good was a net benefit for the project, but it was also something that - were it lower quality or just replaced by buttons - would have worked just as well for the core of the jam. Having that made this early was a mistake, as I would have made different compromises later in the week instead.
Day 4 (March 31st, 9AM to 1AM UTC)
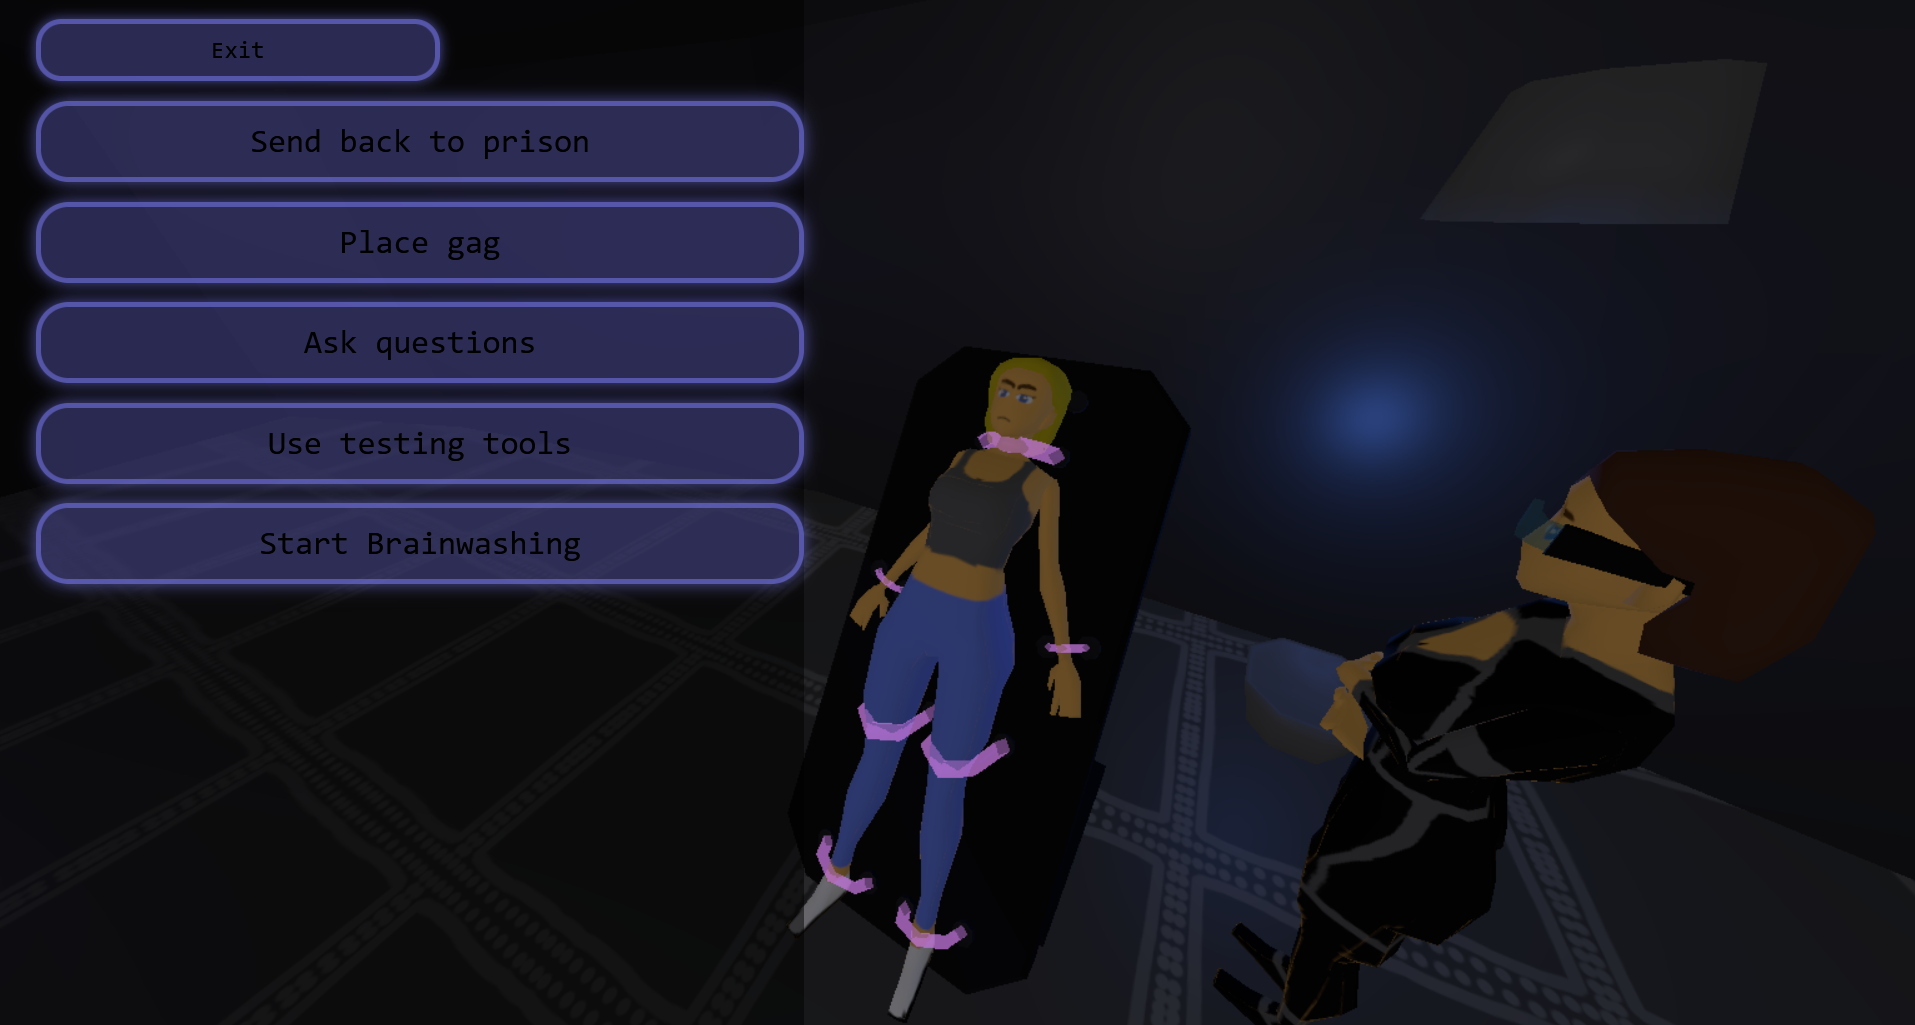
My goal for Day 4 was to simply do the whole interrogation / brainwashing system. I remember coming into that stream with the goal of getting it done quickly, so I could hopefully work on the actual content quickly after that.
The first thing I did was the assets and animations for the table. I made eight animations kind of on a whim, the basic ones being "breathing", "breathing hard", "struggling", and "stimulated", with four "head strap tied" variants of these animations. I, at that point, still had no idea what to do with these.
I went really quick and dirty for this ; making the assets directly inside of the character file and then copying them to the "interior" file for positioning in the room.
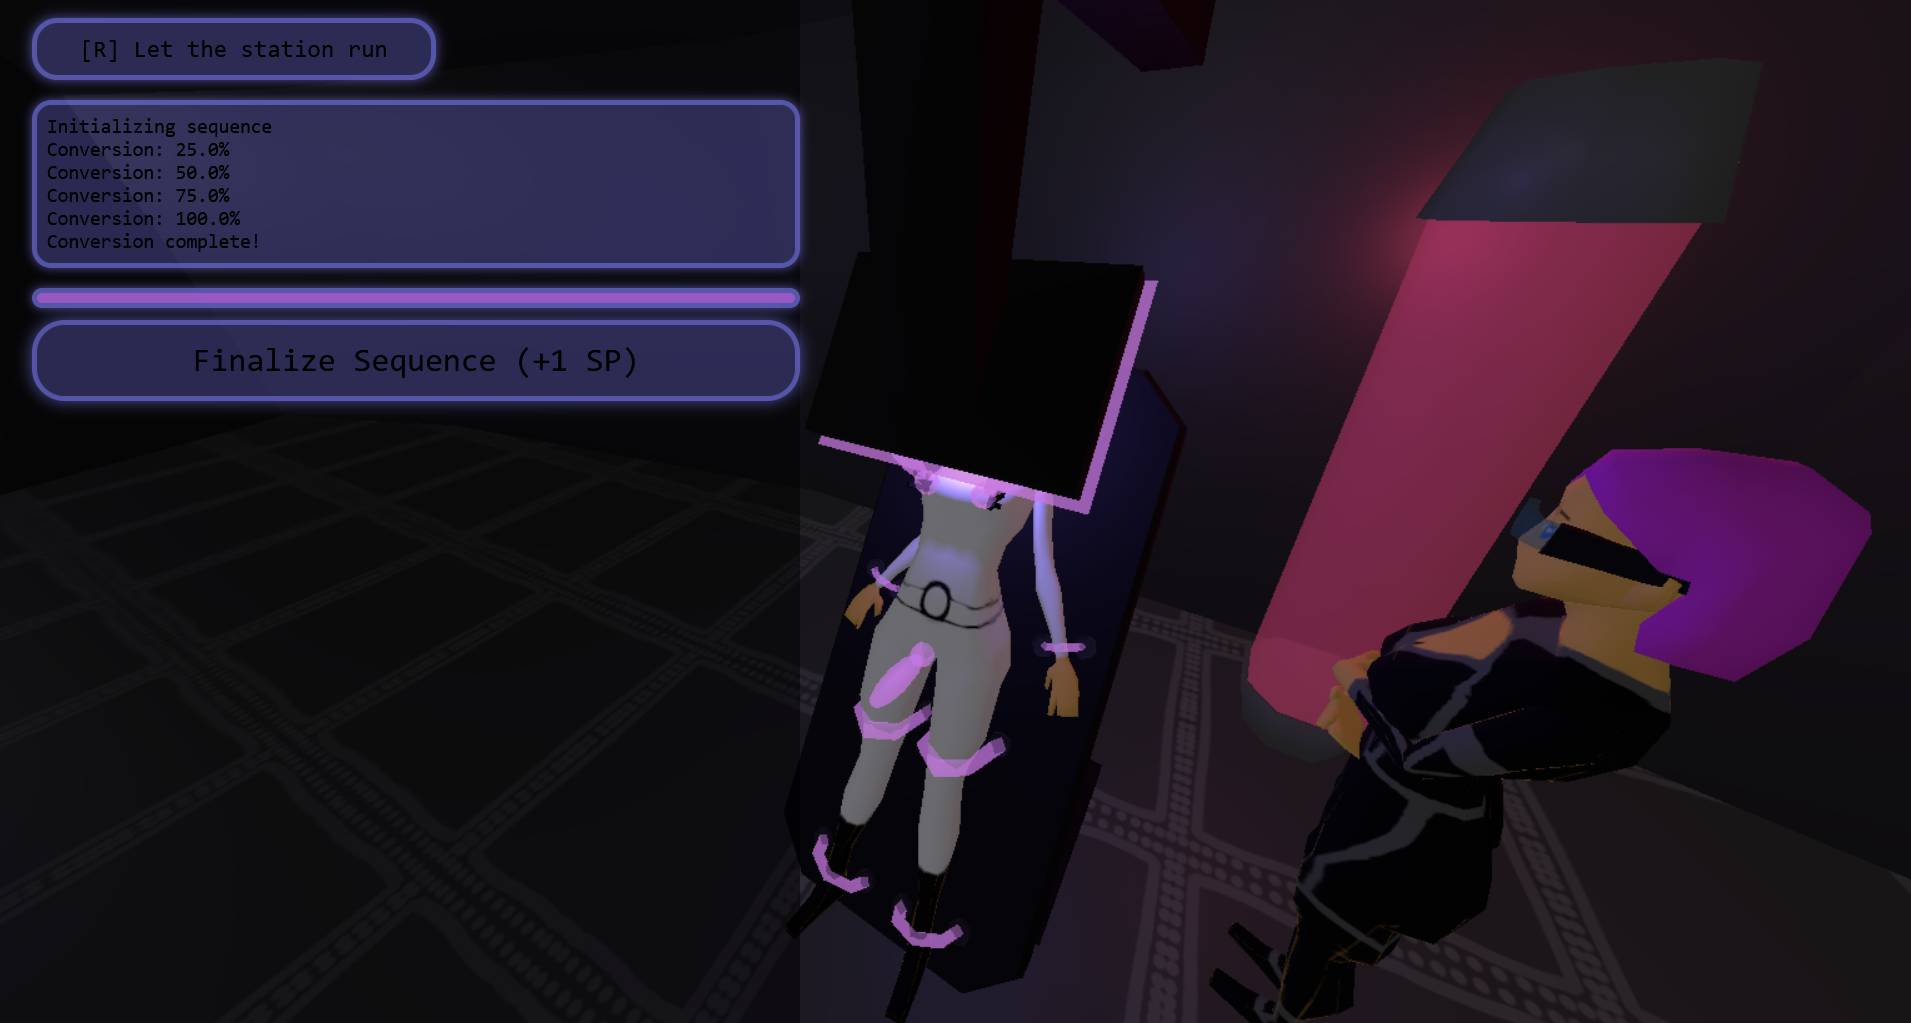
This, however, gave me a good idea, which was to show "progress bars" for each of the table diagetically inside of the station. It took a bit of tweaking, but it looked very nice once done.
I also added some animations to sit down at the piloting chair, and to "use" a console. This was because, at that point, I was starting to imagine making the brainwashed NPCs appear inside of the station after you capture them, to bring it more life. I didn't implement that feature just yet however, and only stuck to the animations.
And I added a mandatory "hands up" animation, because the scenario for the tutorial was starting to take shape, and I knew I didn't want pure fighting for this part.
It took me the entire morning and the start of the afternoon to get these assets ready. I then focused on programming to add the interrogation system and quest system to the global state. This would allow to easily use these inside of the scenes later. Especially, my first draft back on day 2 for the interrogation preferences was a list of "likes" and "dislikes", and then to have the player make their own "guess" about what each list contains. It looked like this:
const npc = {
  preferences: {
    likes: ["science", "friends", /* etc... */],
    dislikes: ["nippleClamps", "orders", /* etc... */]
  },
  playerKnowledge: {
    likes: ["orders"],
    dislikes: ["nippleClamps"],
  },
}
During this rework, I now had a better idea of what I wanted the interrogation to look like, and so I switched to this structure instead:
const character = {
  preferences: {
    gag: "off",
    choiceLimitations: "on",
    intelligenceReduction: "off",
    repetitiveMantras: "off",
    lewdNippleClamps: "on";
    lewdNippleVibes: "off";
    lewdVibe: "denial";
  },
  settings: {
    /* The same thing */
  },
};
Now that the storage was done, and the settings decided, I could implement the UI for the interrogation! Just kidding, I decided to do a new small one-person ship layout for use in the tutorial instead.

Now it was time to do the interrogation UI! Kidding again, I did the UI for the dialogs (talking with NPCs) instead.
And now it was...! You get the gist, I wouldn't actually implement the full interrogation UI until the next day.
Instead, I would create something very interesting, and very useful:
[player]: (I can just pick any of these two interrogation stations to get started)
{waitAction: openedInterrogationUI}
[player]: (Let's teleport that scientist there)
{waitAction: startedQuestTargetInterrogation}
[scientist]: Hnggh...
[scientist]: Wha.... What just happened?
[scientist]: Where am I?
[scientist]: Why am I tied up?
A quest file format.
Now, this seems like a frivolous thing - who takes time during their game jam to write a whole file parser just for dialog and quest data! Well, at the time, Kero and I both expected her to have a bit of time to help with the writing for the quests. And I didn't want to impose editing JS code directly - or worse, writing JSON manually - to anyone. So, I thought writing that file format was a worthwhile investment. I ended up not being wrong.
The first draft of the parser itself didn't take too much time to make - about one hour out of the three I spent on this first draft of the quest system - and, at the time, fit in only 55 lines of code.
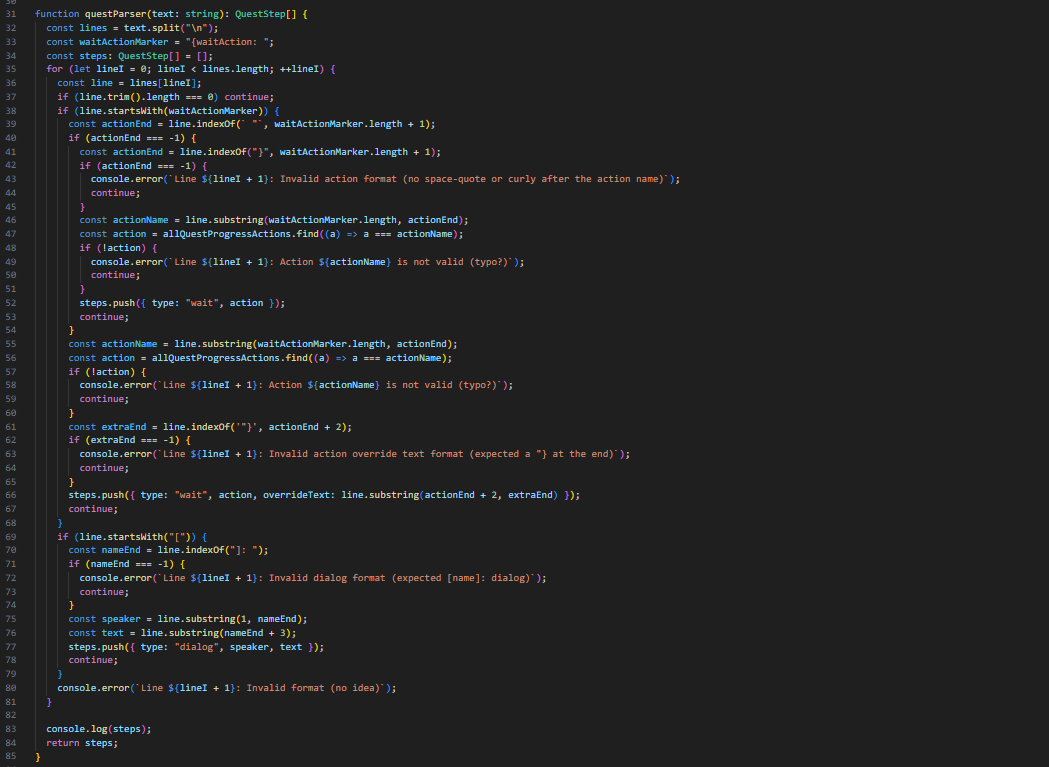
Quick aside: I have slowly over the past year or so been writing a blog post on parsing techniques for that kind of files (and more!) based on what I used in Mirabelle. This gave me a head start for knowing how to do it.
The main thing to know is that the reason this "parser" is so small is that it's dead simple: it looks at each line, checks the start, and decides what to do based on that. Does the line start with "{waitAction: "? If yes, find the "}", take whatever is inbetween the two, check if that text is a known action, and then add it to the list. Does the line start with "["? If yes, then find the "]:", split it before and after that token, and then add it to the dialog as "speaker" and "text". There's some basic error reporting as console logging, with the line number, to help correct it quickly, but that's all of what this code is.
All of this work on the quest system made me run out of things to really do, so I started to actually work on the interrogation UI (for real this time). I had a prototype up fairly fast, with basically the final UI of the game, however, most of the buttons didn't do anything quite yet.
I kept hacking on it until it was time to go to bed, and then I decided to come back to it the next day.
[DONE] Interrogation Table Assets
[DONE] Interrogation Table Animations
[DONE] Console Work Animations
[DONE] Sitting Down Animations
[DONE] Hands Up Animation
[DONE] Interrogation data storage
[DONE] Quest data storage
[DONE] New ship inside layout
[DONE] New ship exterior model
[DONE] NPC immediate surrender behavior
[DONE] Dialog UI
[DONE] Quest System
[DONE] Tutorial system
[STARTED] Start of the Interrogation UI
Thoughts on day 4: This is the day that I'm the most unhappy with. I made lots of fundamental progress, but really, that progress should have happened days before, and I feel like I procrastinated on it before. In retrospect, a lot of what I did this day that "worked well" wasn't planning but happy accidents: the quest file system that was a "happy accident" to make Kero's life easier, the four types of animations for the brainwashing table was a "happy accident" because I didn't know what to do, the progress bars were a "happy accident" of the fact it looked cool to have them diagetically since I didn't have the idea of leaving the table and doing something else just yet. It is a bit disheartening that this day was about such an important mechanic but lacked planning so much, but also, it turned out mostly fine so I guess that's still okay!
Day 5 (April 1st, 10AM-12PM then 6PM to 1AM UTC)
Again, real-life made it so I was busy for a chunk of that day. But, once I was back home, I was able to make some progress still.
The first step was obviously to finally finish the UI of the interrogation... Again, not this time. I first started by adding the data to the quest file format instead, to make it easier to edit.
I then actually moved on to finishing the brainwashing UI, first by making all of the options actually do something, then by building the progress bar when it was running, and then by adding an "end sequence" to it with the newly brainwashed character being dropped from the table.
I added the "lewd interactions" to the game itself, turning the lewd settings choice into a minigame where you had to observe the character's reactions instead of just asking questions about their preferences. It was not an intentional decision, but more of an effect of being able to directly "guess" the correct result right after the implementation of the reactions, and me deciding to keep it in.
Once I implemented the "body language" thing, however, I remembered GMTK's video "Can We Make Talking as Much Fun as Shooting?" that talks, among other games, about L.A. Noire's facial expression system, and how that kind of system requires accessibility options to make it "easier" to understand reactions that are purely body language. This is why I also added a way to ask questions - and get truthful answers - when enabling lewd tools, as the alternative to "figuring it out" from the character's body language alone for the players who wouldn't be able to do it.
I then quickly moved the tutorial data into .txt files ; this was pure vanity work but I hoped it would help with importing new quests, as this would just need drag&dropping the .txt file into the folder and adding a few keys to the code.
I also took some time to add "quest log text" and "target characteristics" to the quest file, to self-contain everything in one place. This wasn't too ideal especially with the informations header basically needing to be raw JSON to make it fast to parse, but it was mostly a good idea to centralize everything.
During this, I was streaming on the DiD Games server, and Admaillus (who was working on their own entry to the game jam called Busa's misadventures) was in vocal with me for a bit. They shared their design for the final boss of the game they were working on, and I decided to try to "copy" it inside of my own game with my own skills.
I then continued working on the quest system and implementations until late in the night, trying to make it so everything could be configured as easily as possible from the file itself.
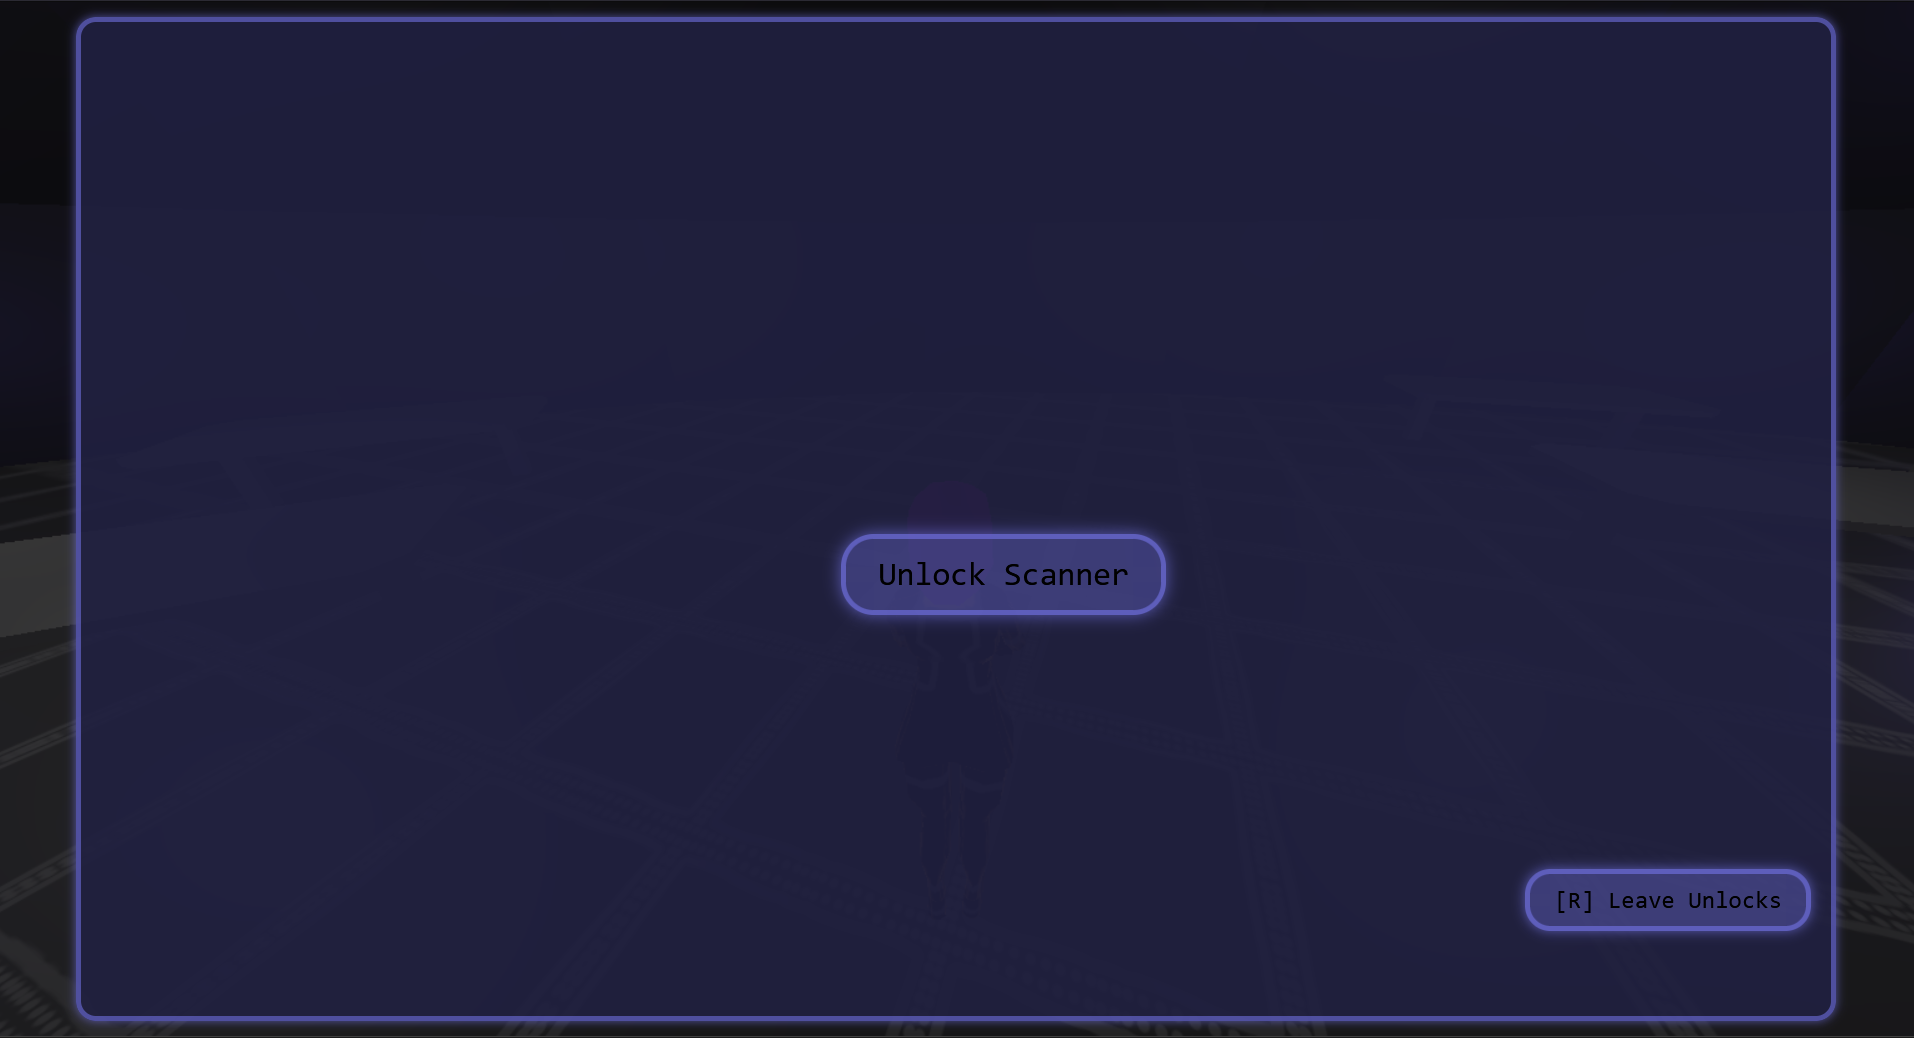
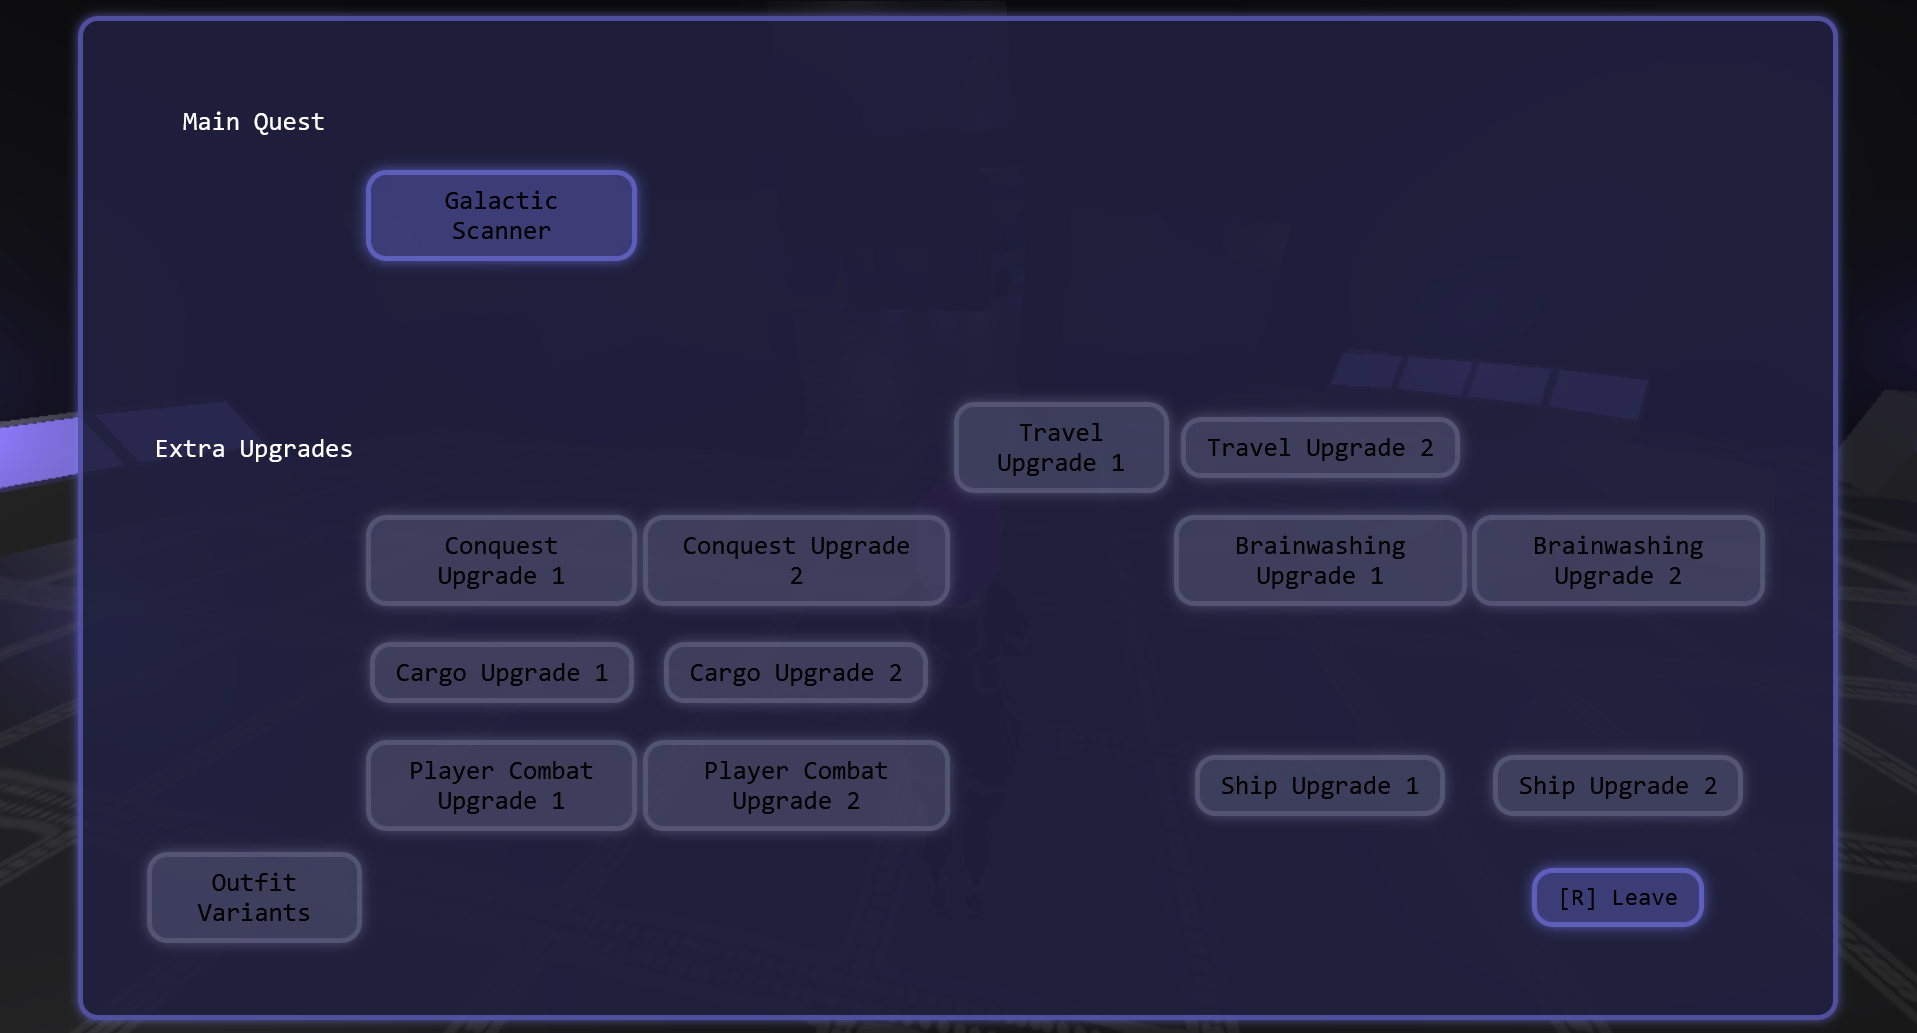
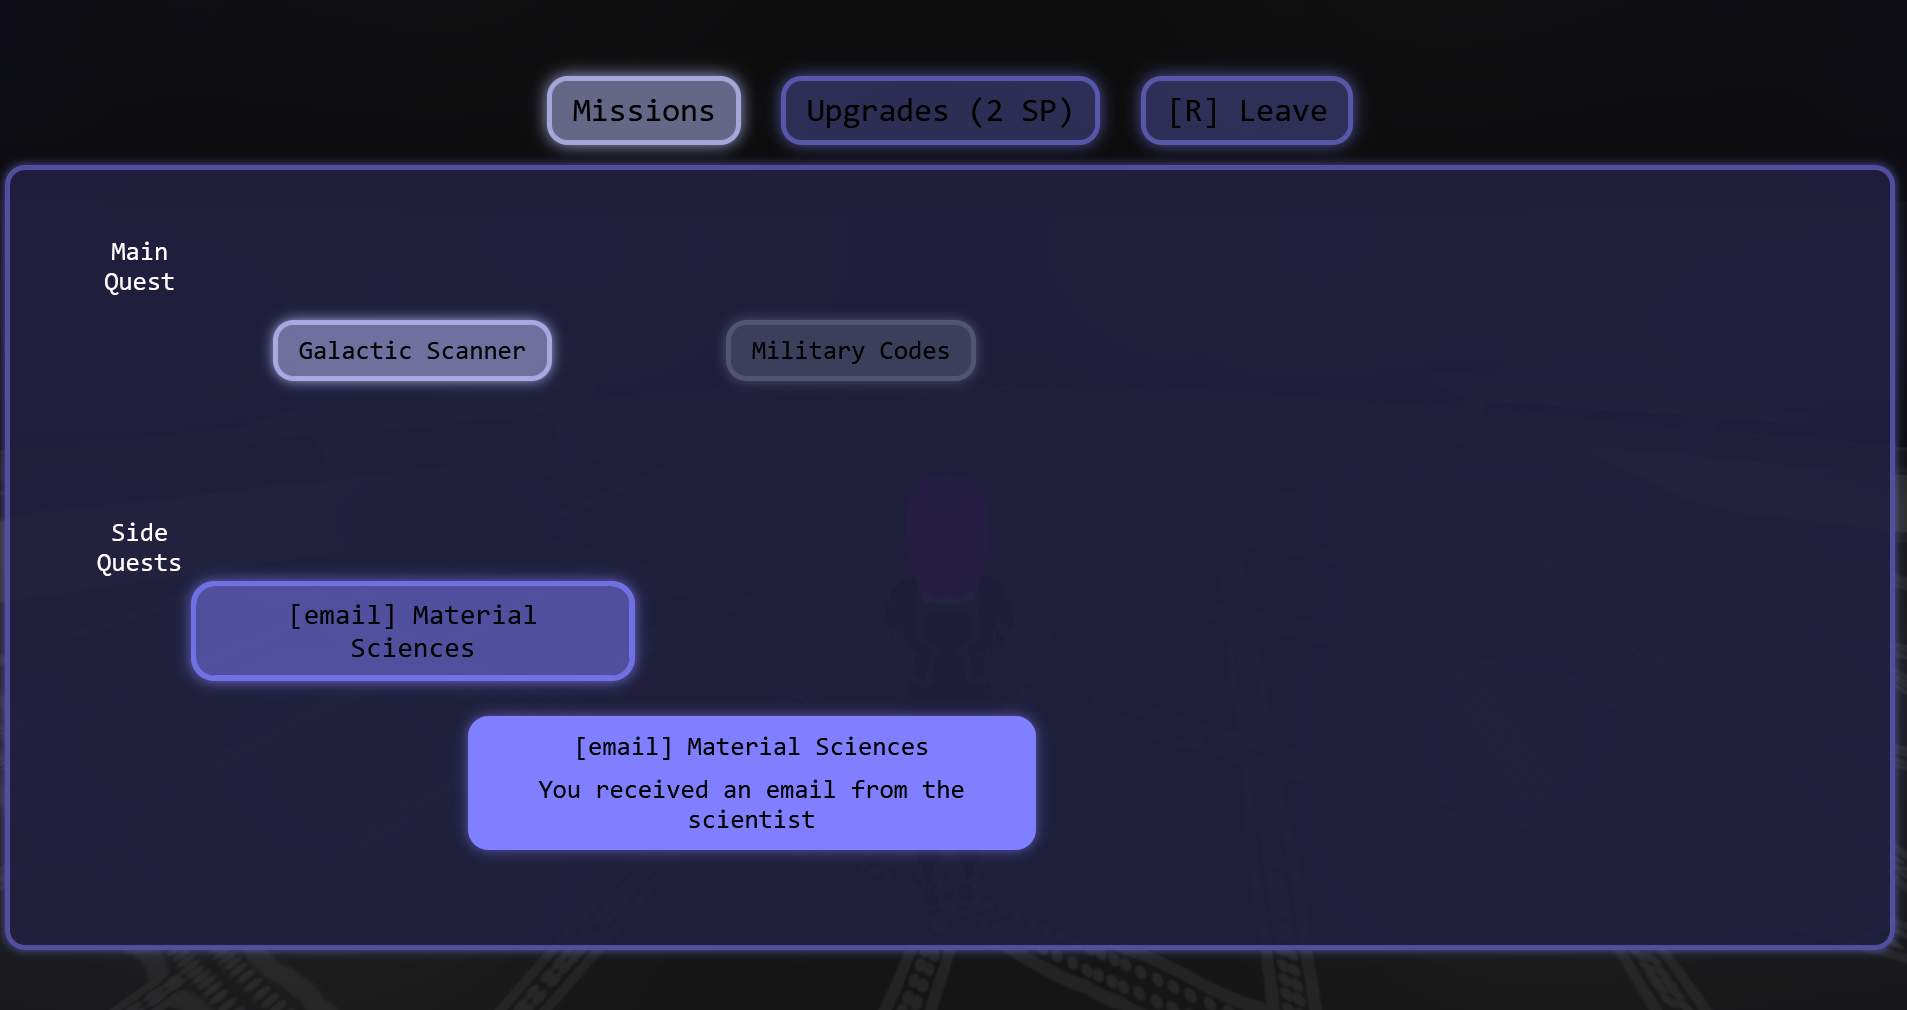
Finally, I did a very quick draft of the final UI of the game, the "upgrades" UI (that was originally called "unlocks"), through which players could unlock upgrades either for progressing the main quest and for improving their tools.
This day is also when I figured out that making all of the quests I wanted to make for the game myself would be too tight in terms of timing, so I asked Mabes for help. This didn't really end up helping for a few various reasons, the main one being that getting Mabes up to speed on the whole quest system, objectives, personality of the characters, and tone was a bit too large of a task with how little she and I's schedules ended up overlapping. I think it was still the correct decision to try even if it was too late, and I didn't end up losing any time to this attempt which is also good.
[DONE] Add interrogation UI data to the quest files
[DONE] Finalize the interrogation UI
[DONE] Interrogation Sequence End
[DONE] Quest files as part of the data / loaded dynamically
[DONE] Quest-defined lewds brainwashing dialog
[DONE] Generated brainwashing dialog for non-quests
[DONE] New hairstyle
[DONE] New bodysuit models
[DONE] Use quest information to create space areas
[DONE] Teleport back to ship on mission failure
[DONE] Display quest log
[DONE] Lock the controls during the tutorial quest
[DONE] Move quest target definition to the quest data
[DONE] Use quest information to create target ships
[DONE] Very rough Unlocks UI (just to end the tutorial for now)
Thoughts on day 5: Despite being a day where I did a lot of useful things and completely finished the quest and interrogation systems, I feel like this was the day with the most "wasted time" of the week. I moved a lot of code around, created a lot of unnecessary code and assets flexibility, and overall took a lot of moment-to-moment decisions about what to do that were unwise in retrospect. This is also the day where the amount of remaining work actually started to be felt for me, I needed to manage that pressure of the deadline properly and it unfortunately wasn't going well on that front either.
Day 6 (April 2nd, 9AM to 1:30AM UTC)
I started by quickly finishing the unlocks UI, as well as adding the basic system to handle per-area control increases. This took me a surprisingly long time, about six hours, but at the end I had everything ready, and the game was basically feature complete on the technical level.
Then, my main objective was to implement the sound and start cleaning up everything to get the game ready for release.
The main issue with all of this was that Kero would actually be unavailable for the last two days of the jam ; which meant that, for each sound that I had failed to plan ahead or that didn't quite fit the ambiance I needed, I did need to create it myself. Thankfully, the musics all fit very nicely, but a lot of sounds - interface sounds, spaceship sounds, enemy hit sounds, teleportation sounds, brainwashing machine sounds - just needed to straight-up be created at this point.
So, I whipped up my favourite tool for making some music and sound effects, an online Digital Audio Workstation (DAW) called GridSound. It, unfortunately, mostly works on Chrome-based browsers for now, but it was just a small compromise to make to have access to an actually very feature-complete tool to make sounds with.
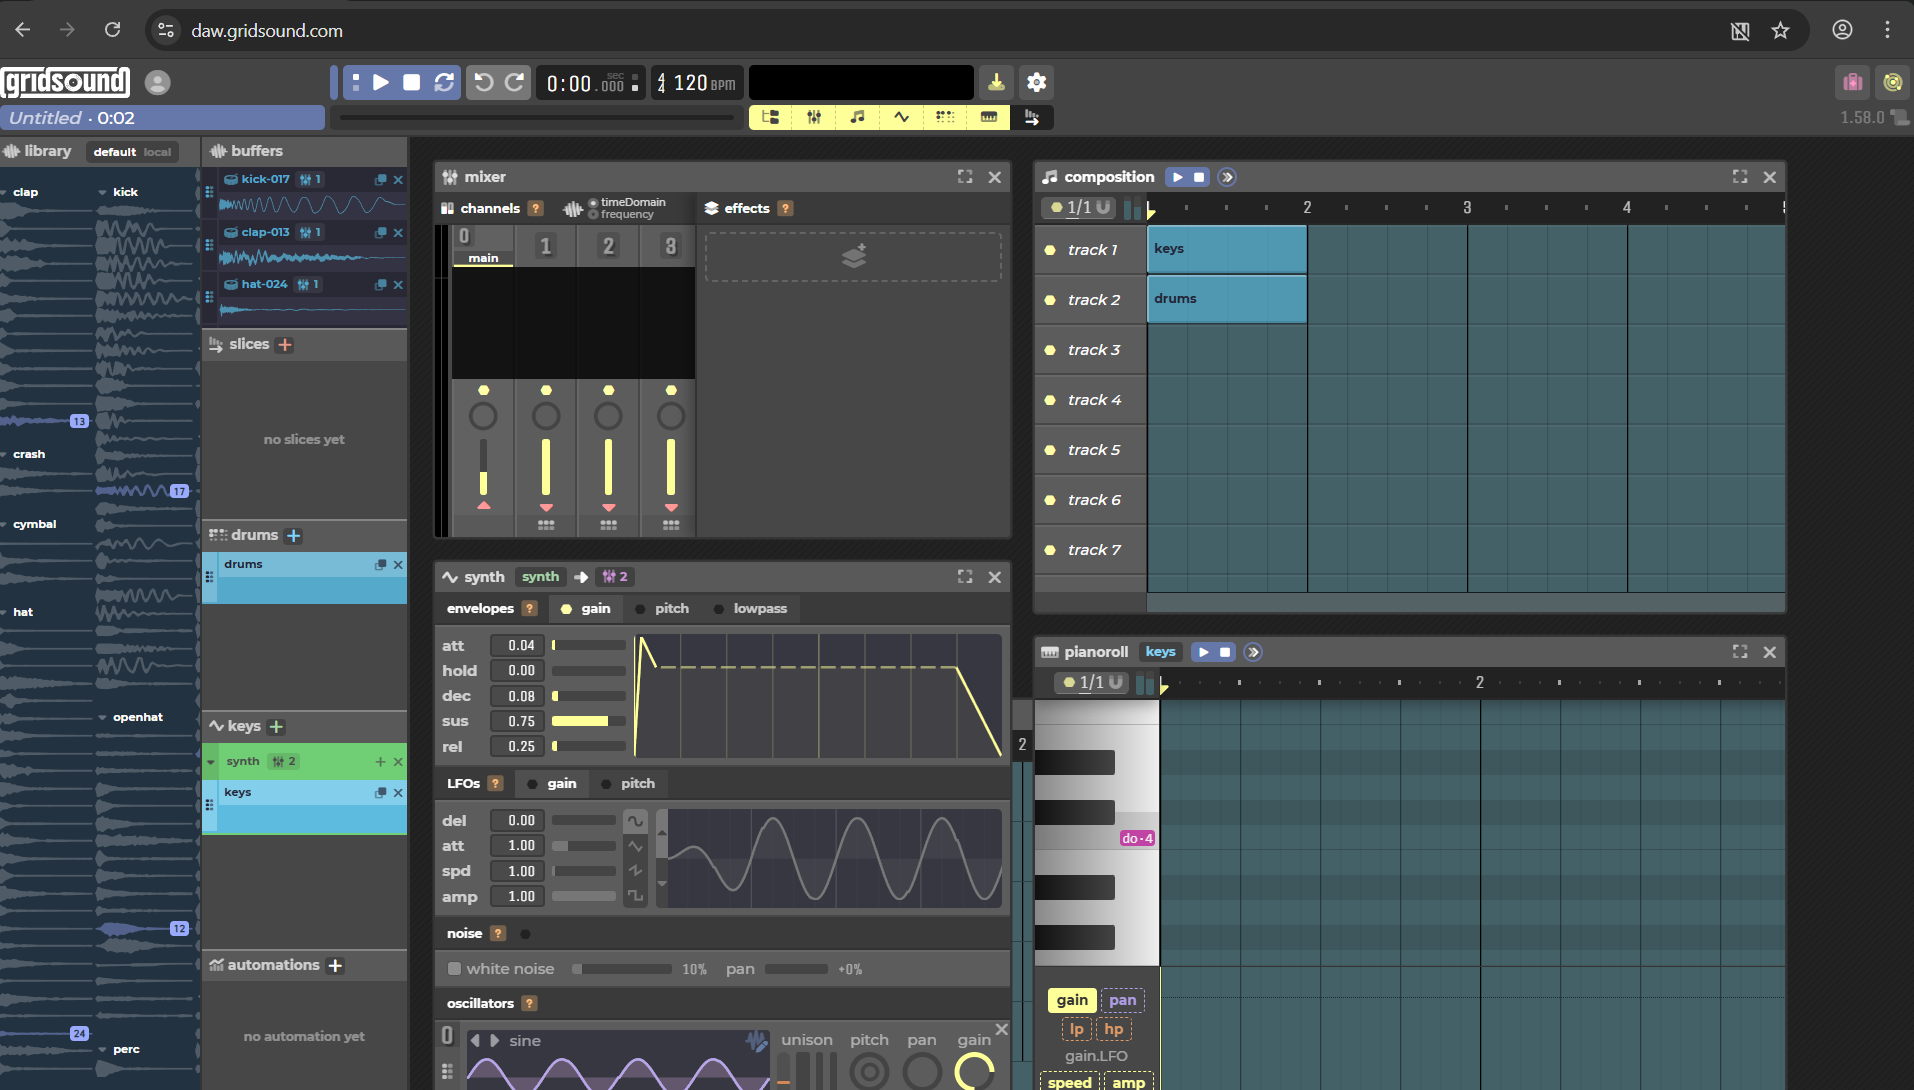
Gridsound, like all DAWs, looks very complicated on first glance, but it is actually a bit easier when you break it down into parts:
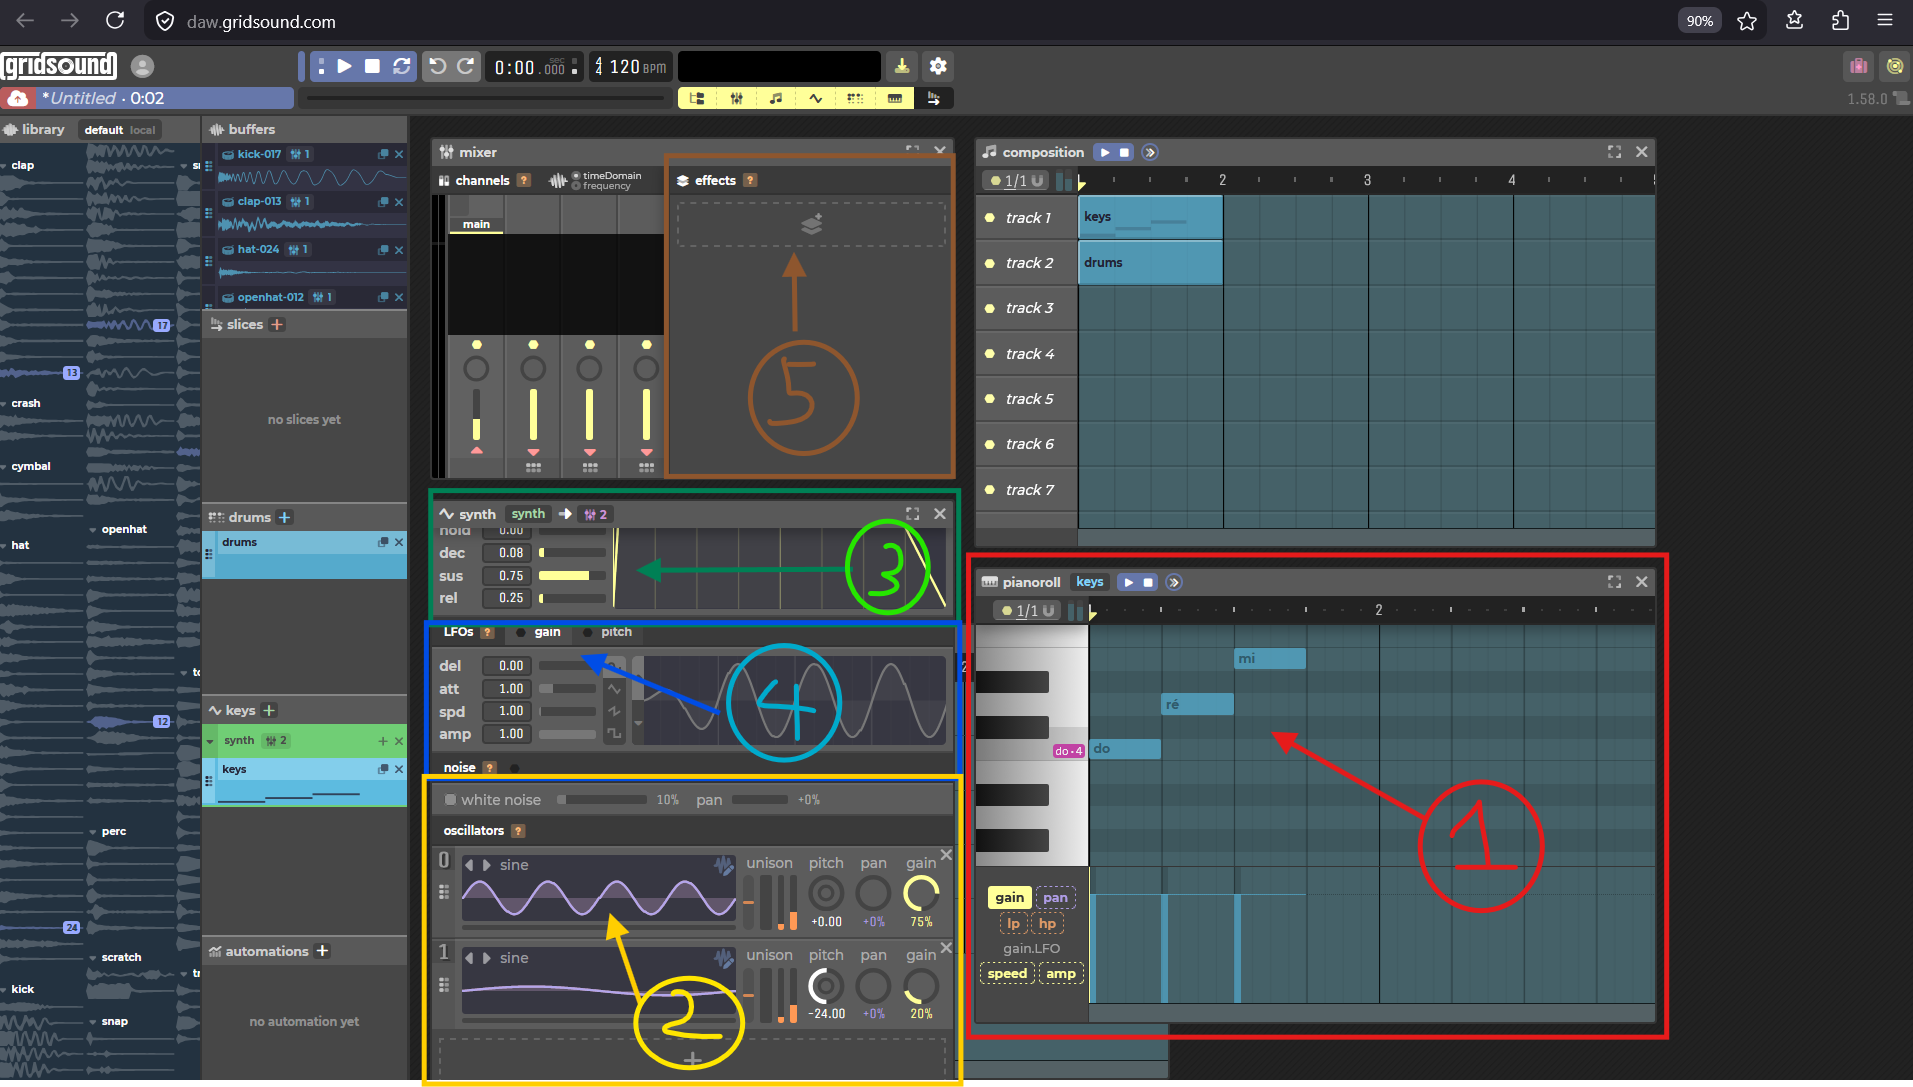
The way it works is that (1) controls what notes to play and when, (2) controls what the instrument "sounds like" and gives you a way to "layer" instruments (3) controls the way the sound "arrives" and "leaves" at the start and end of notes, (4) allows you to add "wobbliness" to the sound, and (5) adds "special effects" like echoing, muffling, and things like that.
The main issue with a DAW is that, someone can give you a guide of what the knobs are called and what they "do" to the sounds, and you still won't be able to do what you want with them unless you have experimented enough to get a "feel" for how everything works. Fortunately, I have played around quite a bit with DAWs before, I have semi-formal training in how to make music and sounds, I have watched the latest Sebastian Lague youtube video about making a music synthetizer, and I have years of experience falling asleep in front of MV's insomnia-driven music making streams.
From there, the process was straightforward, my rudimentary sound engineering skills were thankfully enough for the kind of ambiance I was aiming for. But I was also just working on simple designs, just playing around with simple waves and layering them on top of each other or pitching them dynamically to make things sound "nice enough".
Using both GridSound and the more known Audacity for waveform editing and sound looping, I then spent the next five hours making all of the missing sounds for the game and adding them to the engine.
This playing around ended up with a very happy accident, where the idling engine sound's base note was exactly the base note of the music playing at that time, and that ended up making the sound design very coherent. It was probably a subconscious decision, having heard the music just a bit before making the sound happen, but it was still a very good thing!
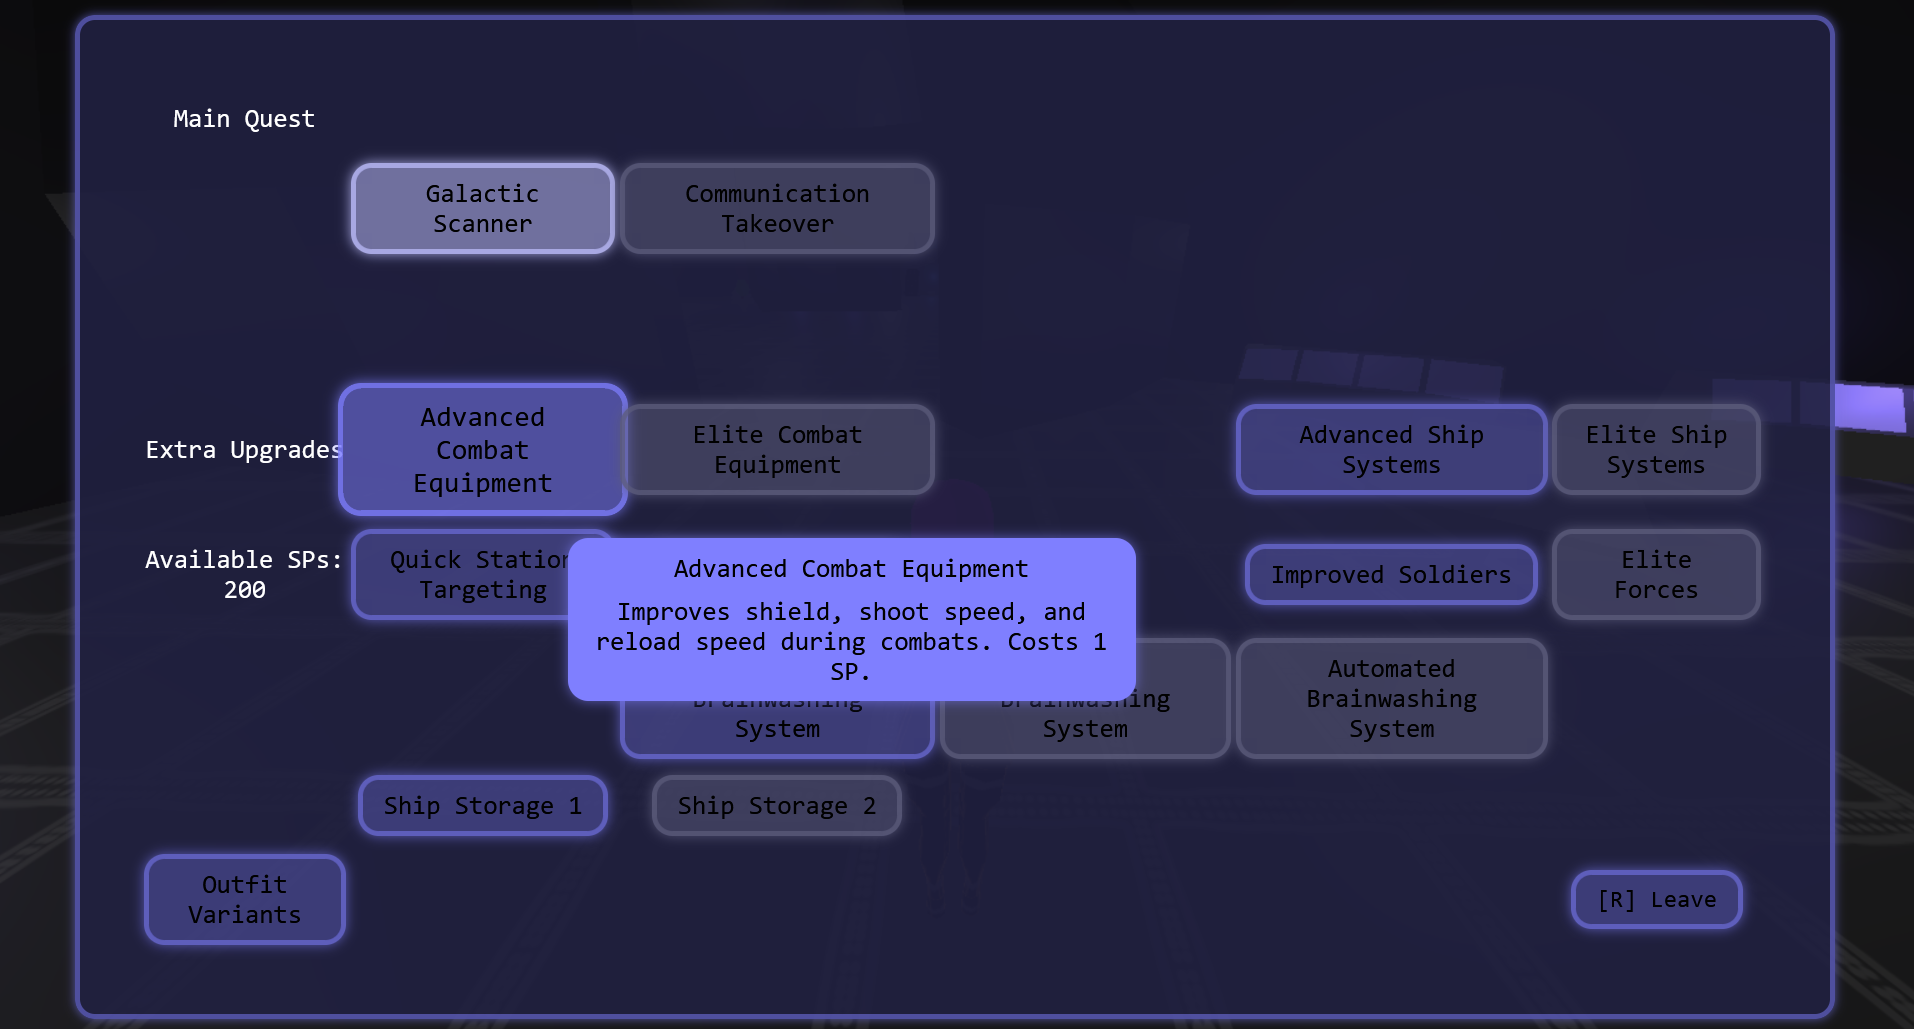
Near the end of the day, I started to work on the quality of life features that would pepper the rest of the jam days. First, I added popups to the upgrade UI so I could give the player relevant information when they hover over a choice:
Then, I improved the prisoner UI to show more information about the targets. This included adding an "automated brainwashing" mode for the non-important targets, that would be unlockable in the upgrade system.
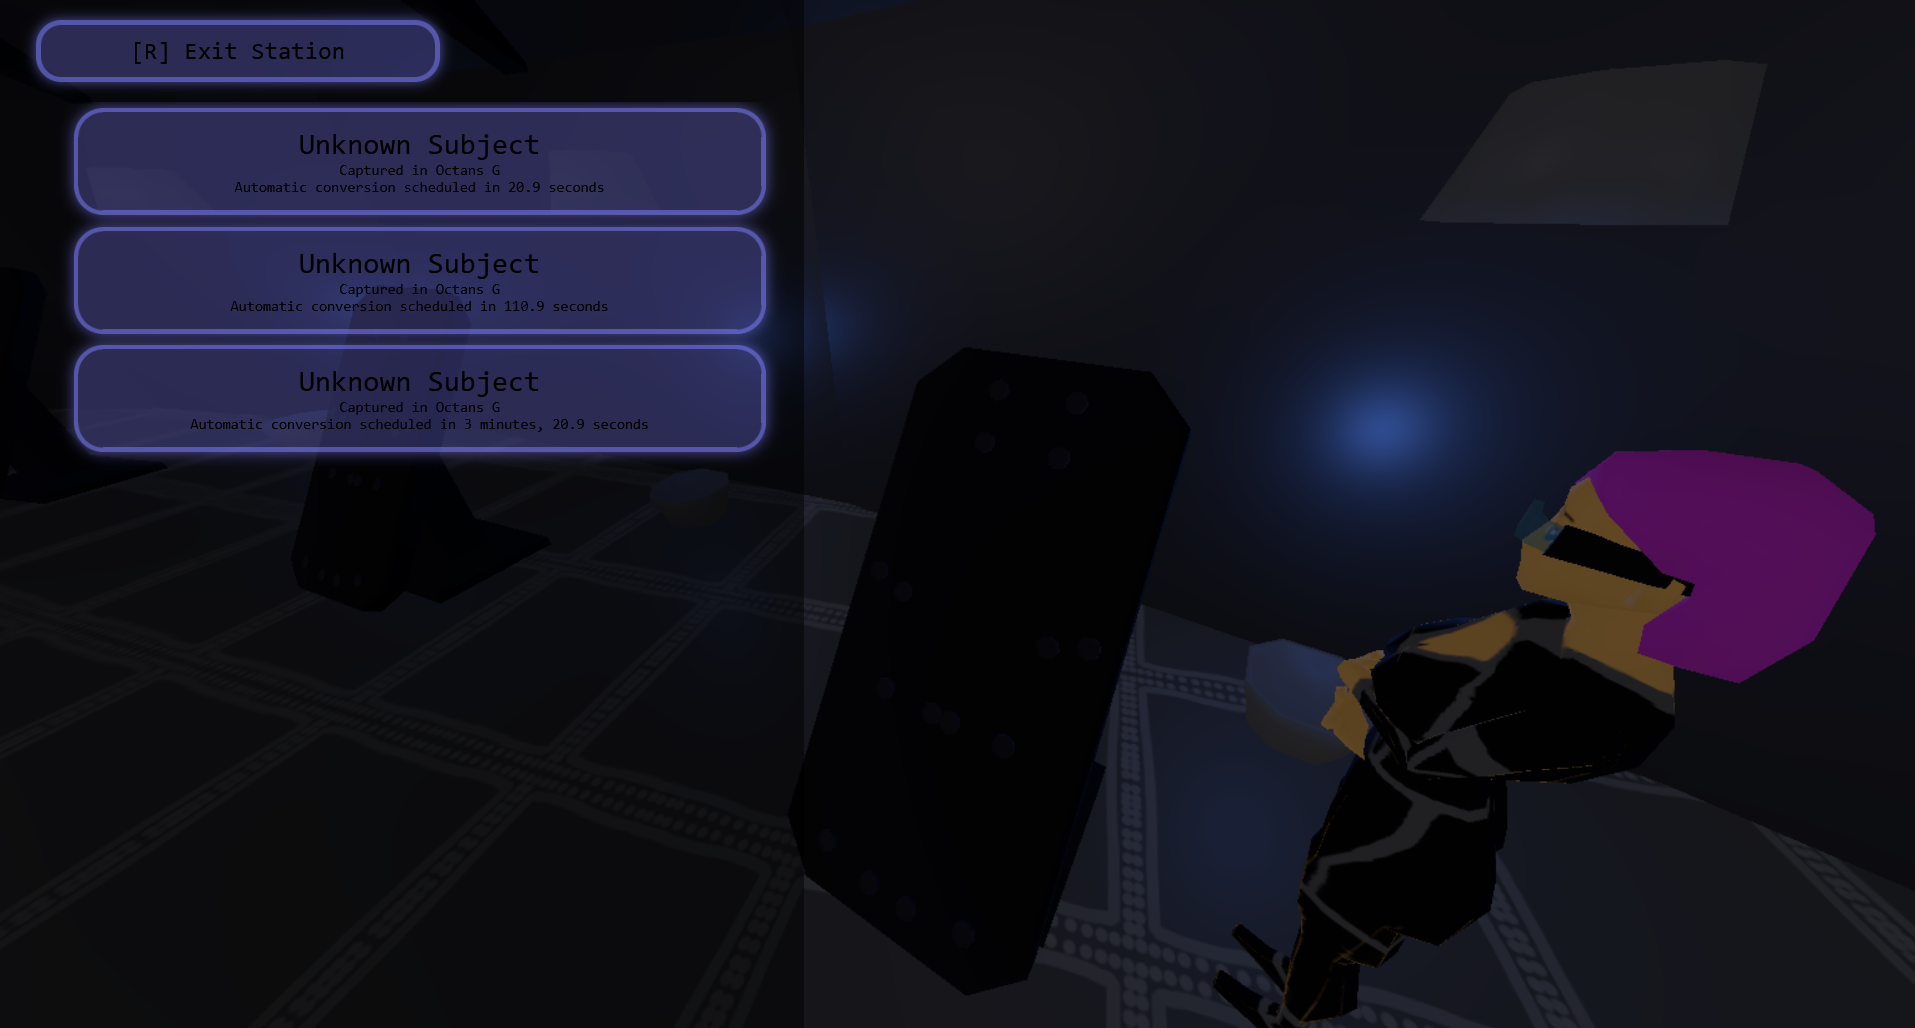
I then added a "targeting arrow" in the space gameplay to point towards either ships or the warp point:
And finally, I added the eye texture variants to use both for "base character look" and for the interrogation sections:
I added a small variant to the spaceship model to make a "science ship" that could be used for the first quest:
And finally, I made a test build and uploaded it to itch.io to check if everything was working well. This is an important step when nearing the end of a game jam, so doing it nearly 18 hours before the end felt like a good idea ; the idea is to be able to fix issues and not find out at the very last minute that you won't be able to upload your game for submitting it to the jam.
Thankfully, the itch build worked perfectly correctly on the first try!
[CODE] Add control increases to the starmap after capture
[CODE] Unlocks / Skills UI
[CODE] Add music
[CODE] Add sound
[CODE] Improve some behaviors during shootouts
[CODE] Make enemies not shoot at your character while in the dialog UI
[CODE] Show available SPs in the upgrade UI
[CODE] Show upgrade details in the UI
[CODE] Make spaceships fly back to the center of the space area
[CODE] Add eye textures for the character model
[CODE] Add eye/mouth selector functions
[CODE] Handle eyes and mouth movements during the interrogation UI
[CODE] Add science ship space models
[CODE] Visual objective markers while in space
[CODE] Improve the prisoner list UI to show automated progress / sort important NPCs first / etc...
[CODE] Implement the "idle brainwashing system" upgrade for the non-quest NPCs
[CODE] Fix the starmap tutorial popup immediately retriggering when pressing "space"
[CODE] Add area difficulty system
[CODE] Add science ship interior
[CODE] Made a test build for itch.io
Thoughts on day 6: Day 6 is when a big missed prioritization decision really caught up with me: I should have integrated the sounds early, to figure out which one were missing and ask for them to be created at that time, but I didn't and got caught off guard when I was missing them without any assistance available. It went less badly than I expected, but it still lost me a bunch of time.
Day 7 (April 3rd, 7:30AM to 6PM UTC)
Day 7 was to be spent on two things: the last quality improvements to the game, and content.
I started with some cleanup of various features, such as making the "fast travel" have sound (really, just pitching the ship's engine), and more importantly, creating the "achievements" system.
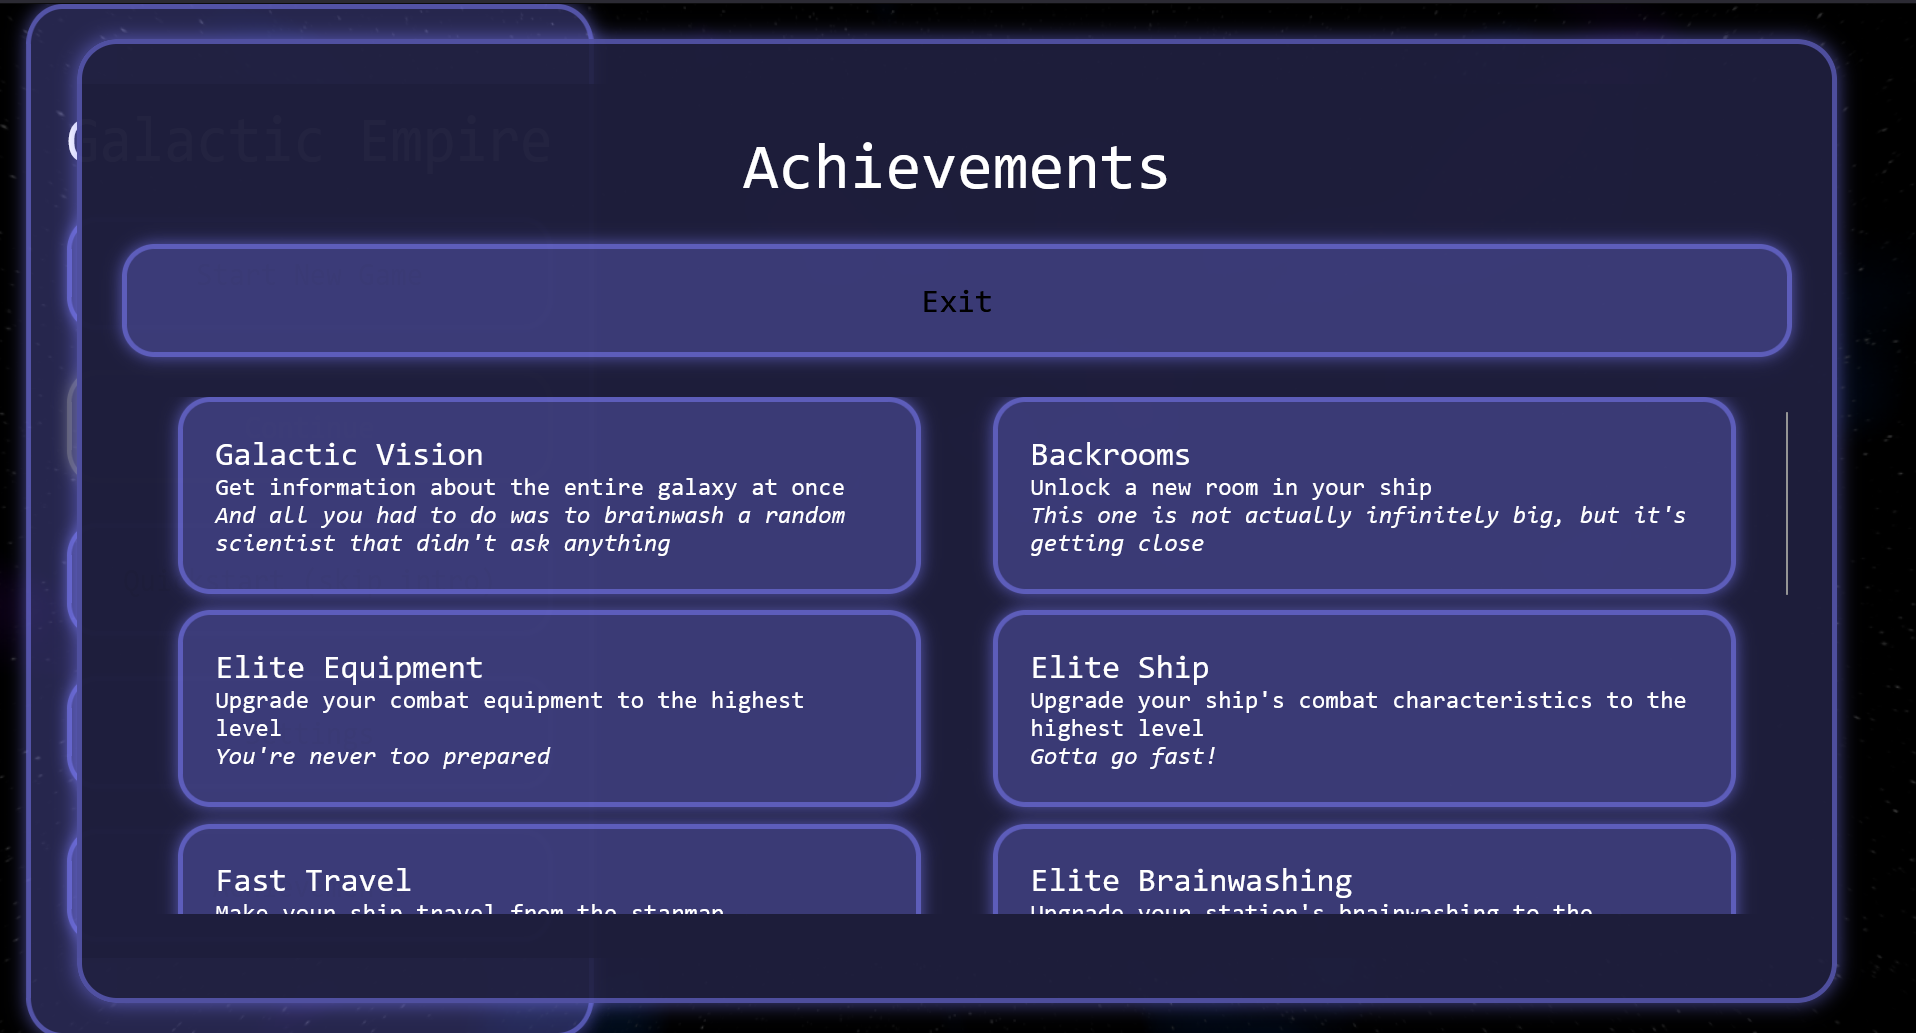
I really like achievements in jam games, they give a sense of progression to the players using a technique that really takes less than an hour to implement. This time, due to how short I was on time - I had less than twelve hours left at this point - I absolutely hacked the heck out of the achievements, turning it into a pure independent global state and then calling to update that state directly everywhere an achievement would pop up.
Making the full list of achievements - 13 total, including two hidden ones - really drove home for me how much content I had just made.
I then made the decision to split the "generic NPC interrogation" files into mini-quest files, using the same structure but easier to edit. Again, this was with the goal of easily integrating new writing (hopefully from Mabes) ; I would use this exactly once during the jam itself to split military and scientist dialog, and another two times in the jam followup days to add one variant of each of them.
I also took a bit of time to add a "save" feature and a "continue" button, which, thanks to the work on the global state that dated all the way back to day 2, only took about ten minutes to implement. It was surprisingly fast to do.
I also added one "dumb" feature that I'm still extremely happy about, the fact that NPCs spawn in the station after you brainwash them:

Still, all of the work so far wouldn't be worth much unless I created quests to showcase all of it. Which is what I moved on to making.
I made quests 2, 3 and 4 over the afternoon. The original plan, as of from Wednesday evening, was to have six quests. I immediately cut down that amount to four, to keep it focused on the most important quests. Writing these quests, creating the layouts in the game, and making sure they worked, took the bulk of the remaining time of the jam.
One hour and a half before the end of the jam, I decided to stop with the code and the quests, and only stick to last-minute bugfixing, last minute changes, and getting ready for publishing.
I also asked Mabes for feedback with the game a few hours before release, and she pointed out a few little things here and there to correct in the quests (such as typos and missing lines). This kind of early playtesting was actually very good to give a complete experience after the game, and I wish I was able to do it earlier!
I finalizing the loading screen with a proper screenshot as its background:
The last few hours right before the end of the jam were spent just on taking screenshots, and getting the itch.io page ready. I also took way too long, nearly 30 minutes, to create this actually very bad "presentation image" for the game.
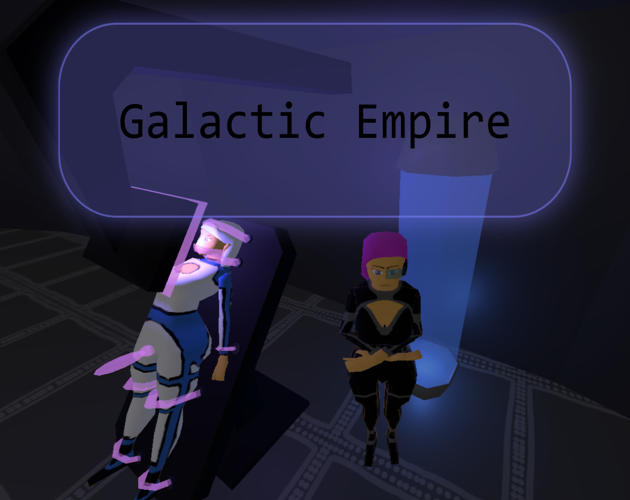
It would have been so much easier to whip out Krita, put a few images into it, and write some text. I would only have that idea... Well, as I was writing this blog post, really, and I changed the image to the new one (shown at the start of this article) only now due to that reason. But still, missed opportunity.
And with that done, the game ready, the page ready, all that was left was to publish the game on itch.io.
[DONE] Renamed tutorial => quest1
[DONE] Add lewds toggle in the option settings
[DONE] Add lewds toggle on game start
[DONE] Generic dialog/personality as part of the station NPC data
[DONE] Add a three-person protected scientist random ship (2 army + 1 target) to replace the 1-person ship
[DONE] Starmap fast travel sound
[DONE] Achievements + UI
[DONE] Add a 'continue' button in the main screen (greyed out if unavailable) + a 'save' button
[DONE] Add quest 2
[DONE] Achievement unlock sound
[DONE] Add scientist dialog variant
[DONE] Make converted NPCs spawn in the station to do stuff
[DONE] Add quest 3
[DONE] Add quest 4
[DONE] Fill the information on the itch.io page
[DONE] Take screenshots for itch.io
[DONE] Make a project image for itch.io
Thoughts on day 7: The last day of a jam is always chaotic, and this one was no different. I would say I should have tried harder to do writing work, but doing too much in a single day is unfortunately not possible, and this showed here. I think that day 7 is the one I did the best I could on ; I didn't crack under the time constraint, I managed to get as far as I could, I didn't do stupid compromises on quality, that kind of thing. I'm happy with how that day went even in retrospect, and I think that's the important part.
Post-Jam, days 8 and 9
And then the jam was over. Nearly. What was left was to play all of the games, which you can also still totally do, to give my opinions and votes on them. And what was also left was to prepare the classic "post-jam update" for games, where I can address bugs and feedbacks that players eagerly hand out during the voting phase.
The main feedback I got was about the "roughness" of the game, which mostly meant "the graphics are bad". This isn't something I would fix, both because that's a lot of assets to redo "just" for a jam game that I made in a week, and also (and mostly) because I'm not confident I can do much better than that even now. I could, of course, subcontract it... But that's plans for something bigger than a game called "Galactic Empire [7-day game jam entry]". Maybe one day, no promises.
The other main request I got were really obvious ; more content, more variation in the end game / after the main quest. This was obvious how to solve (make more quests and add more dialog variants).
There were some usability issues that were reported too. The fact that the game required a mouse to play and a request for alternative controls in this case, the fact that clicking on "main menu" didn't ask you to save and therefore removed all of your pending progress with one click, and the fact that the starmap was "too far away" from the cockpit and required to walk a bit too much inside of your own ship to be comfortable.
And finally, the main "unexpected" feedback I got was about the lack of science points. This is very, very obvious in retrospect, and it should have been found with someone else trying a post-endgame run before the release. Mabes didn't have enough time left at the time, so she obviously couldn't have noticed that issue, but the game just never explains how science points work, how to acquire them, and when you acquire them, and all that was combined with a spawn rate for the science ships at 1 in 6 which is actually "vanishingly small" in terms of player experience. I added an explanation to the description "for now", and then I explaned the whole thing inside of the game directly by indicating rewards as you get them in the brainwashing UI.
For the quests side of things, I decided not to touch the main questline and leave it as-is to not completely "change" the experience between the jam release and the update. Instead, I decided to add new content "next" to the main quests, by the way of sidequests.
This required a slight change to the UI, by breaking the "upgrades" UI into an "Missions / Upgrades" UI with two tabs instead.
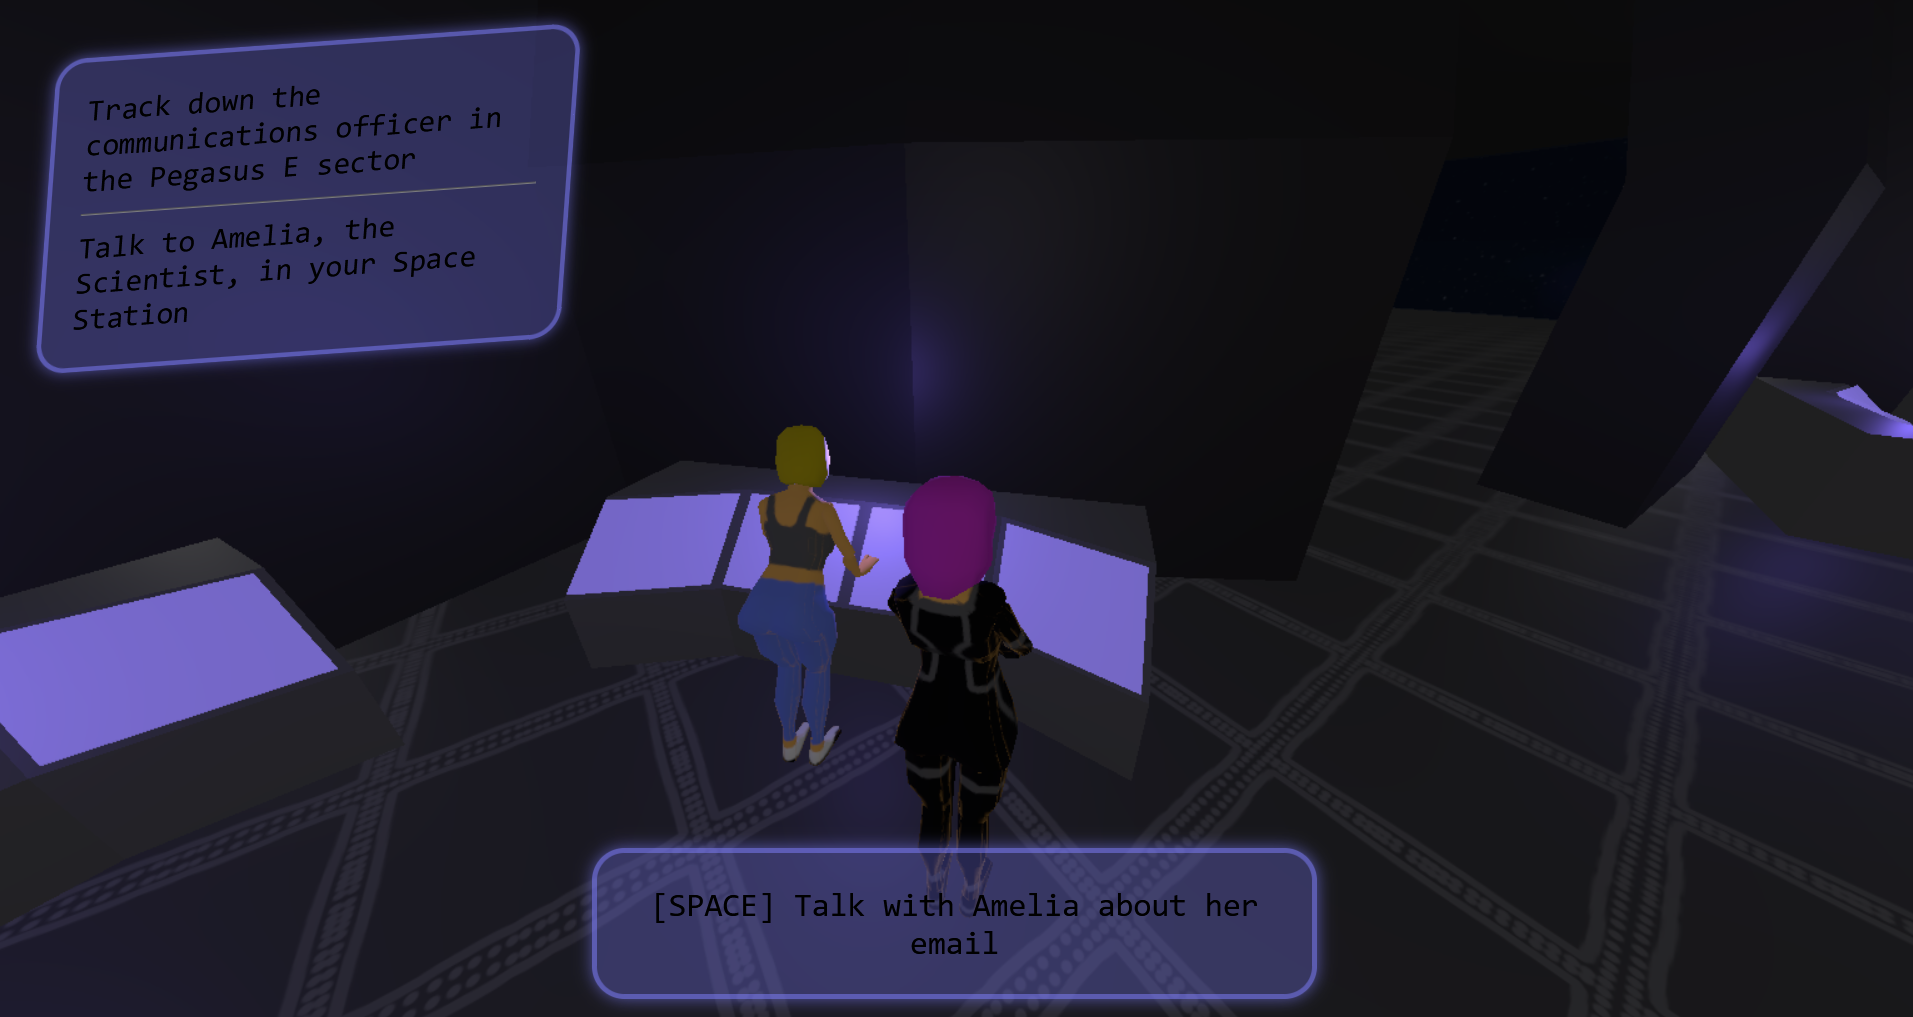
Then, the main thing was that sidequests would involve taking with a "quest giver" NPC in your space station ; making it feel even more lived-in.
This allowed me to do some... Specific scenes later on in the side-quest progression lines, which again, any of you familiar with my work will have no surprises about!
I managed to do all of these changes in the two days between the end of the jam and the voting time, even if once again, I had too much ambitions in terms of written content and couldn't do all eight of the sidequests I expected to do. Oh well. Lessons for next time.
[DONE] Pause menu to main menu: confirmation if game is unsaved
[DONE] Add info at the end of the conversion about what the benefits are ("Finalize" button should show "+X SP" or "+X control % to Place")
[DONE] Fix the left/right directions during the quest1 dialog
[DONE] Add info to the end of quest1 about picking an upgrade and about SPs being obtained from brainwashing a scientist
[DONE] Make all conversion timers longer
[DONE] Add player dialog to q2 about walking away and doing some exploring, mention offline mode
[DONE] Make science ships more likely to spawn
[DONE] Add a "keyboard only" movement mode (togglable in the options, replaces left/right with player rotation & removes 'back')
[DONE] Add reticle for the ship's cannon in the space scene (html UI layer, togglable in the options)
[DONE] Add a laser visor for the enemy ship scene (togglable in the options, add a global options state for that)
[DONE] Replace "[SPACE]" and "[R]" in all control prompts when they're mapped differently in the UI
[DONE] Add a few more generic NPC personalities
[DONE] Rework the upgrades UI to split it into two tabs ("quests" and "upgrades")
[DONE] Add upgrade series to cut down on the manual conversion time
[DONE] Add a "Quick Starmap" option in the unlock menu and a "[R] Open Starmap" option in the ship
[DONE] Add idle animation steps in enemy patrol
[DONE] Add a system to talk to the NPCs with sidequests to give you
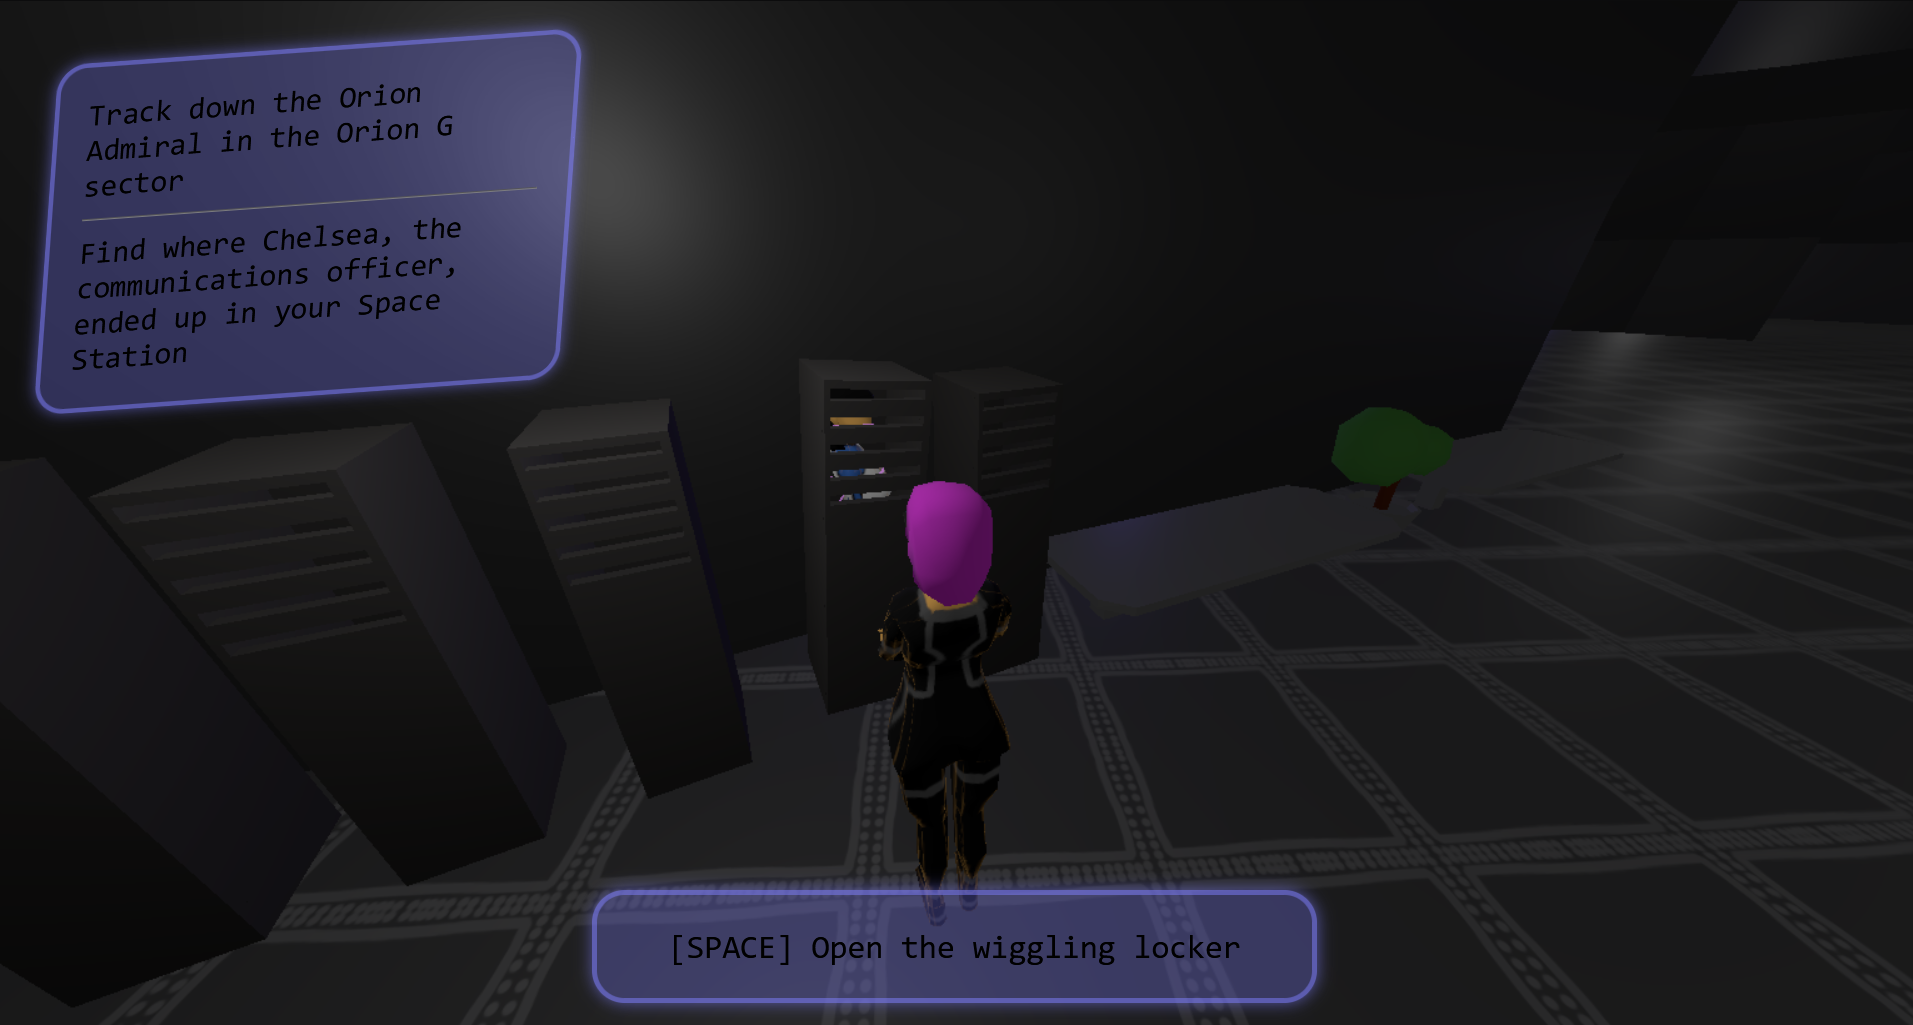
[DONE] Add a locker model and "struggling in locker" animation
[DONE] Add four new sidequests
Conclusion and overall retrospective
That jam was a really, really fun experience, even if it was pretty exhausting. I managed to do a lot, the game itself was extremely wide and gave an impression of vastness that I didn't think was going to be possible to convey.
The issues that I encountered during this jam were interesting because they weren't the mistakes I expected.
My expectation was that I would fail the game loop, I didn't. My expectation was that I would have a very hard time with sound design (hence me asking Kero for help before I even started), I didn't. My expectation was that I would take a long time building the code for the individual systems, I didn't.
I didn't expect to spend quite as long on "small" technical challenges that were more for fun than for actual use. I didn't expect to spend as long struggling to write quests. And I especially didn't quite expect how long 3D modeling everything would take.
The main learning experience I got is how important the visual presentation is for a game jam. The better looking the project is, the better received it will be. Gameplay is very important of course, the best games combine the two, but the graphics are too major to fail at them. Especially, the "vignette" image for the game must present everything at one glance, and spending even twenty more minutes just on that would certainly have helped, I'm sure!
In any case, I'm excited for the next jam, that will hopefully be at some point next year. I'll be less ambitious for this one, I'll probably go for a real group project again instead of a semi-solo "if they help, that's a bonus, otherwise, I'll just stick with the original solo plan" way to build a team. And I'll try to keep improving my modeling skills until then, exploring techniques like toon shading and simole anime faces to make the end result more appealing.
And maybe, who knows, I'll turn this little project I did in nine days into something bigger and grander. But that's for later, if it ever happens. So, until then, see you next time to (hopefully) talk about what's next with Project Mirabelle!